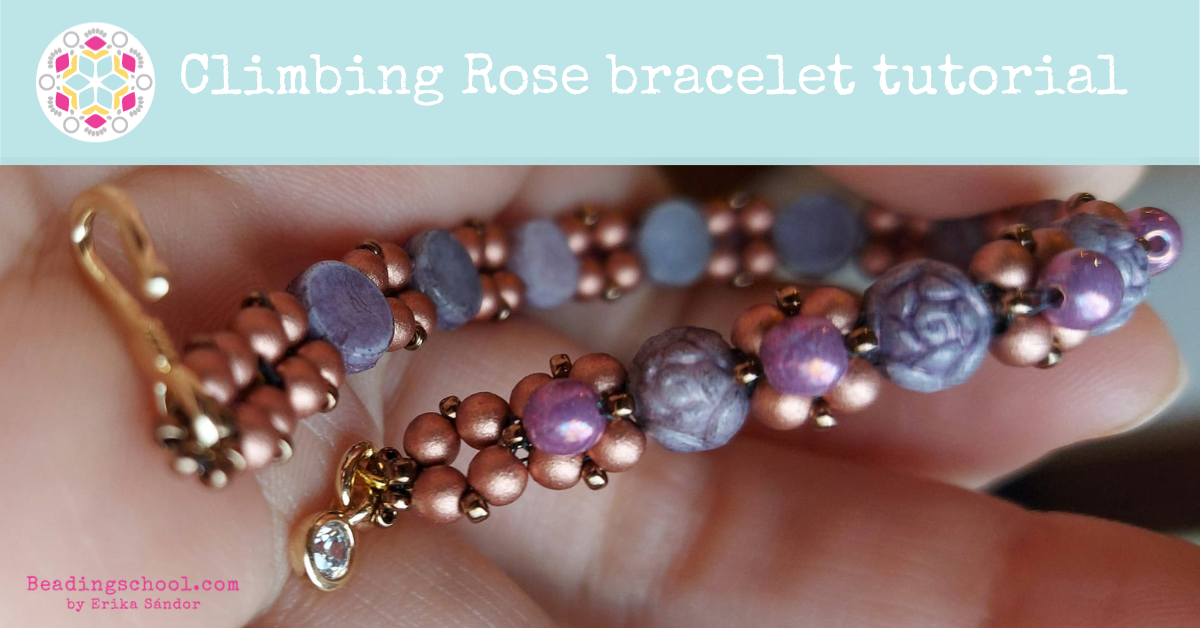
Climbing Rose bracelet tutorial
This is the very first photo tutorial Veronika Královičová prepared for Beadingschool by Erika Sándor and we’re very happy to present it to you!
Veronka says:
Hi everybody,
I would like to share with you this quick and easy project! Do you want to practise your RAW (right angle weave stitch), or make a small gift for a friend really fast? If your answer is yes, then you can make this cute little bracelet. You can also use it as a rope for a necklace, or experiment with RAW by changing rosettes for another 2-holes bead. I hope you will enjoy it!
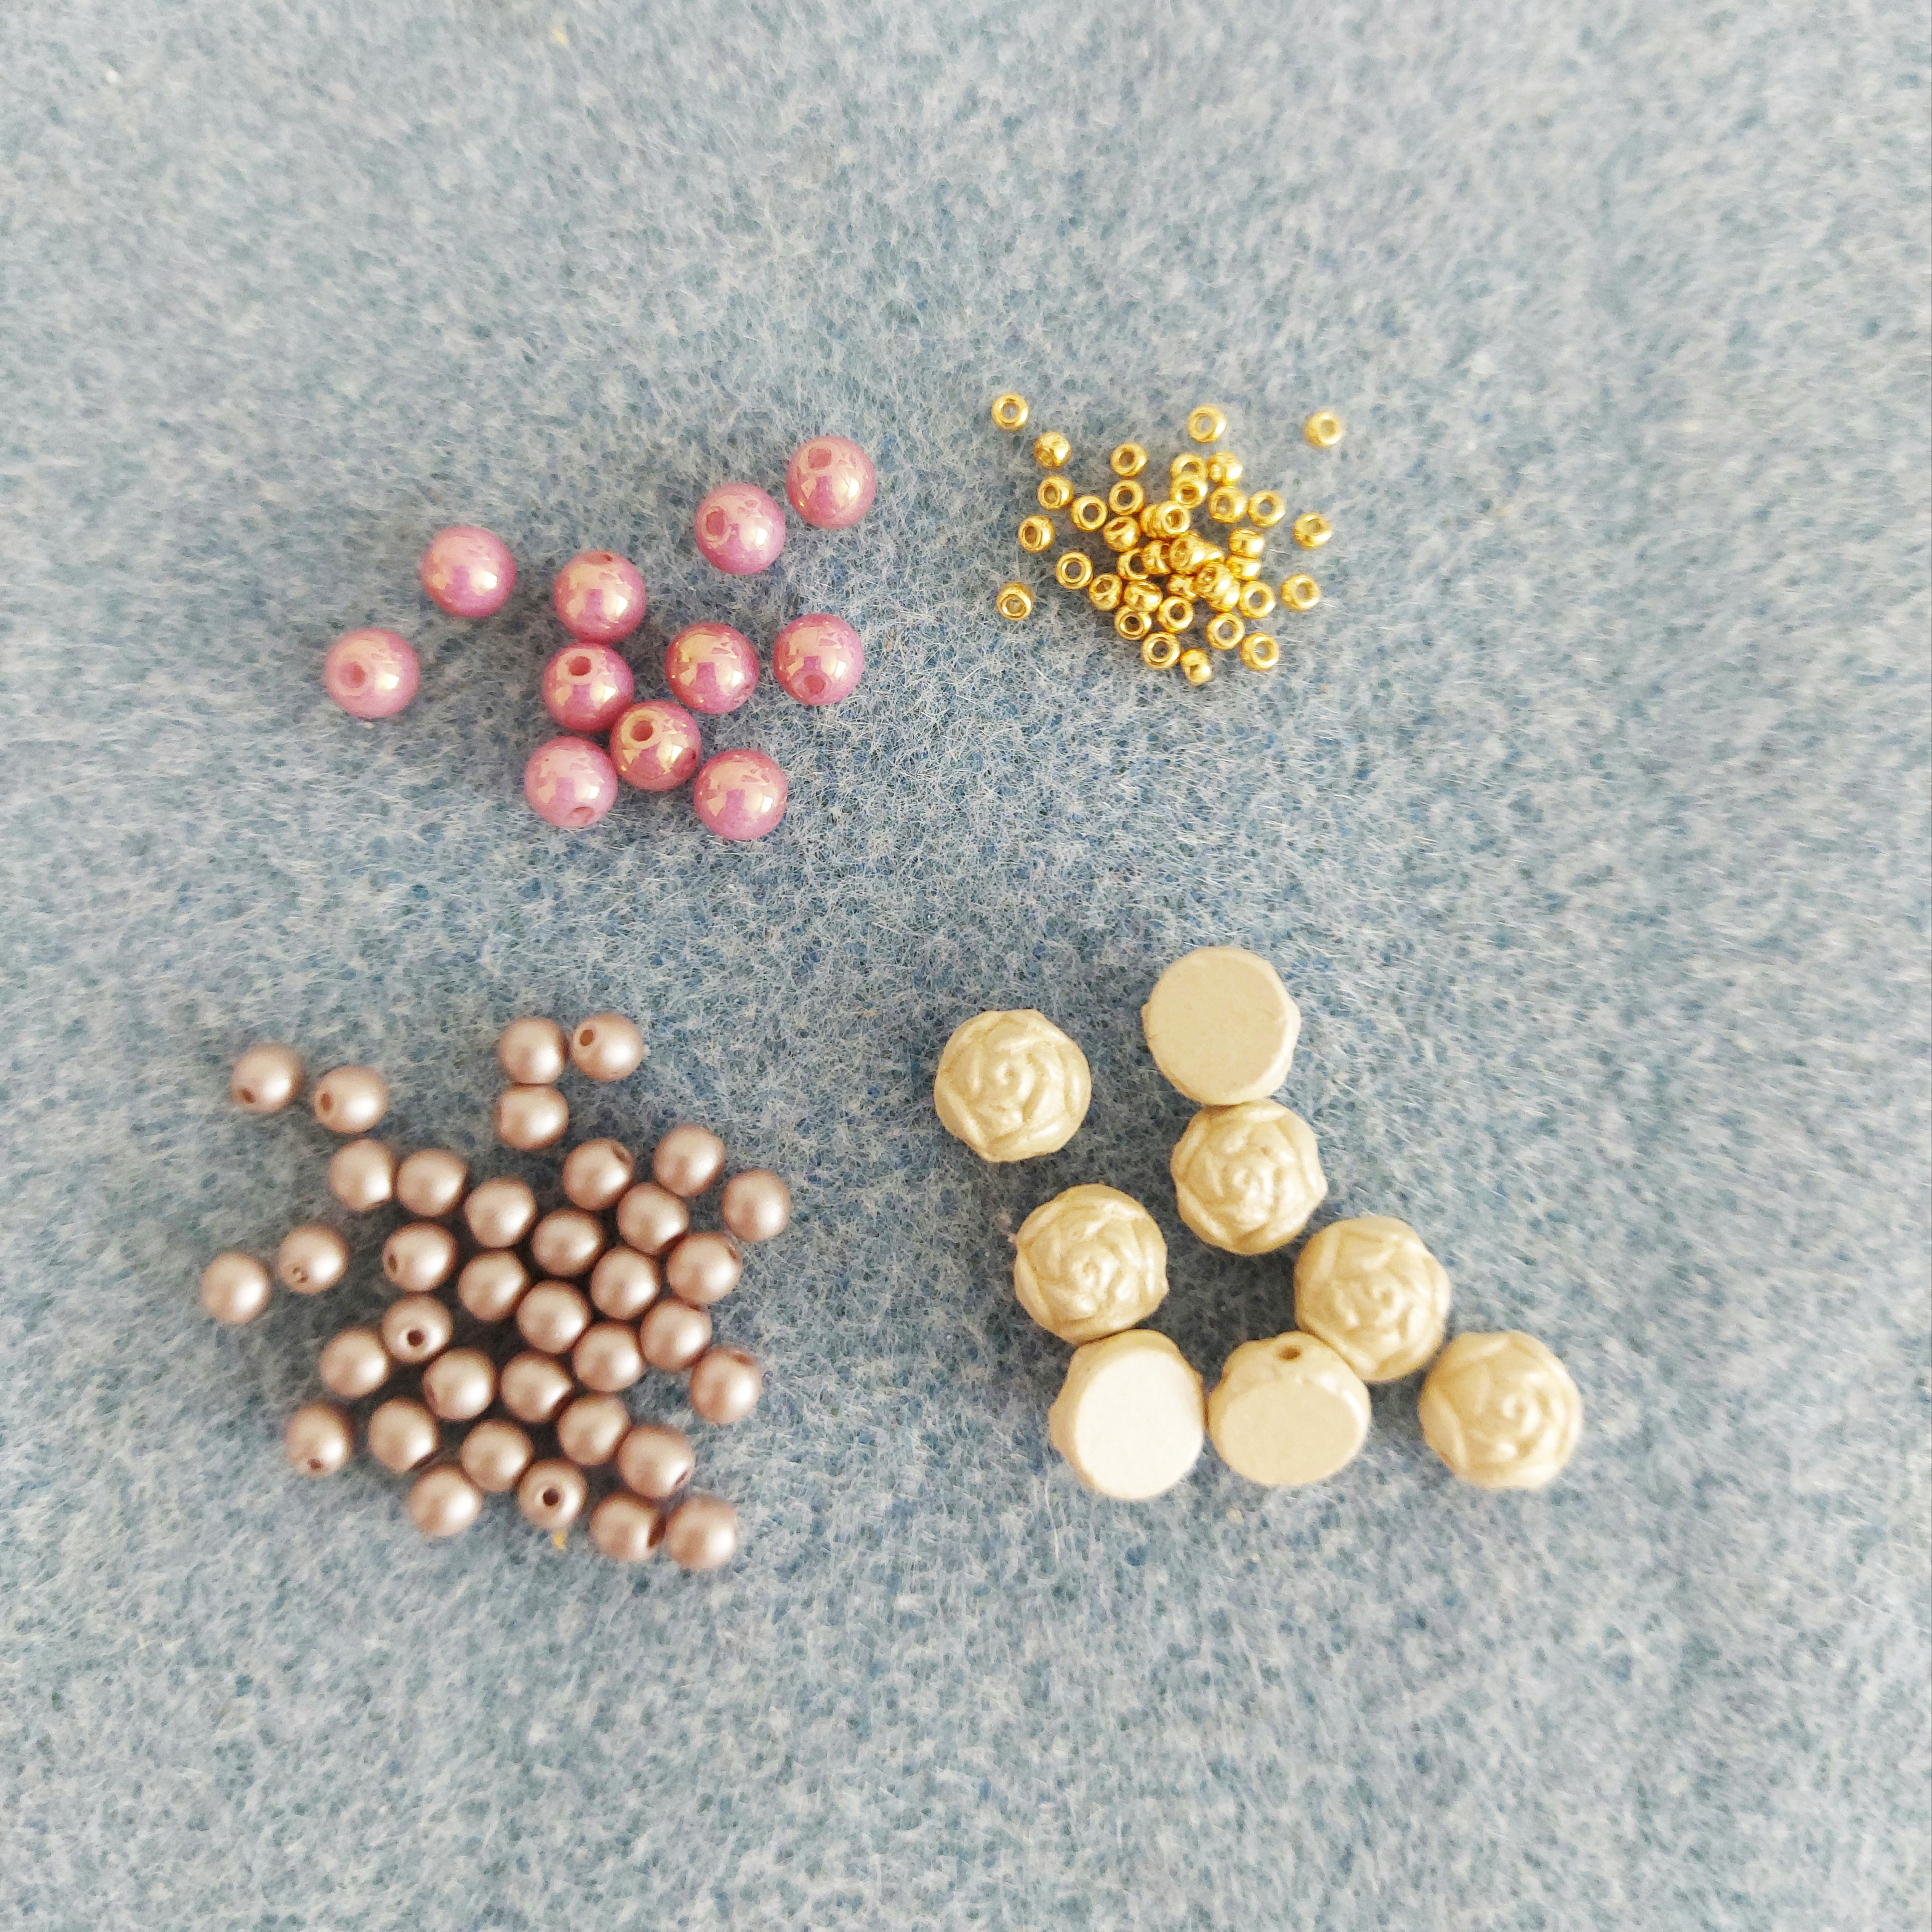
For one bracelet you need:
ROS – 2-hole Rosetta cabochon
R15 – 15/0 Miyuki seed beads
R11 – 11/0 Miyuki seed beads
Would you like to get a bunch of free beading tutorials?
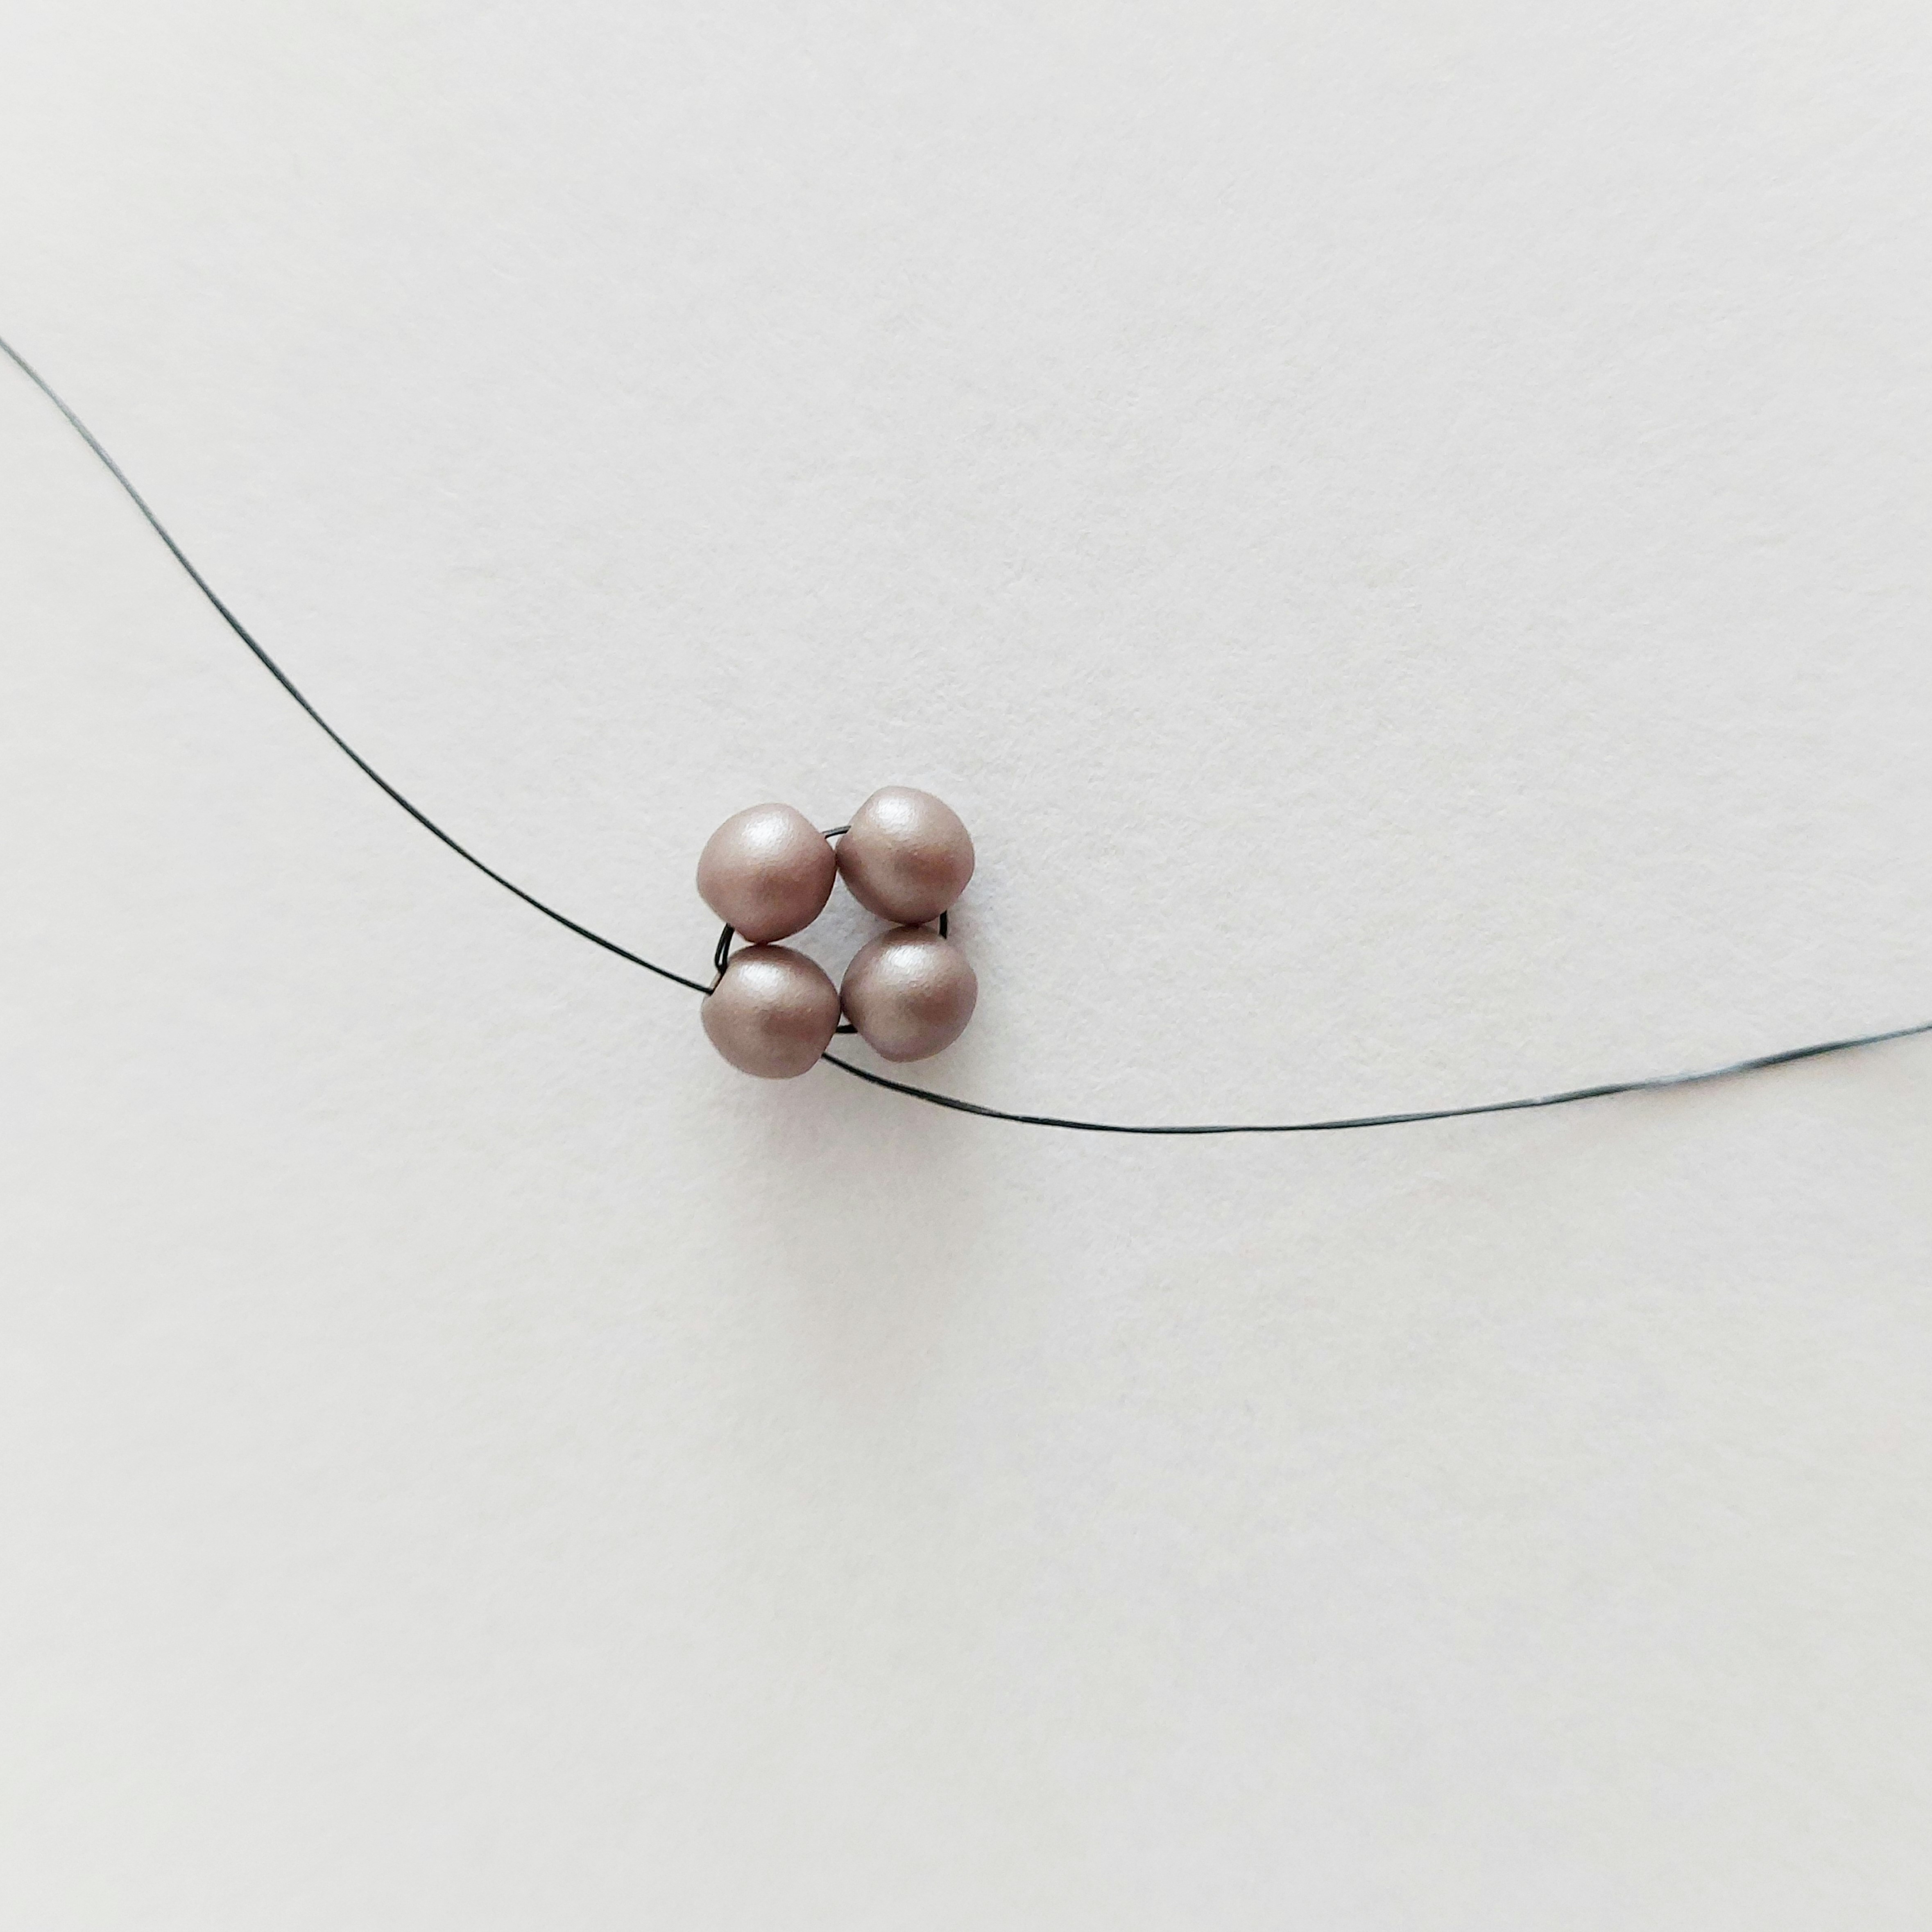
- Start with picking up (4) P3. Bead through them one more time, and bead through the first one for the third time as well.

2. Add R15 between all of the P3, then bead through the first added R15.
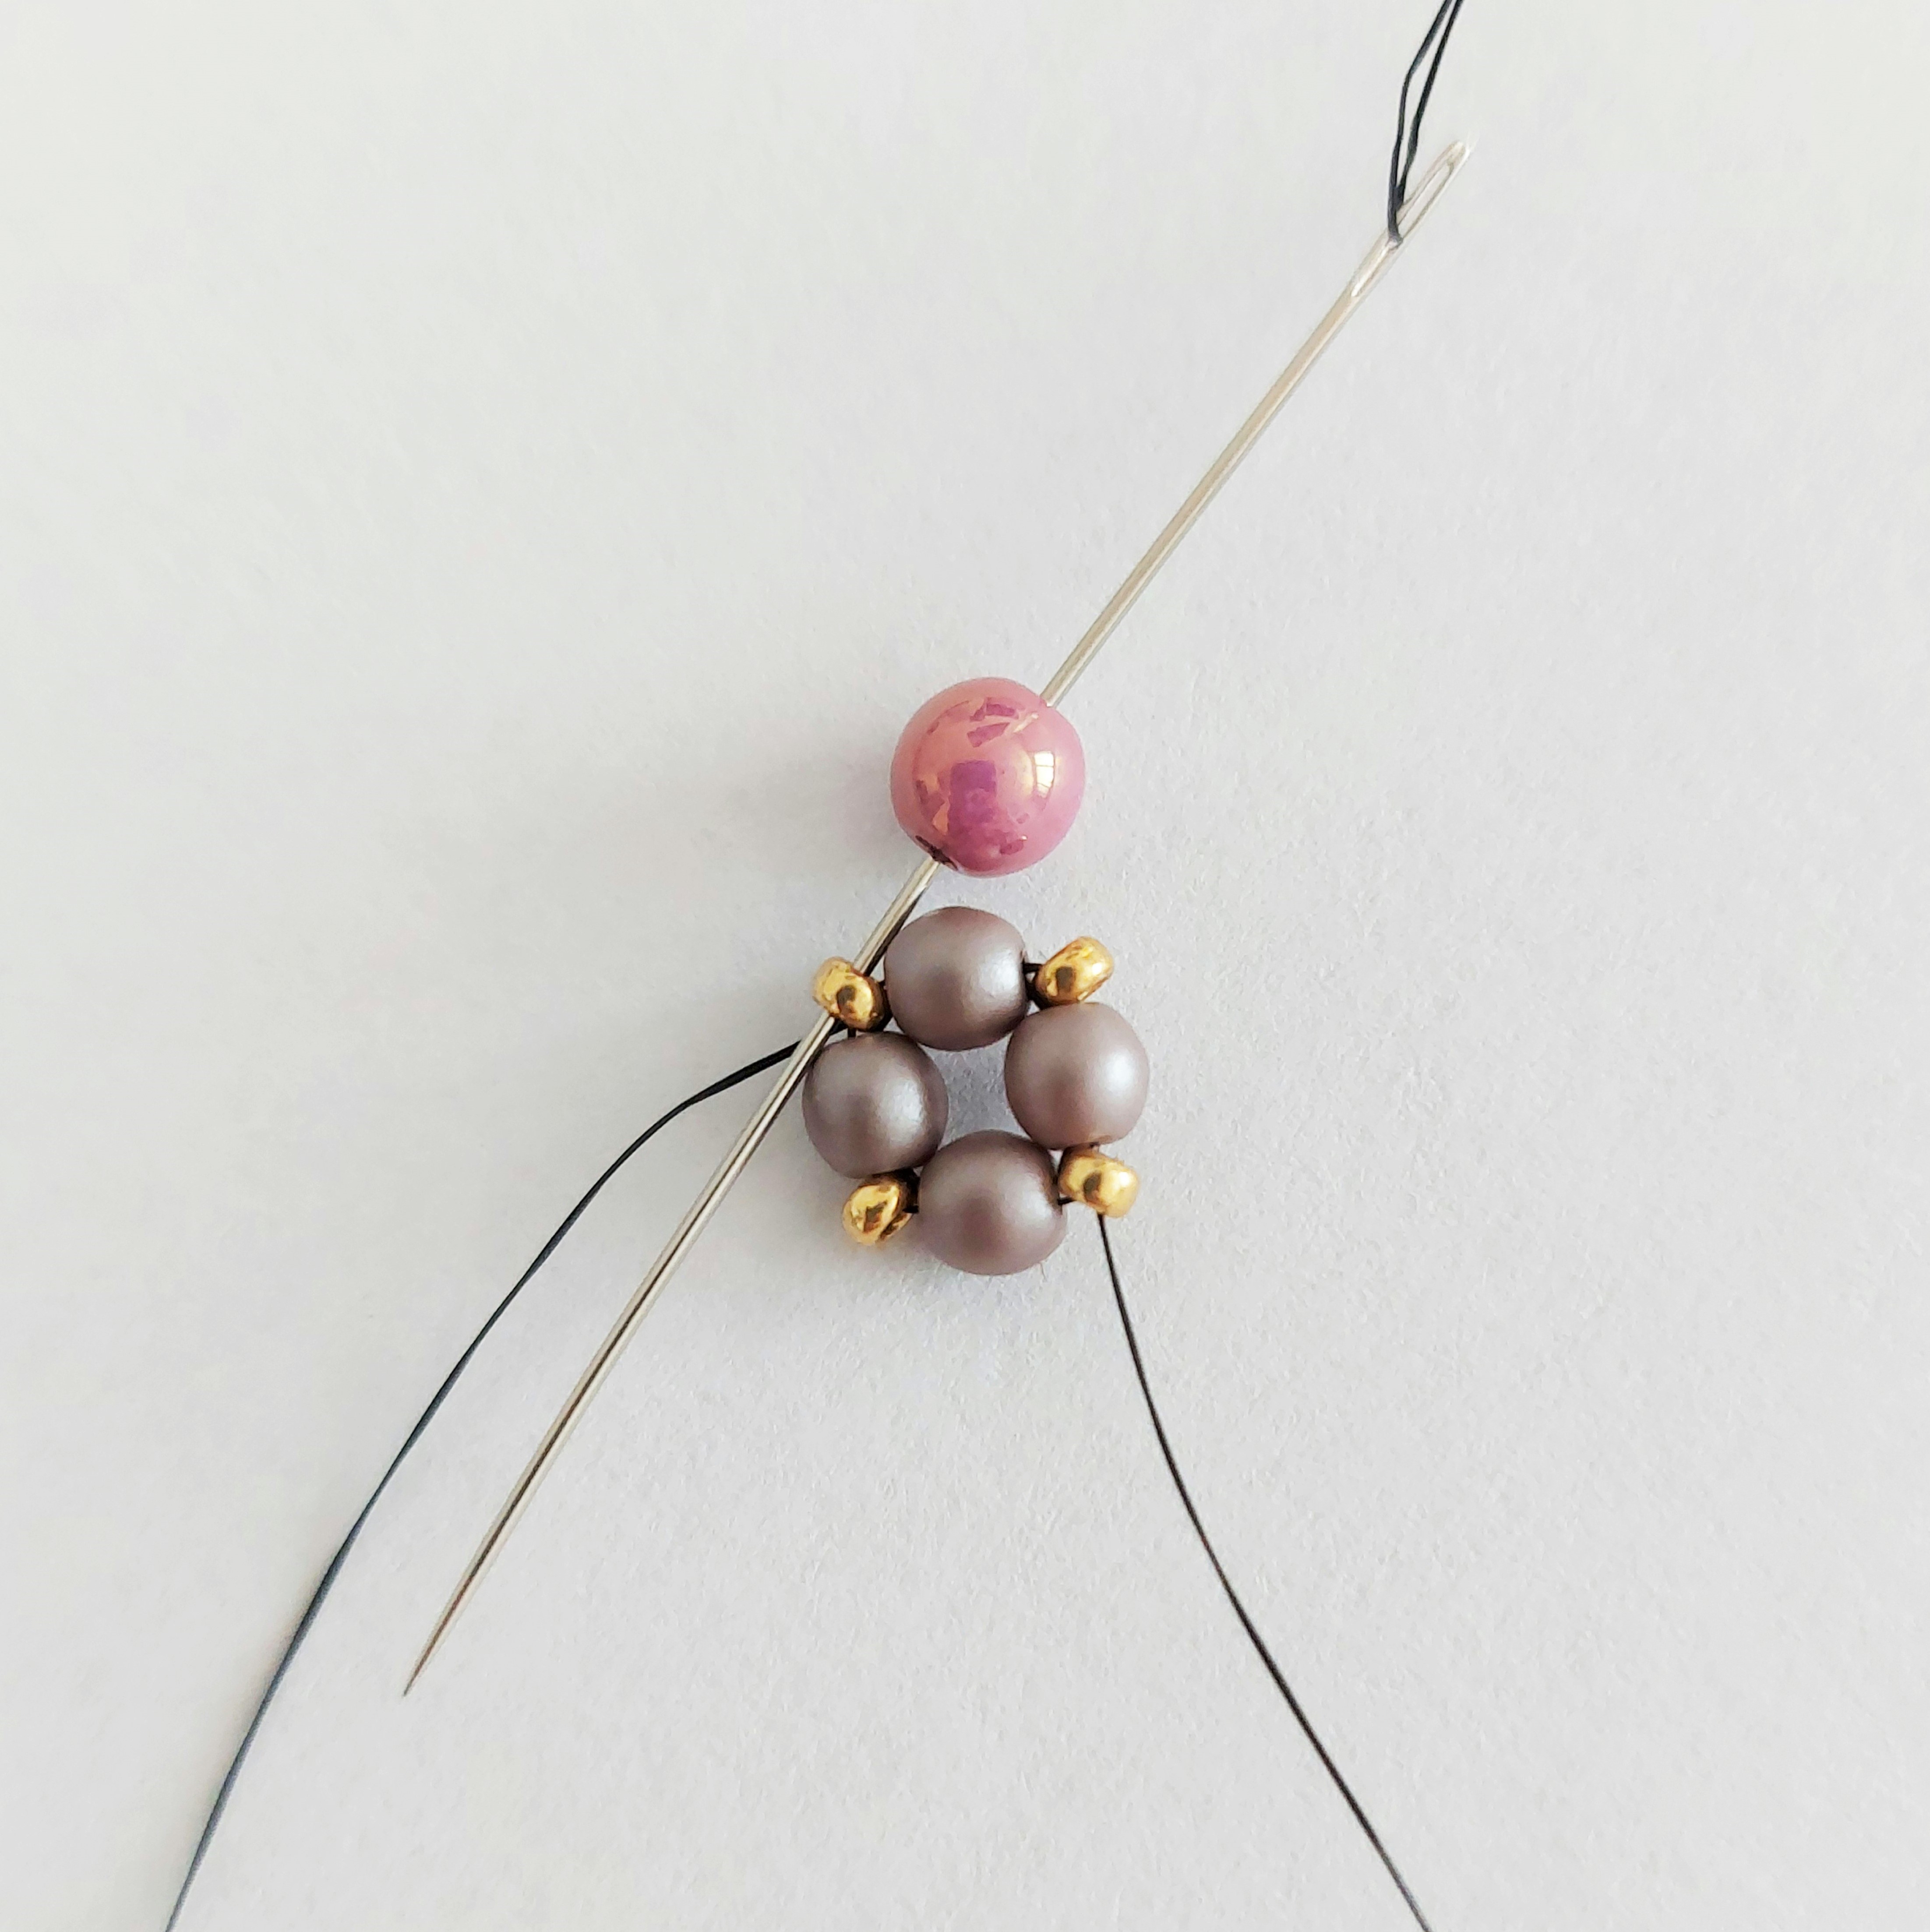
3. Pick up P4 and bead through the R15 on the opposite side, then go back through the P4 and R15 that you started from in this step. Finish by beading through the next (2) P3.
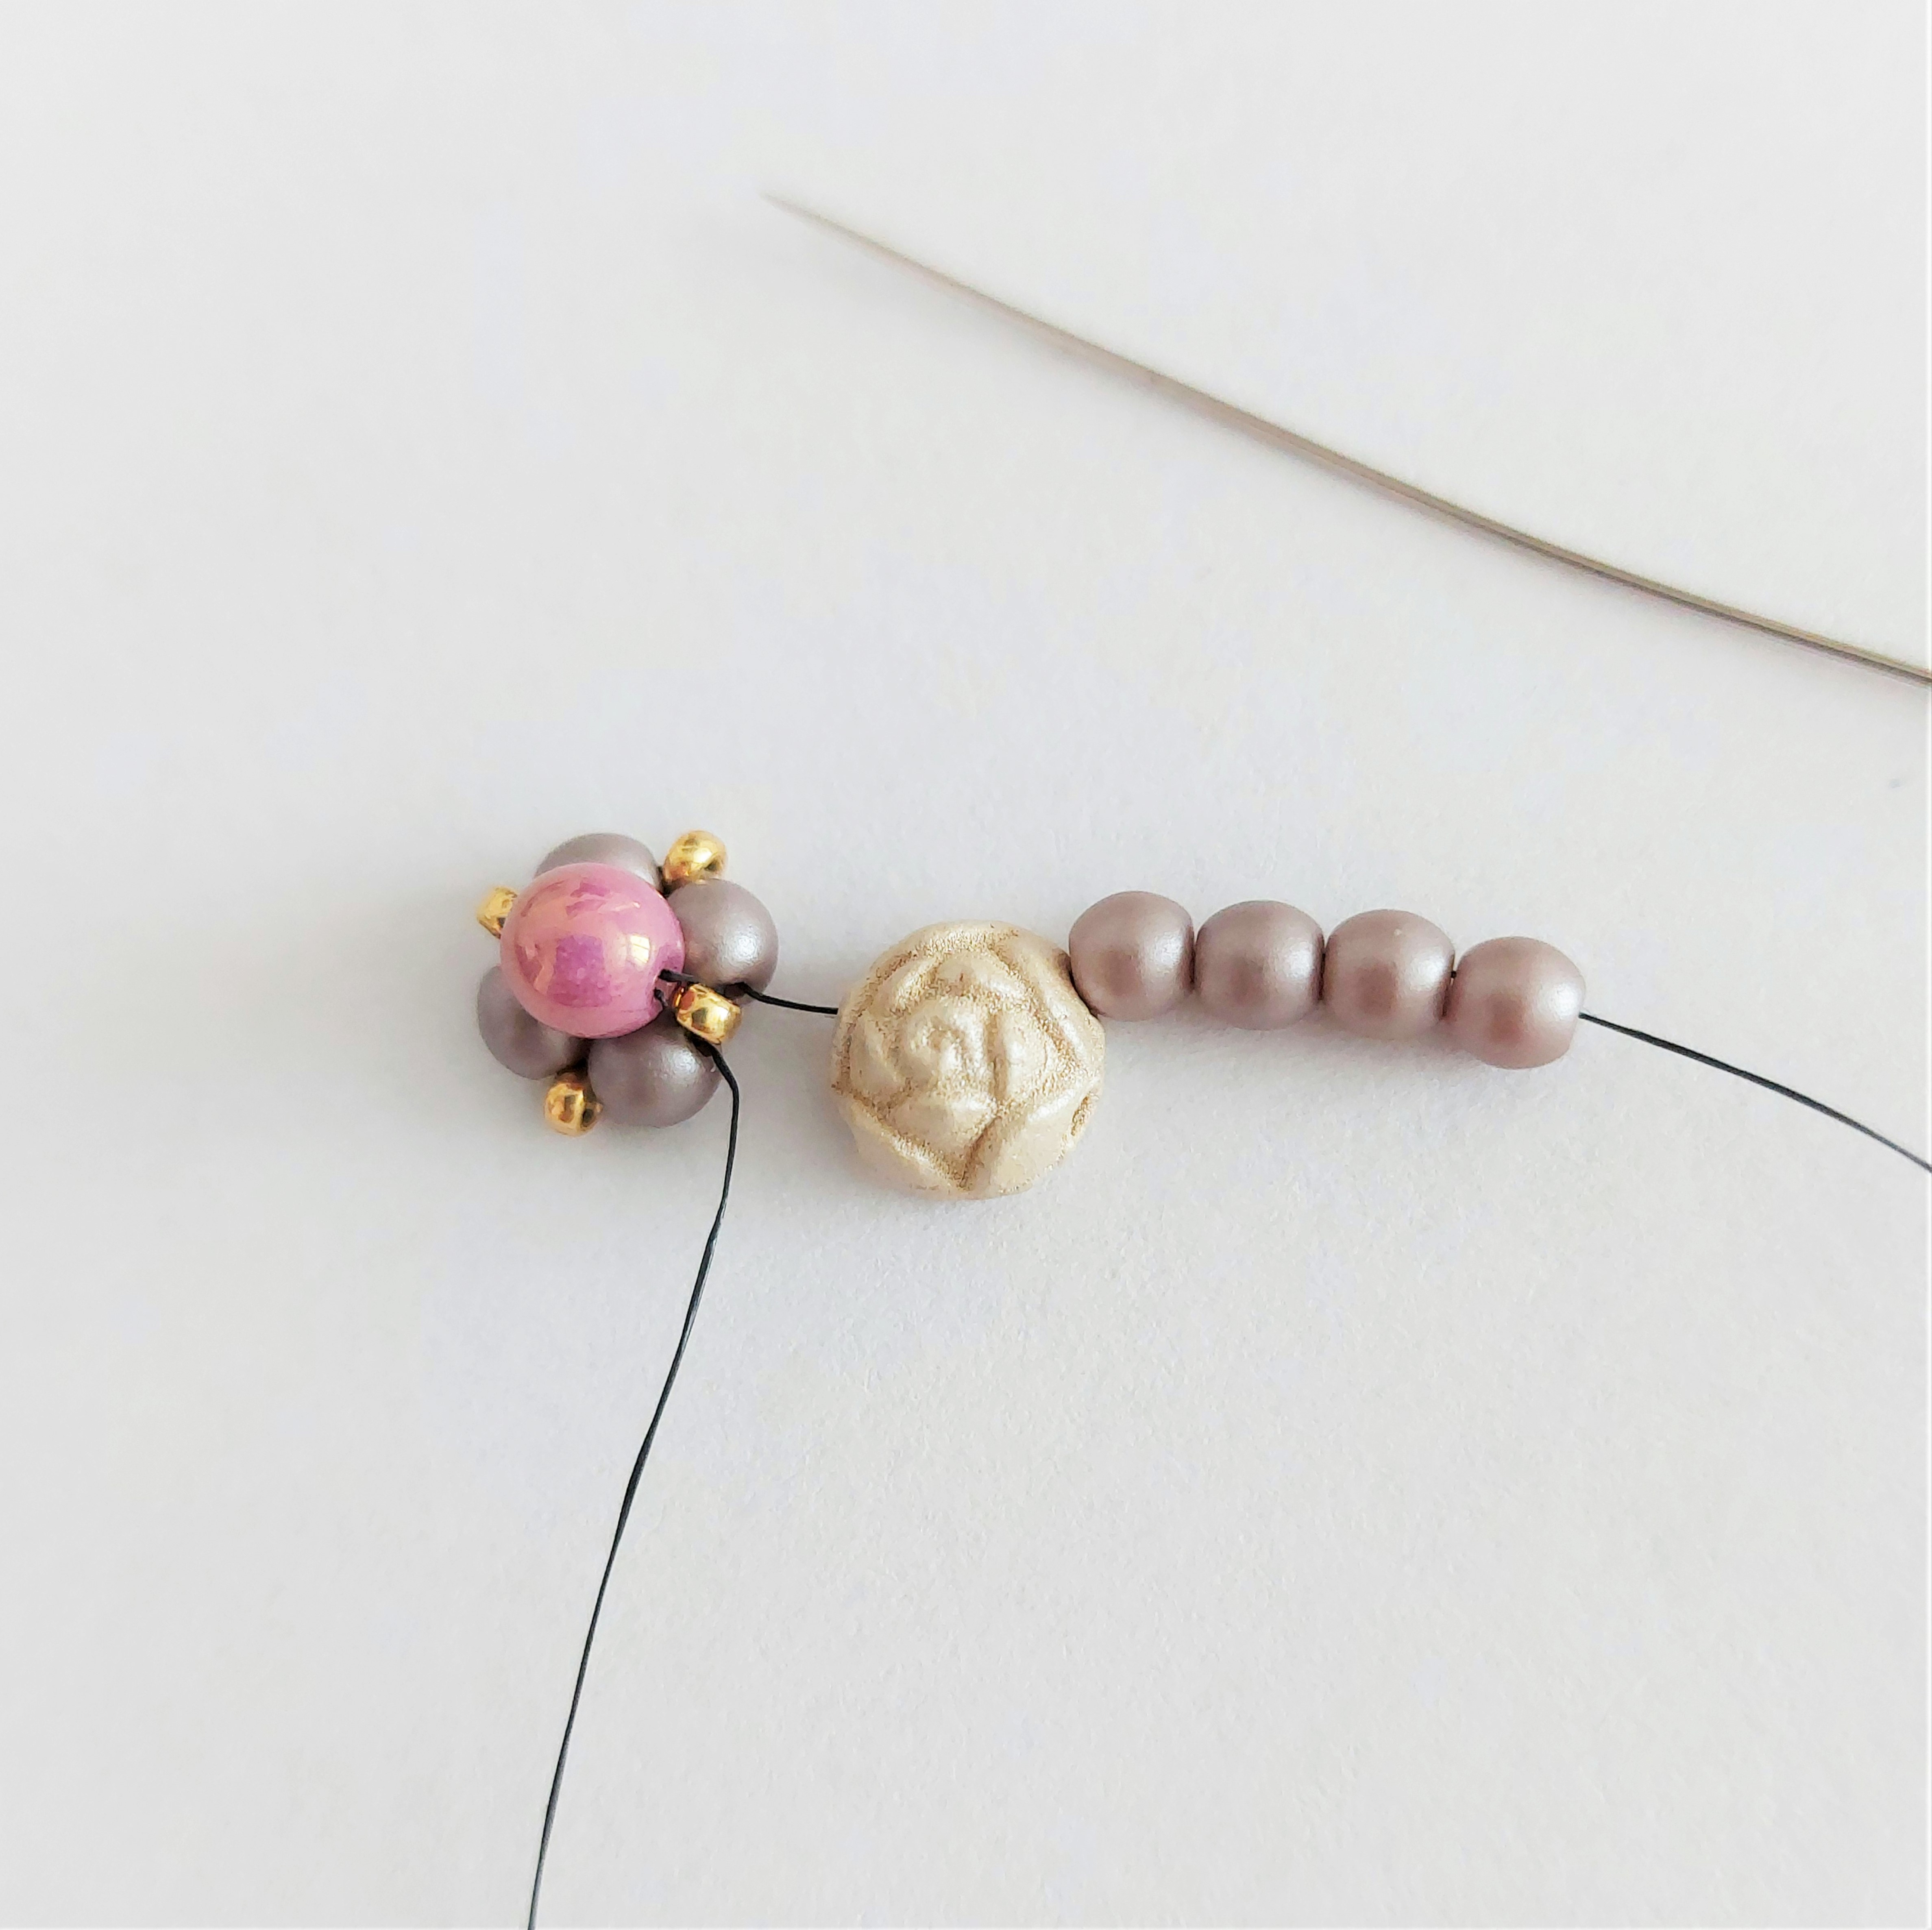
4. Pick up ROS + (4) P3. Bead through the second hole of the ROS + (4) P3 + first hole of the ROS + (4) P3.
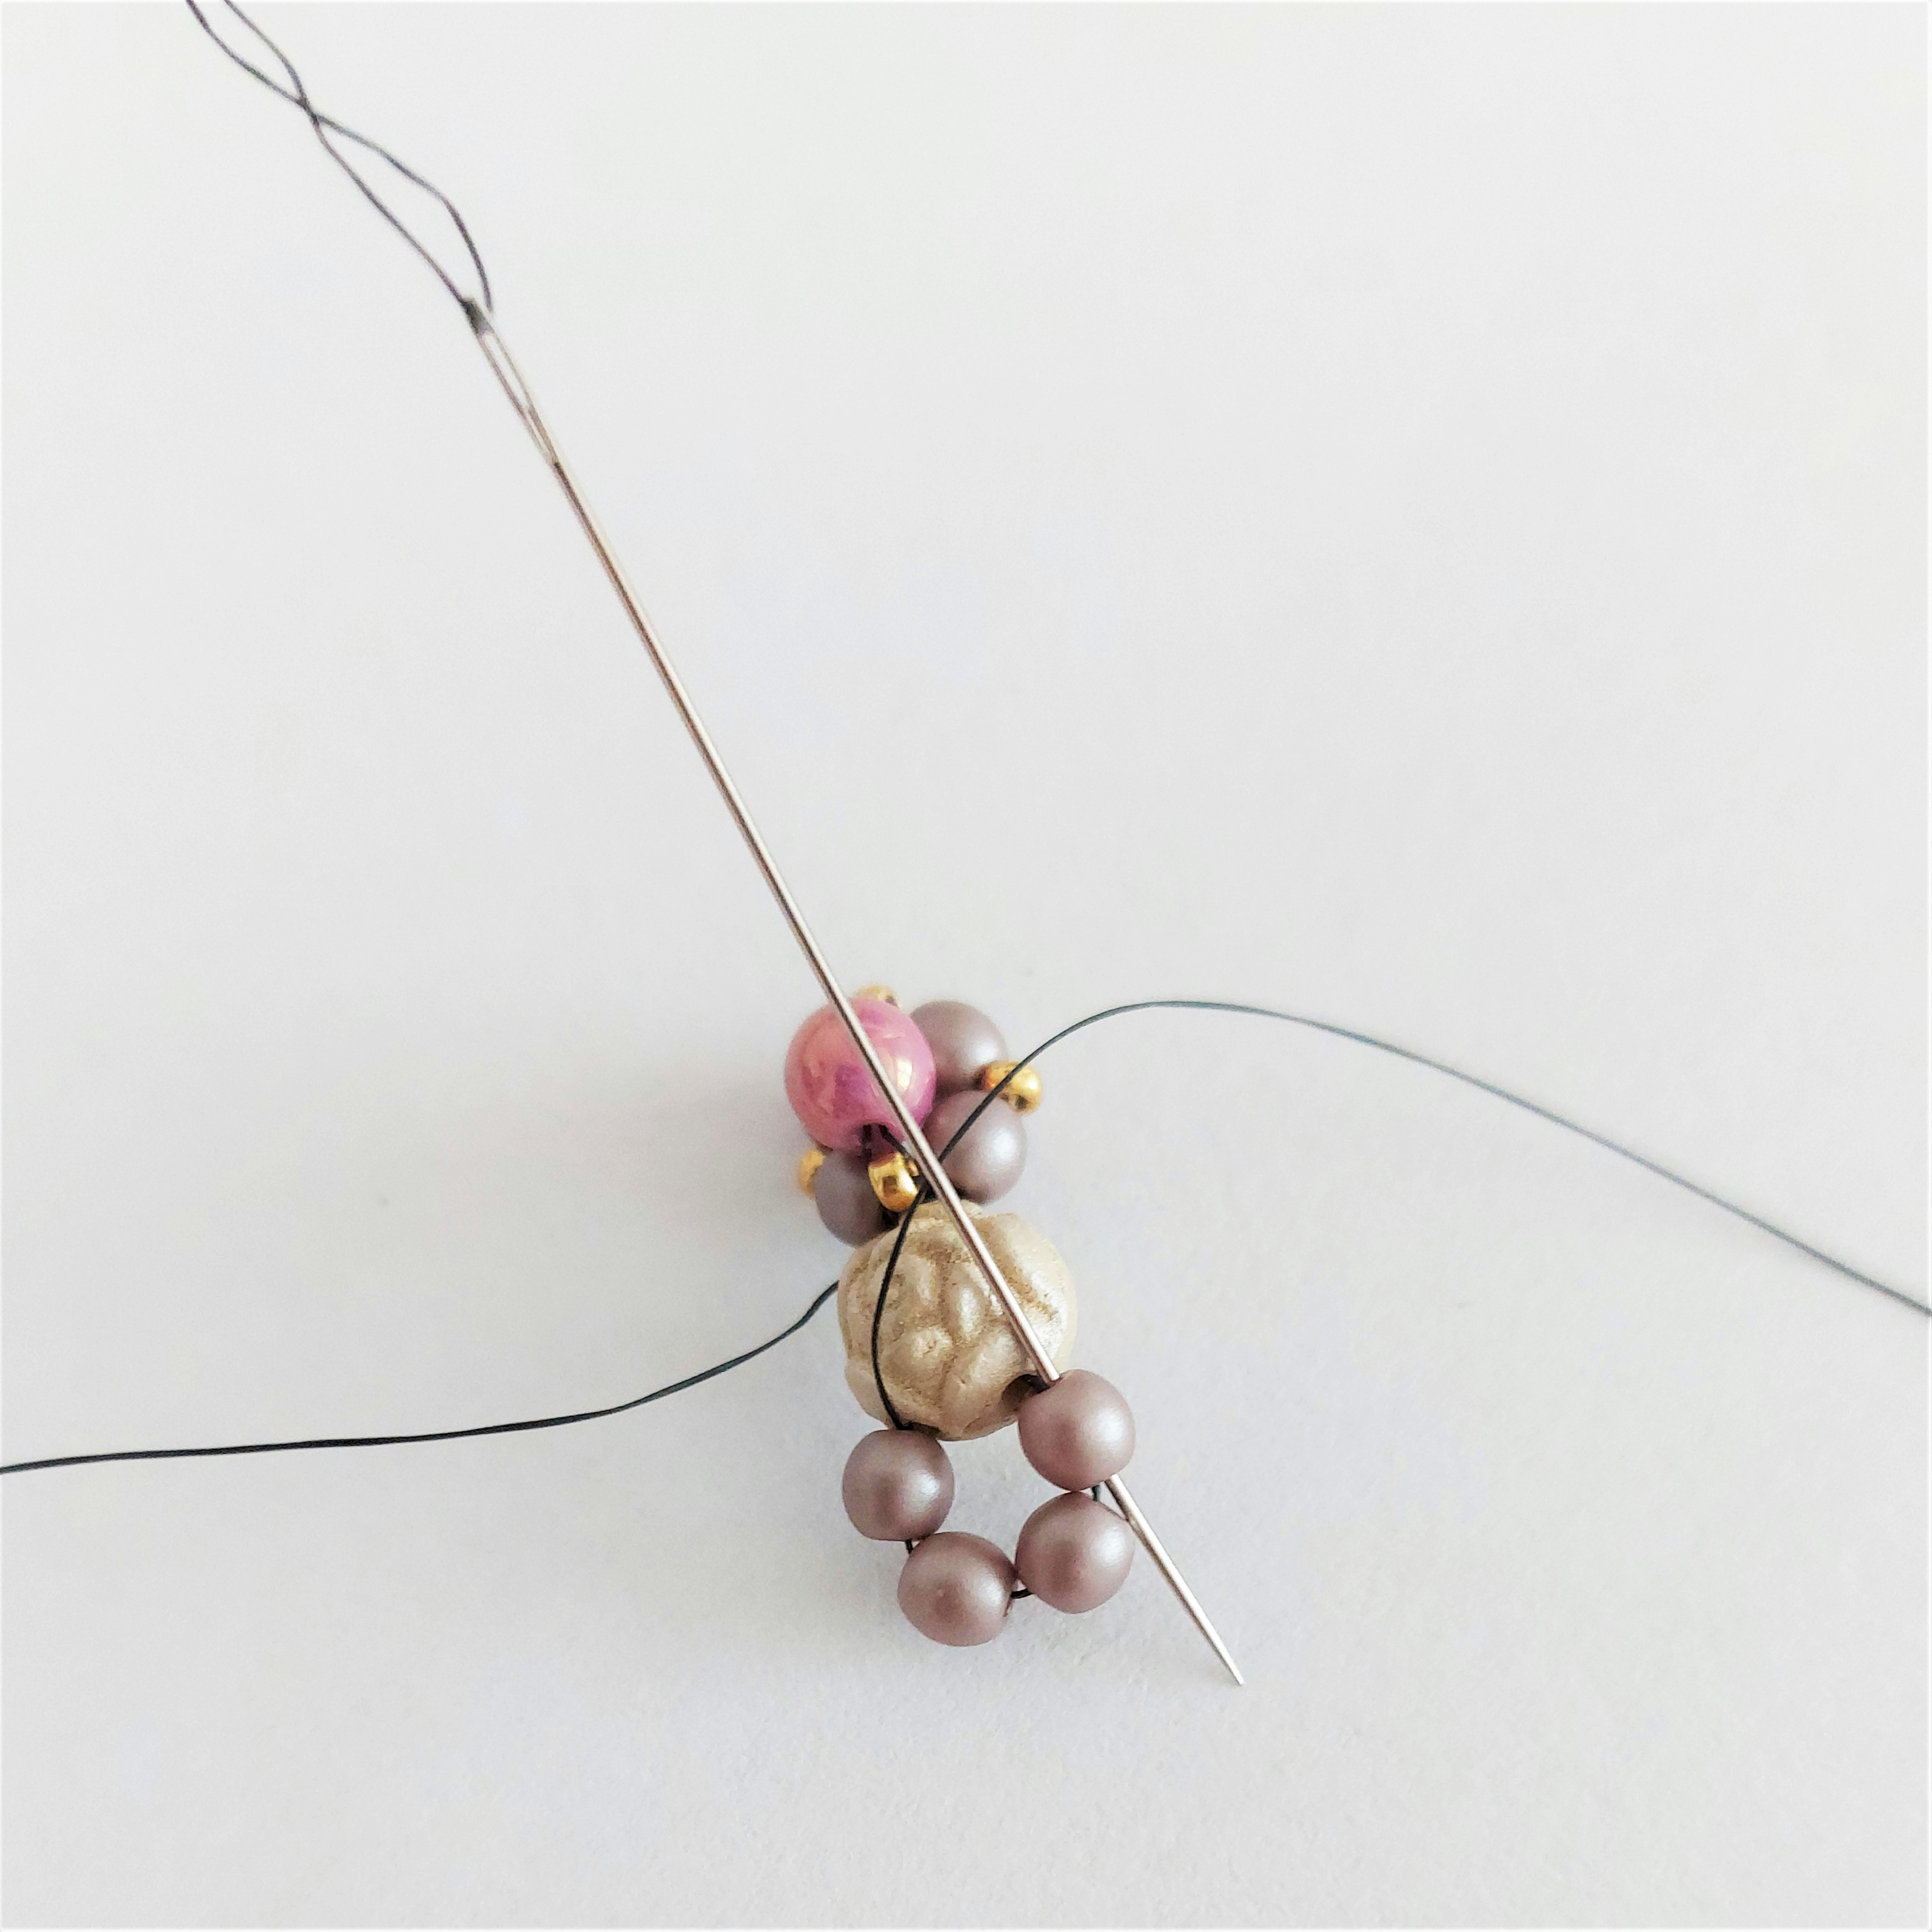
5. Bead through the first P3 from the new added group of P3 to join them into a circle.
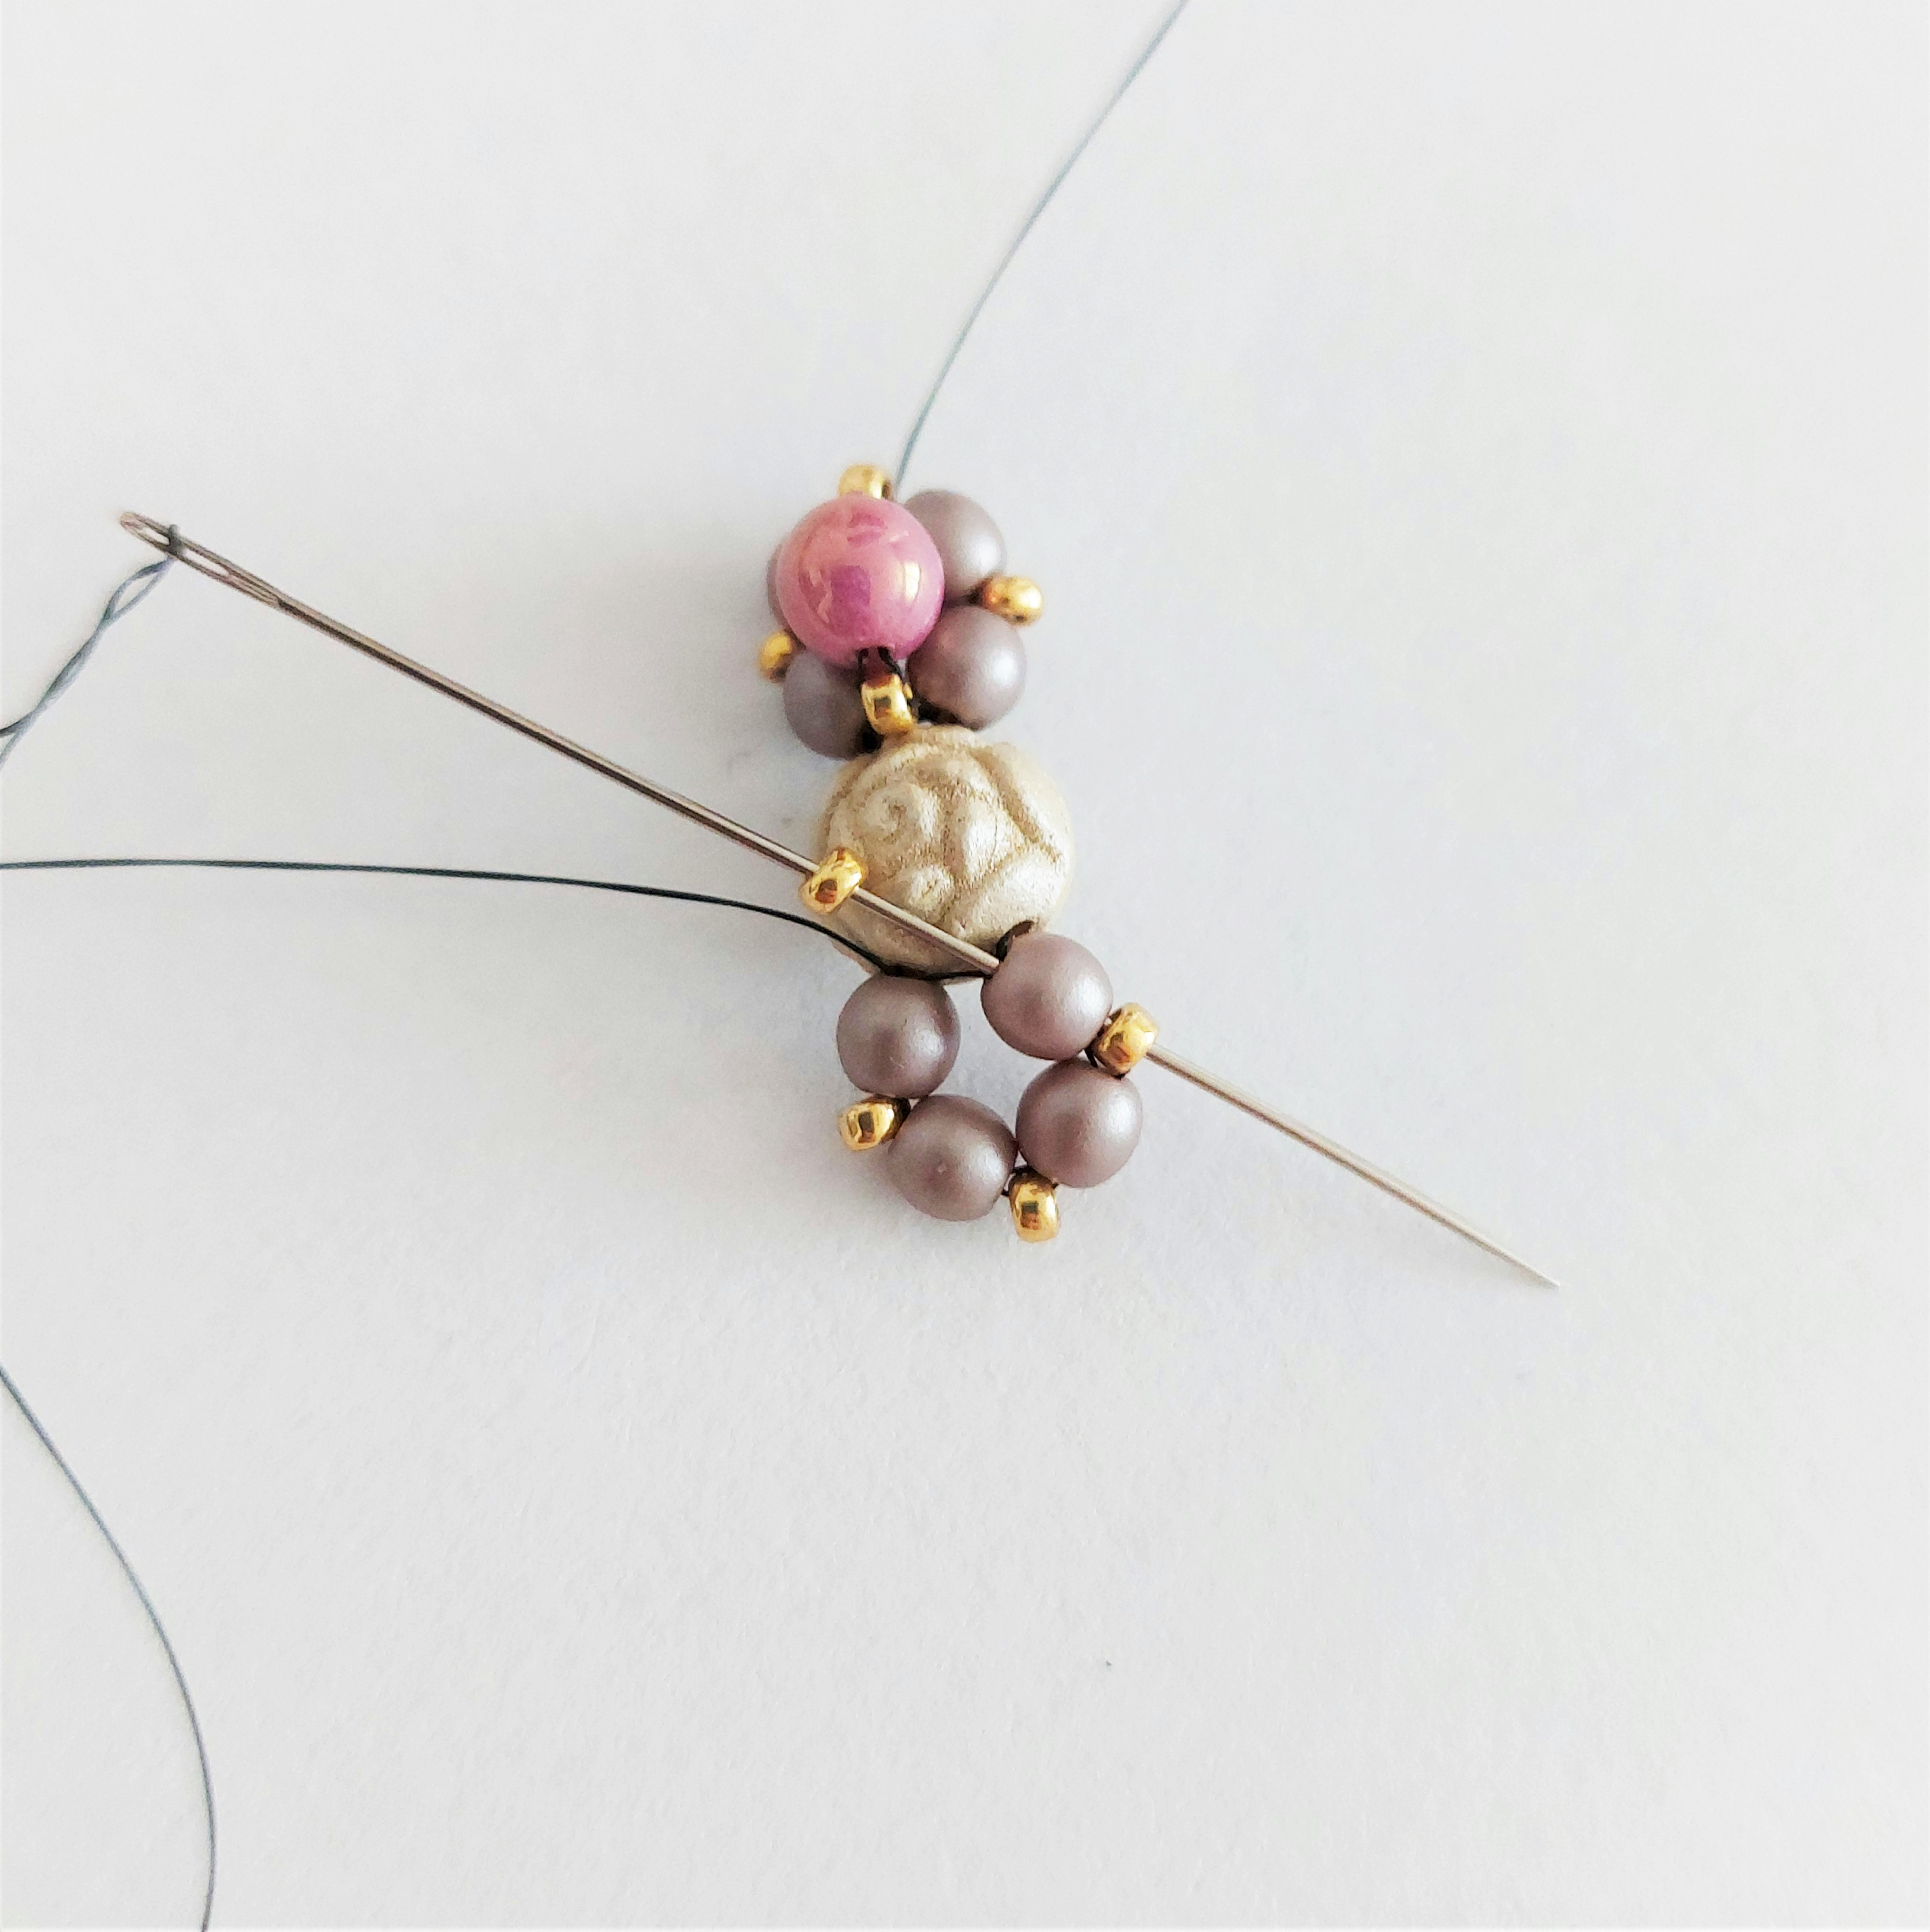
6. Add R15 between every P3, then bead through P3 + R15 + P3 + R15 and continue from the step 3. until your bracelet has the required length.
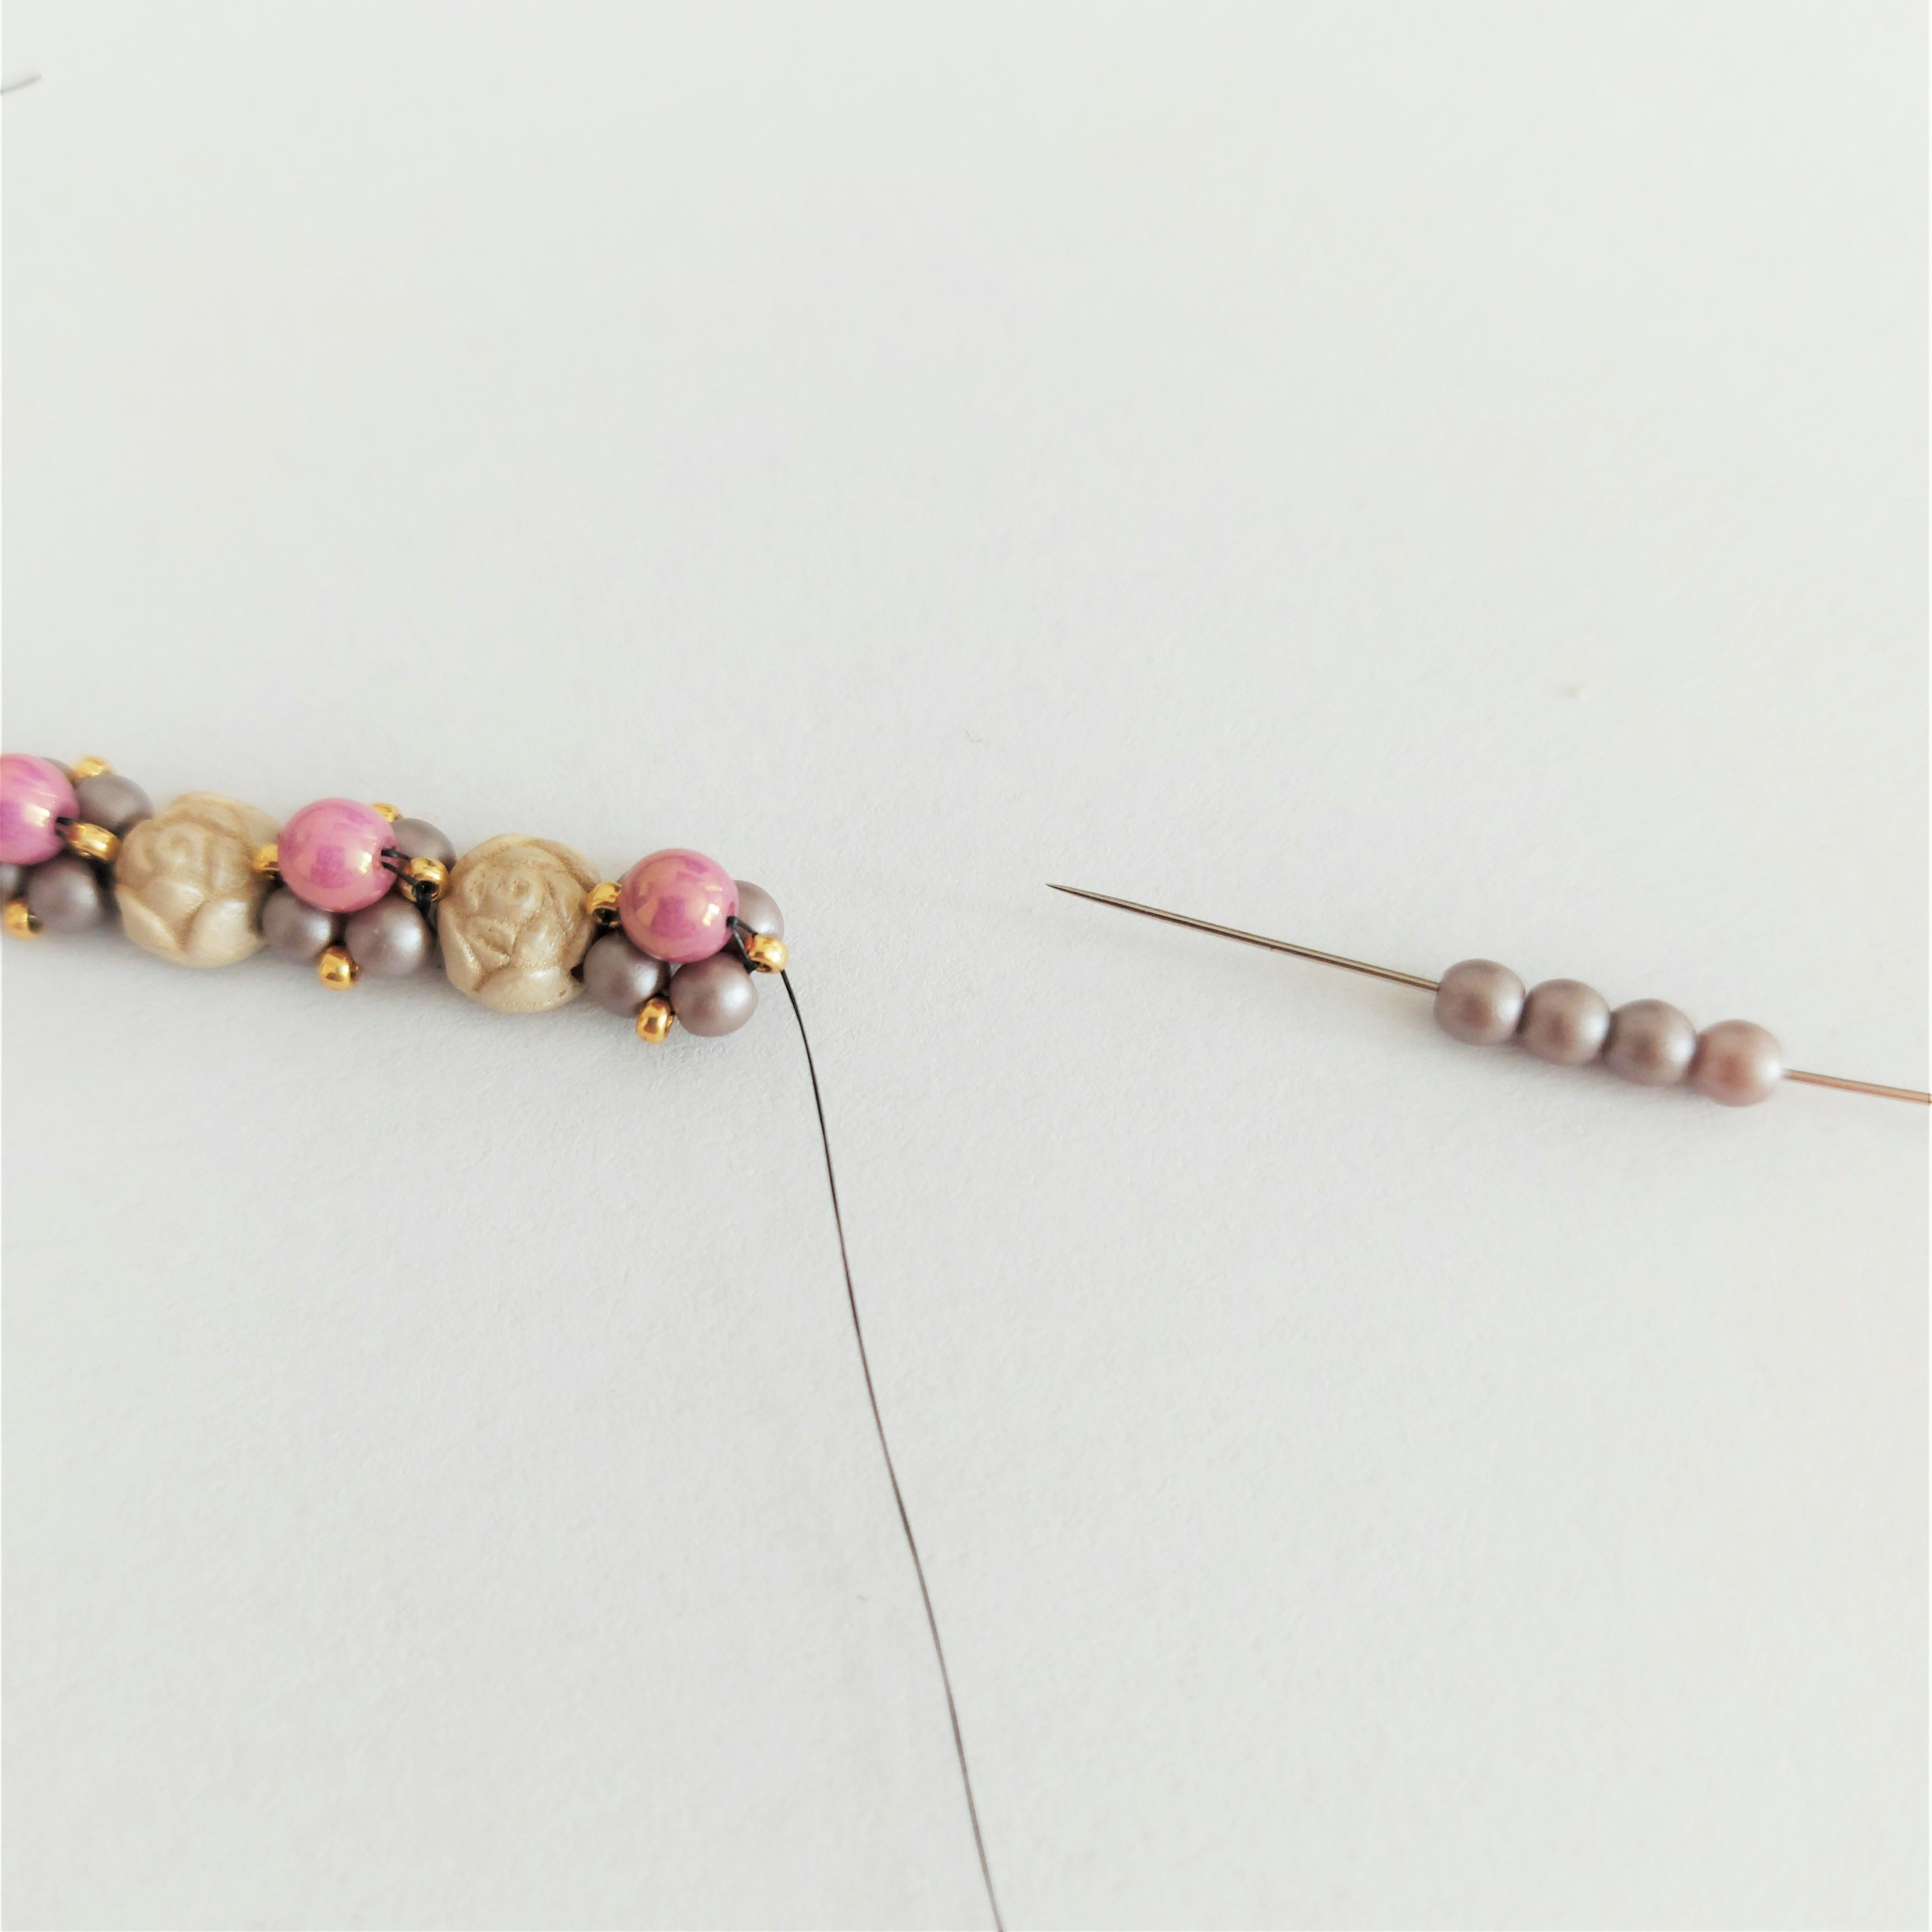
7. To finish the bracelet after exiting from the P3 pick up (4) P3 and bead through (4) P3 from the previous group.
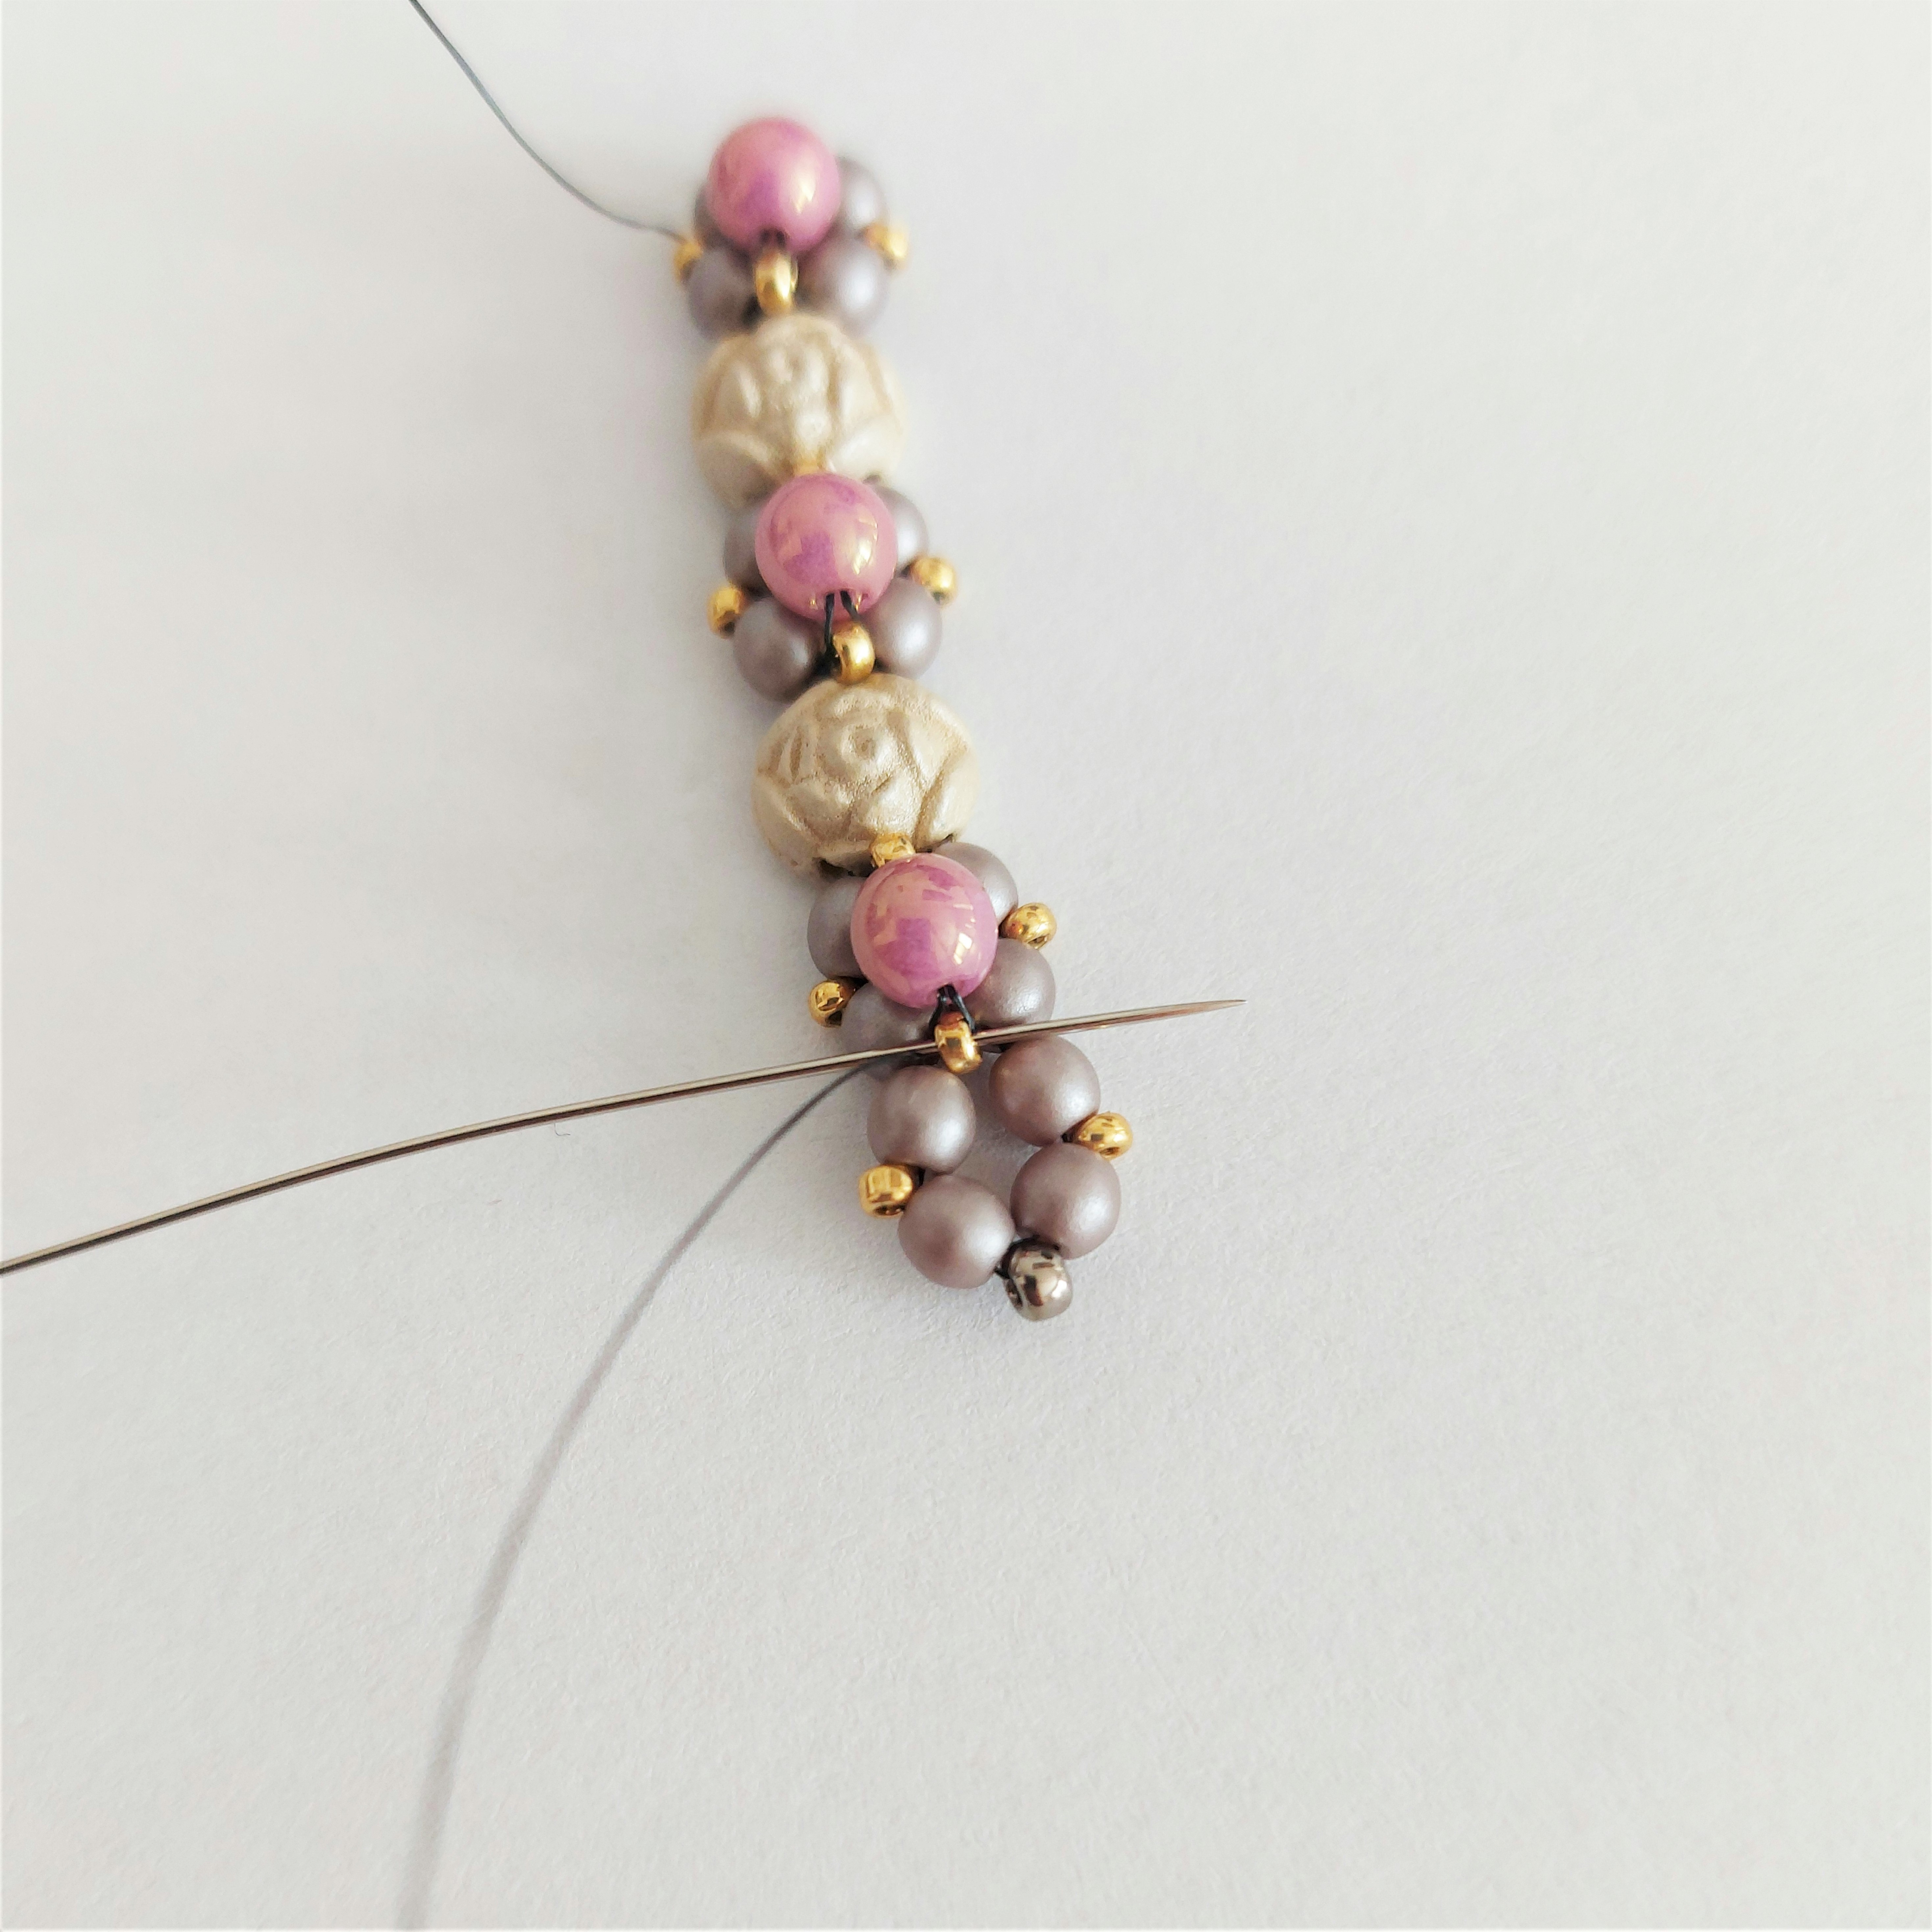
8. Add R15 between the first (2) P3 from the new group of P3, then add R11 between the second (2) P3, R15 between the third (2) P3. Finish by beading through the R15 from the previous group of P3.
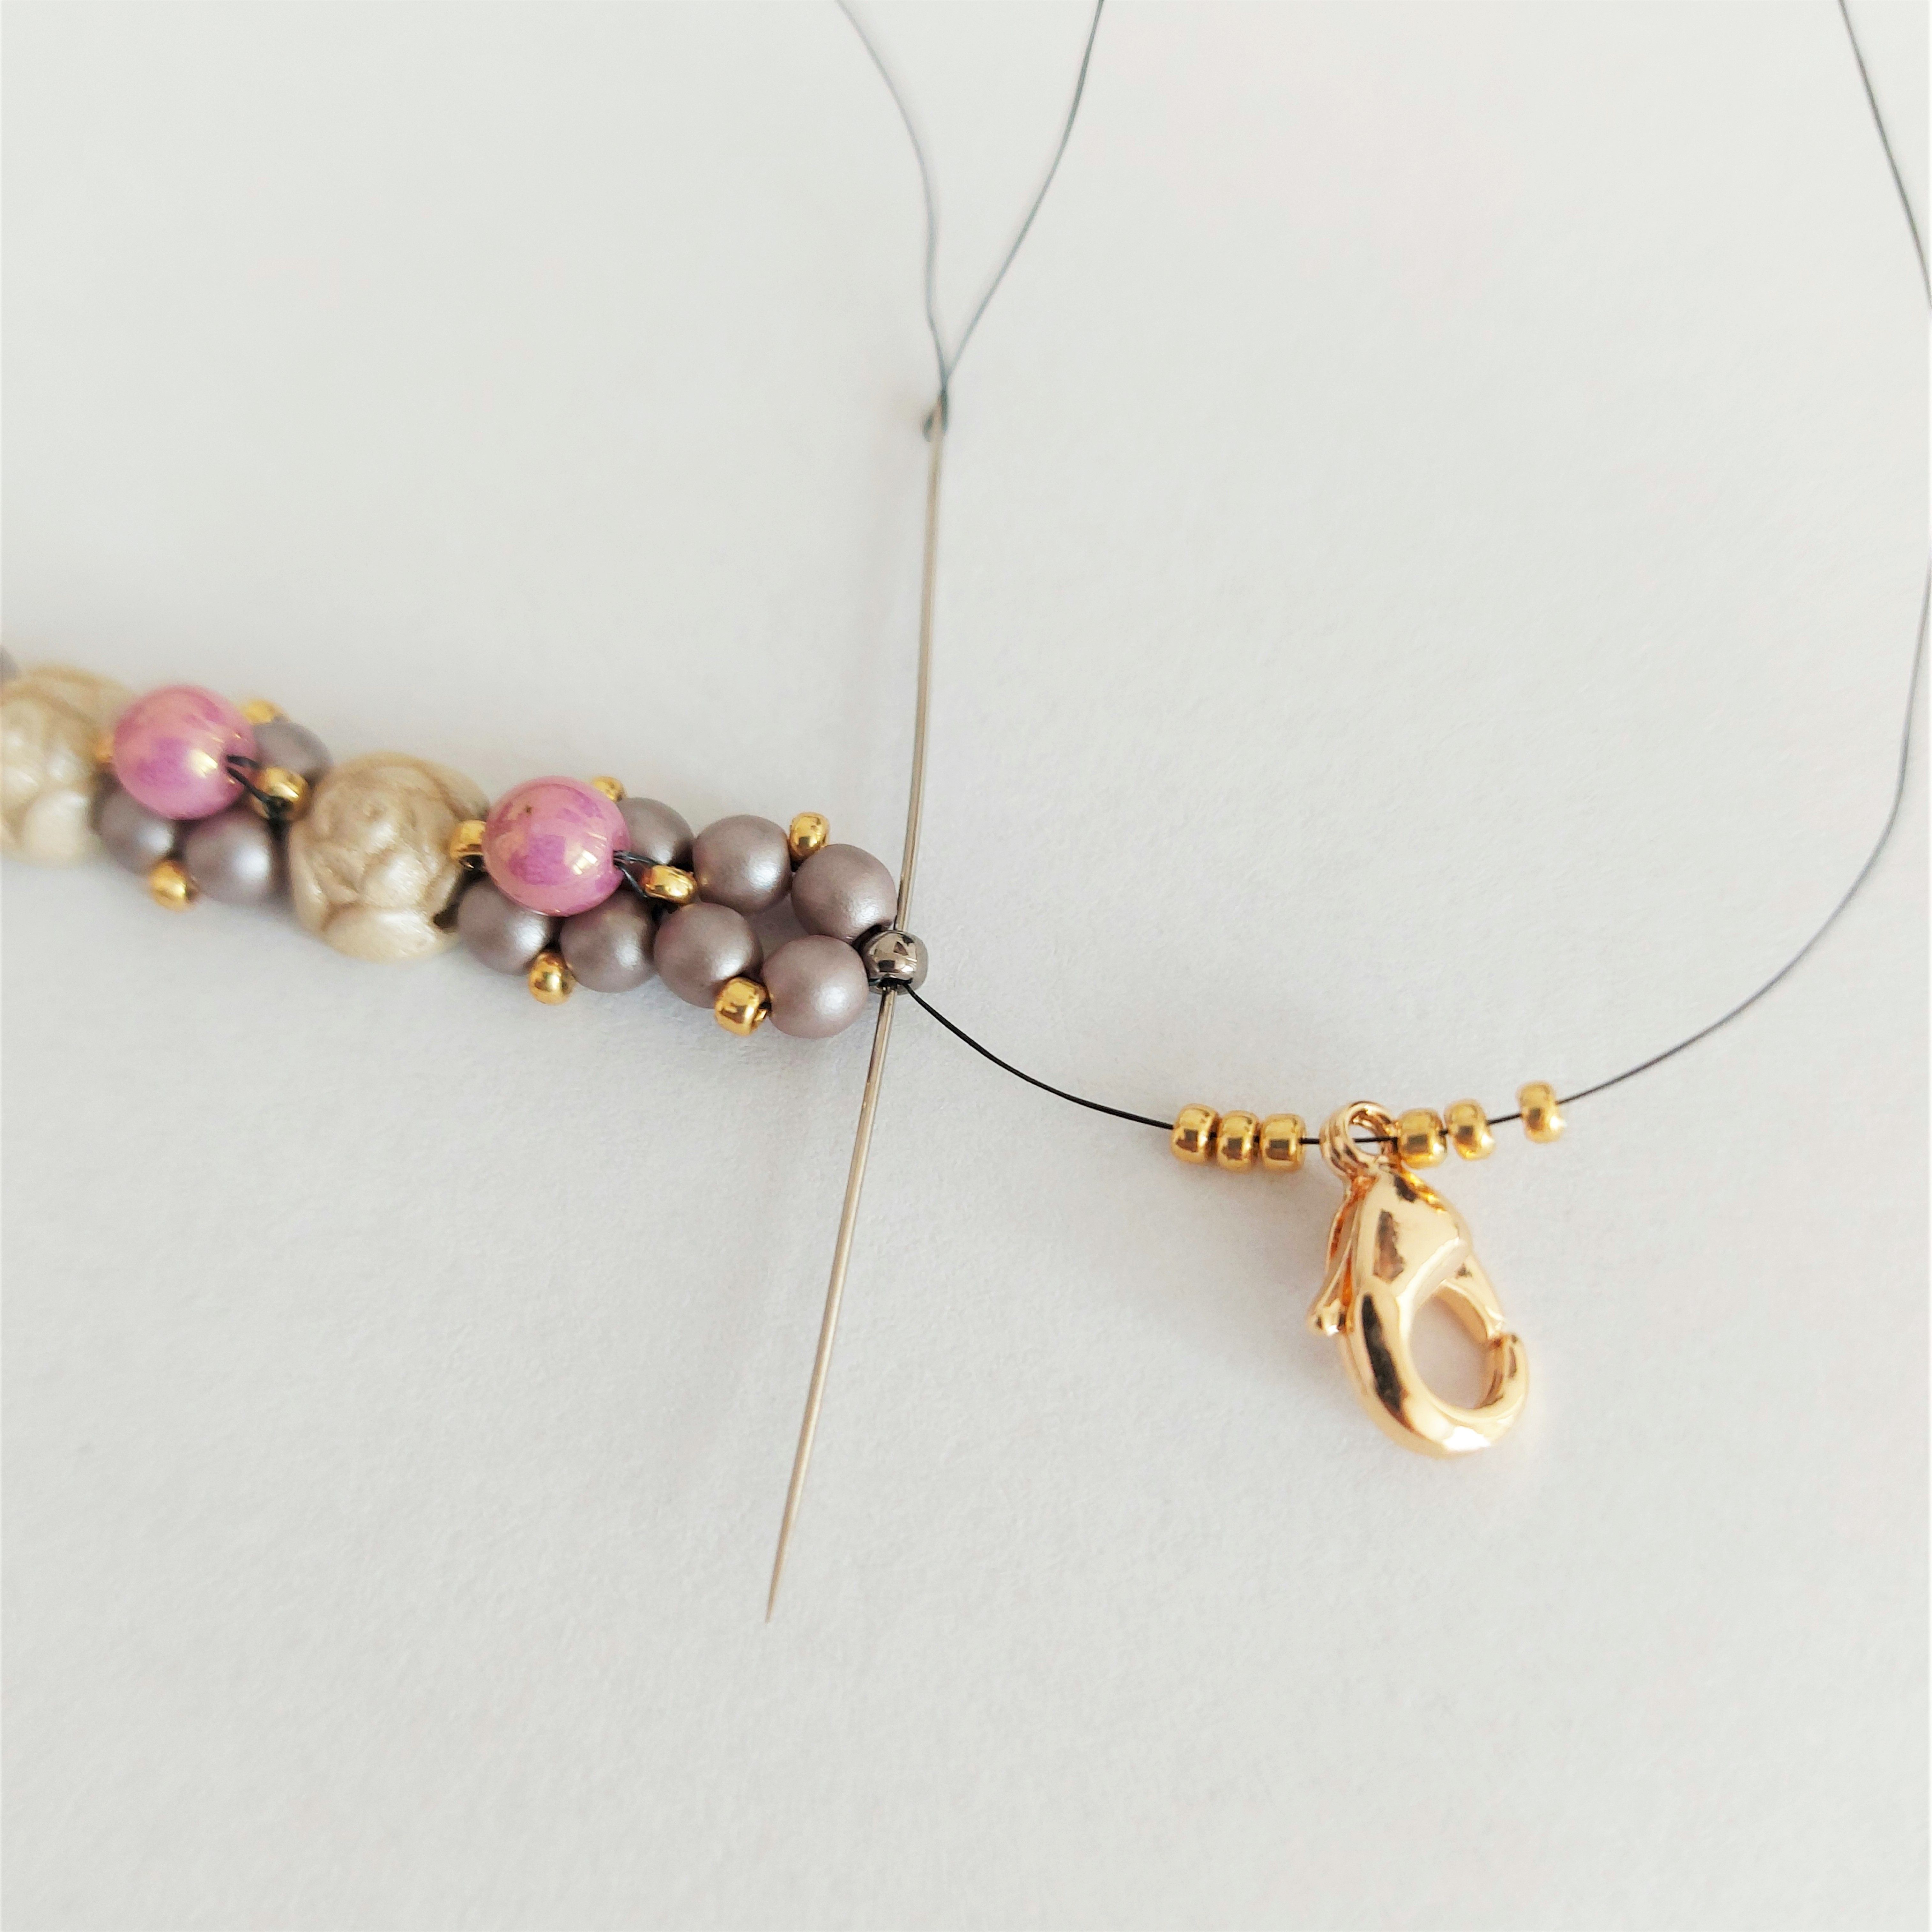
9. Bead through P3 + R15 + P3 + R11, pick up 3R15 + clasp of your choice + 3R15 and bead through R11. Repeat beading through R15s + clasp more times to strengthen it. Then bead through all the P3 + ROS on the side of the bracelet to attach the other part of the clasp.
Note: If you would like to have a bigger bracelet, try to connect more strings of the bracelet together, or experiment with substituting 2-hole rosettes with other shapes of 2-holes beads in your beadwork.
Congratulations! Your bracelet is now finished! Let us know how did you like it and show us pictures of your creations, we are very curious!



Thank you so much for this really nice tutorial. I think this would look great as a chain for a pendent.