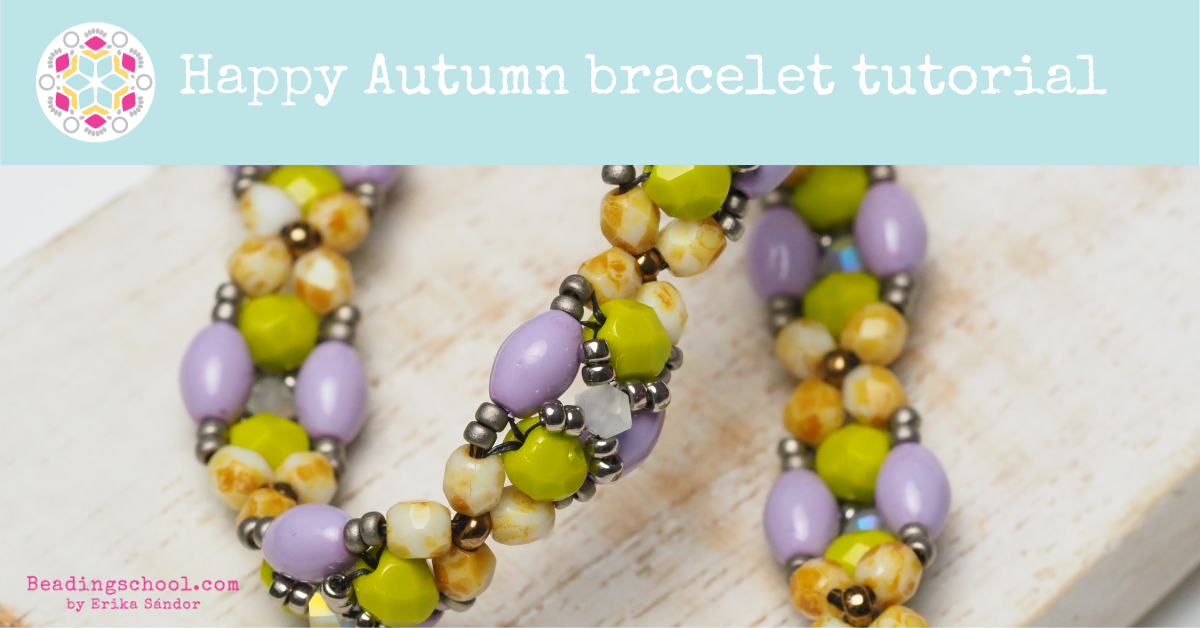
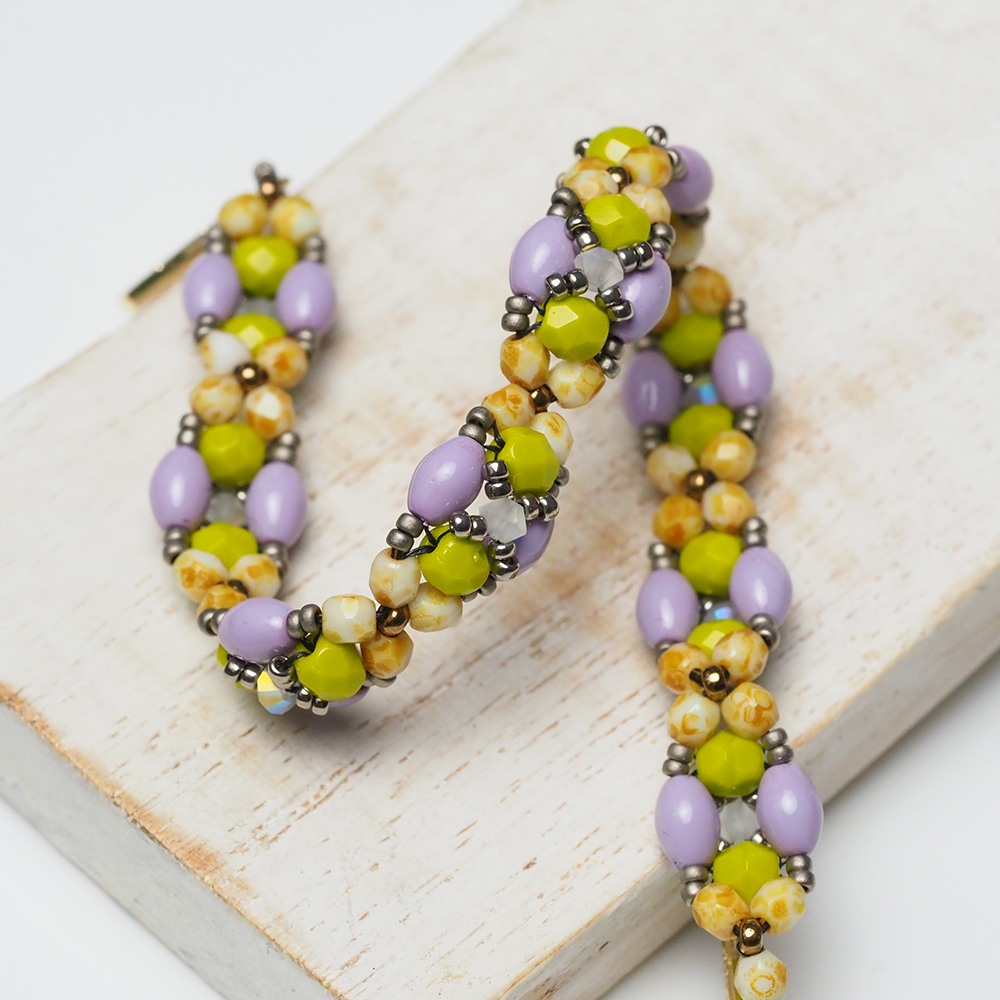
The Happy Autumn bracelet is based on the RAW – Right Angle Weave stich. It consists of identical motifs that can be beaded in one go, without having to start a new thread for each part. The middle part of the motif is a rectangle with 4×6 mm olive-shaped pressed glass beads for the long sides and 4 mm round fire-polished beads for the short sides. On both sides of the rectangle we have a triangle consisting of a 4 mm fire-polished bead (being part of the rectangle, too) and two 3 mm fire-polished beads. The rectangle in the middle is decorated with a 3 mm bicone bead and some Miyuki seed beads.
Happy Autumn bracelet tutorial
Darker, shorter days are approaching, and beaders living on the northern hemisphere need to add some extra measures to their daily routine to cheer themselves up. A warm blanket, candlelight, a warm cup of tea, and colourful beads underlining the changes in the nature are a perfect choice for November evenings when we rather stay at home instead of going out for adventures. In the second half of yesterday’s #CoffeeTimeWithErika we were talking about different ways of bringing the autumn-mood to our jewels, while creating a “Happy Autumn” atmosphere. The new colorful Fiesta beads are great for creating a cheerful mood on our beading boards, and the Happy Autumn bracelet will be finished in no time!
Would you like to get a bunch of free beading tutorials?
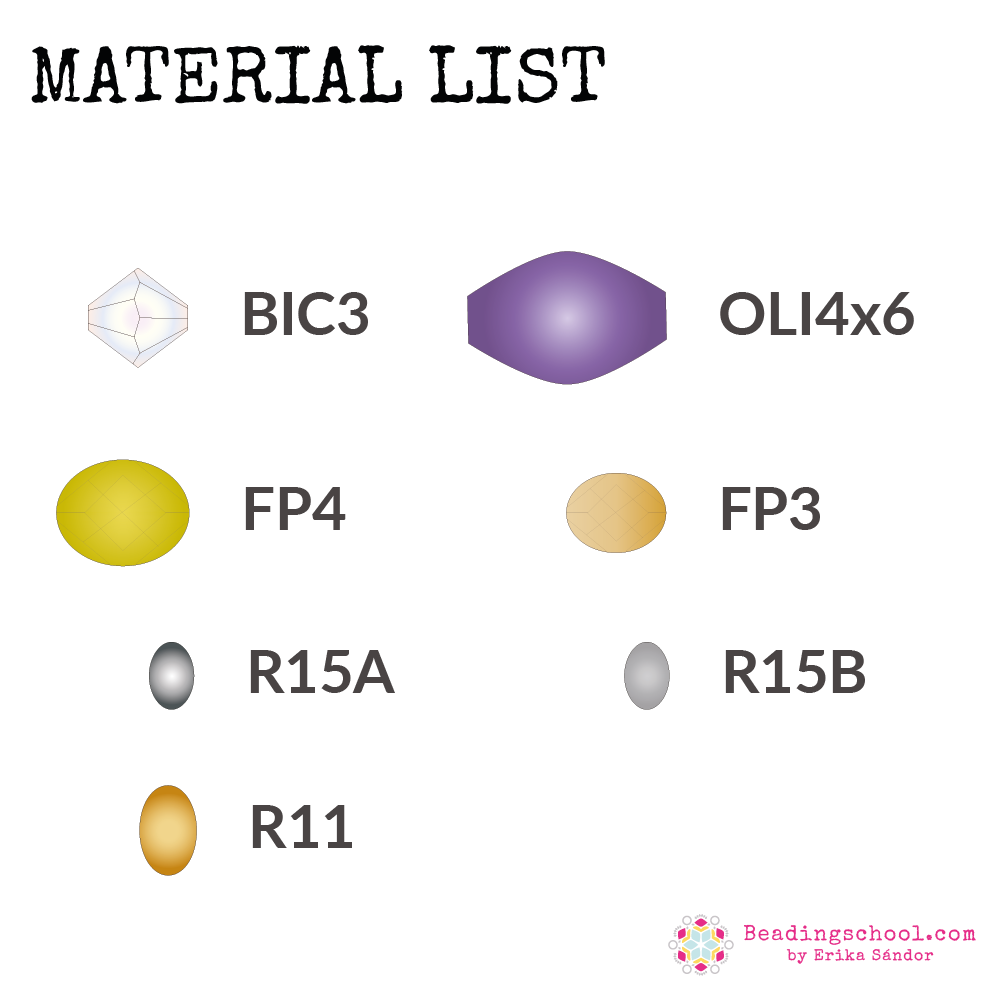
BIC3 – 3 mm Preciosa bicone beads
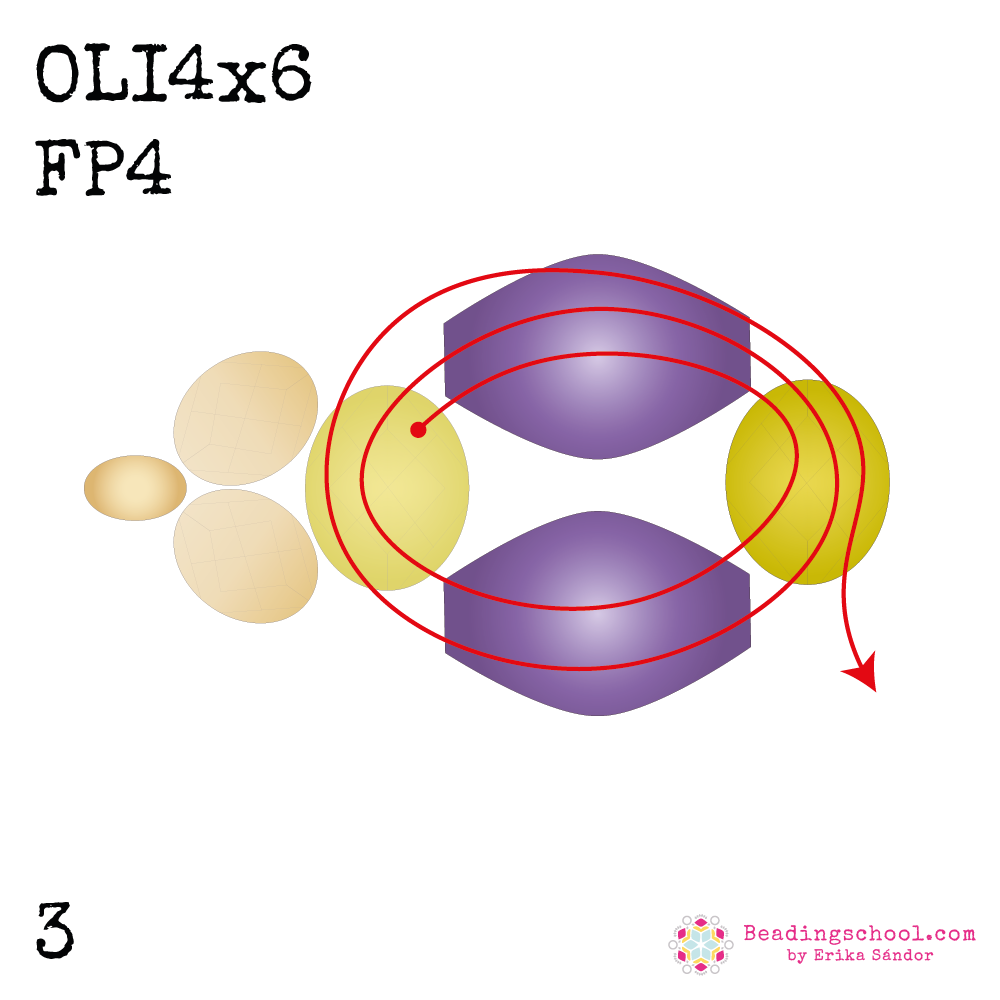
OLI4x6 – 4×6 mm olive-shaped glass beads “rice”
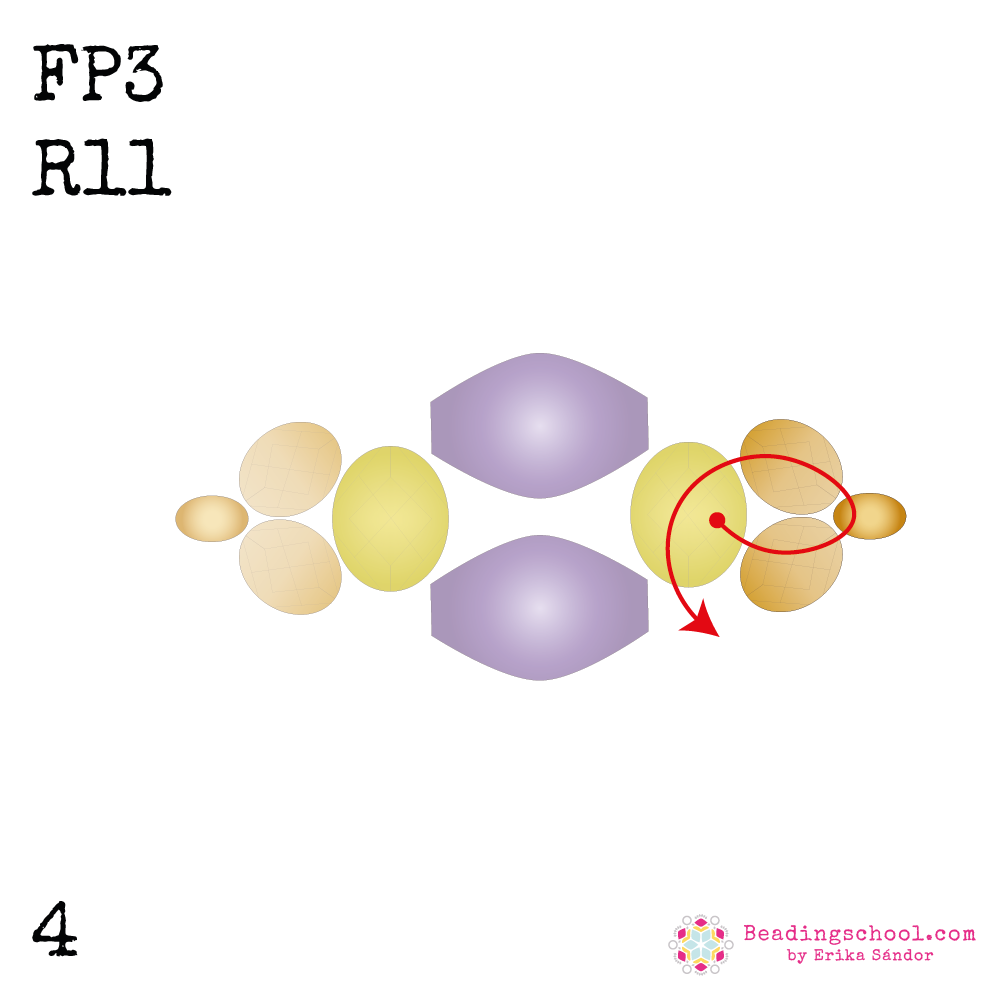
FP3 – 3 mm fire-polished beads
FP4 – 4 mm fire-polished beads
R15A and R15B – 15/0 round Miyuki seed beads
R11 – 11/0 round Miyuki seed beads
clasp (I chose a triangle shaped clasp, as it mimics the shape of part of the motif)
thin beading needle (I use 11/0 Tulip)
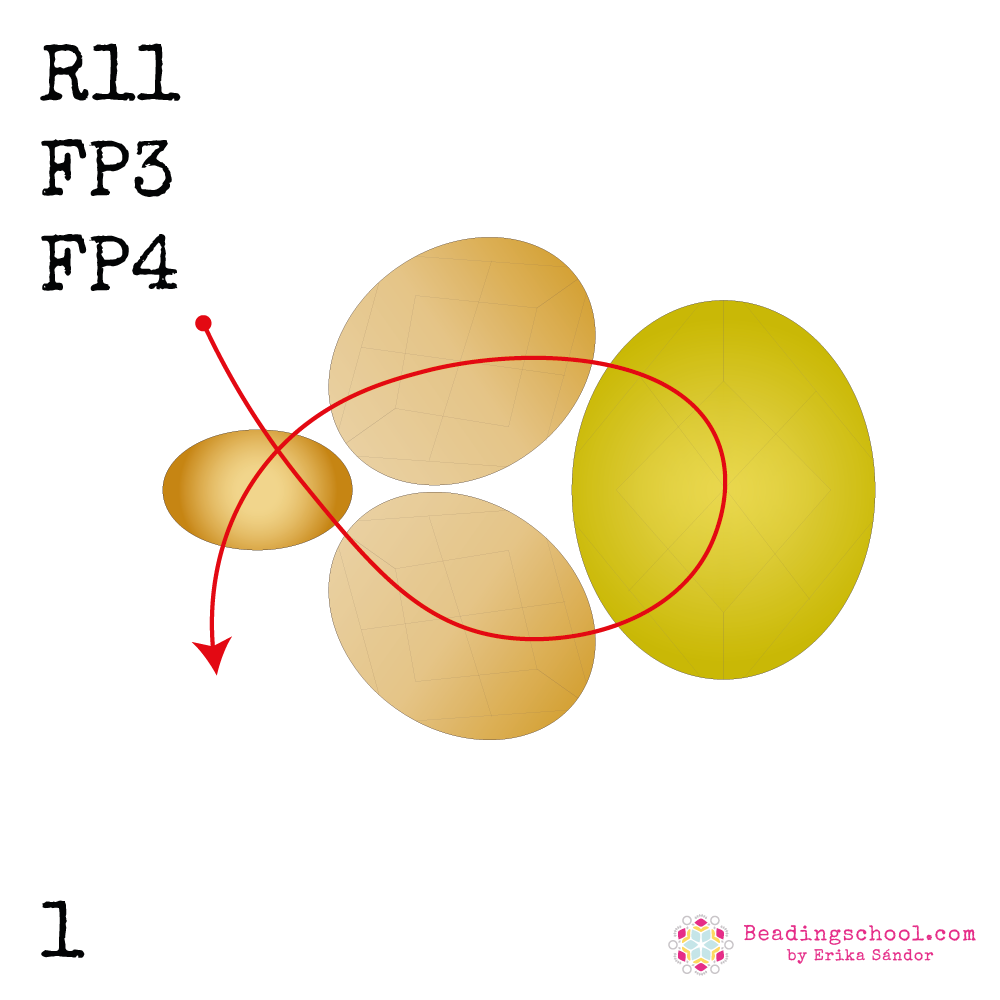
Pick up R11 + FP3 + FP4 + FP3.
Bead through the R11 one more time to join the last bead to the first one.
Bead through FP3 + FP4 + FP3. Skip the R11.
Bead through FP3 + FP4.
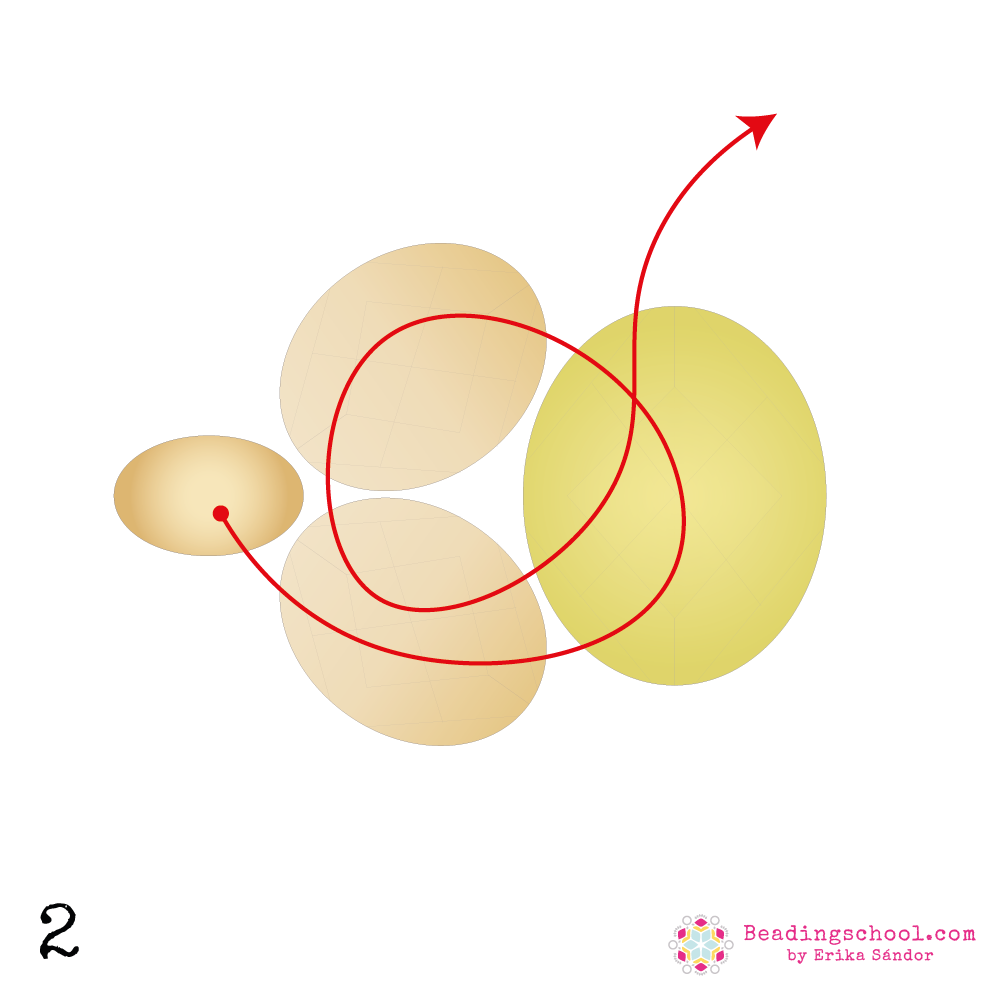
Pick up OLI4x6 + FP4 + OLI4x6.
Bead through the FP4 bead that you were exiting before picking up the new beads.
Repeat the thread path to strengthen the connections.
Bead through OLI4x6 + FP4.
Pick up FP3 + R11 + FP3.
Bead through the FP4 you were exiting at the beginning of this step.
Bead through (2) FP3, while skipping the R11 in between.
Bead through FP4.
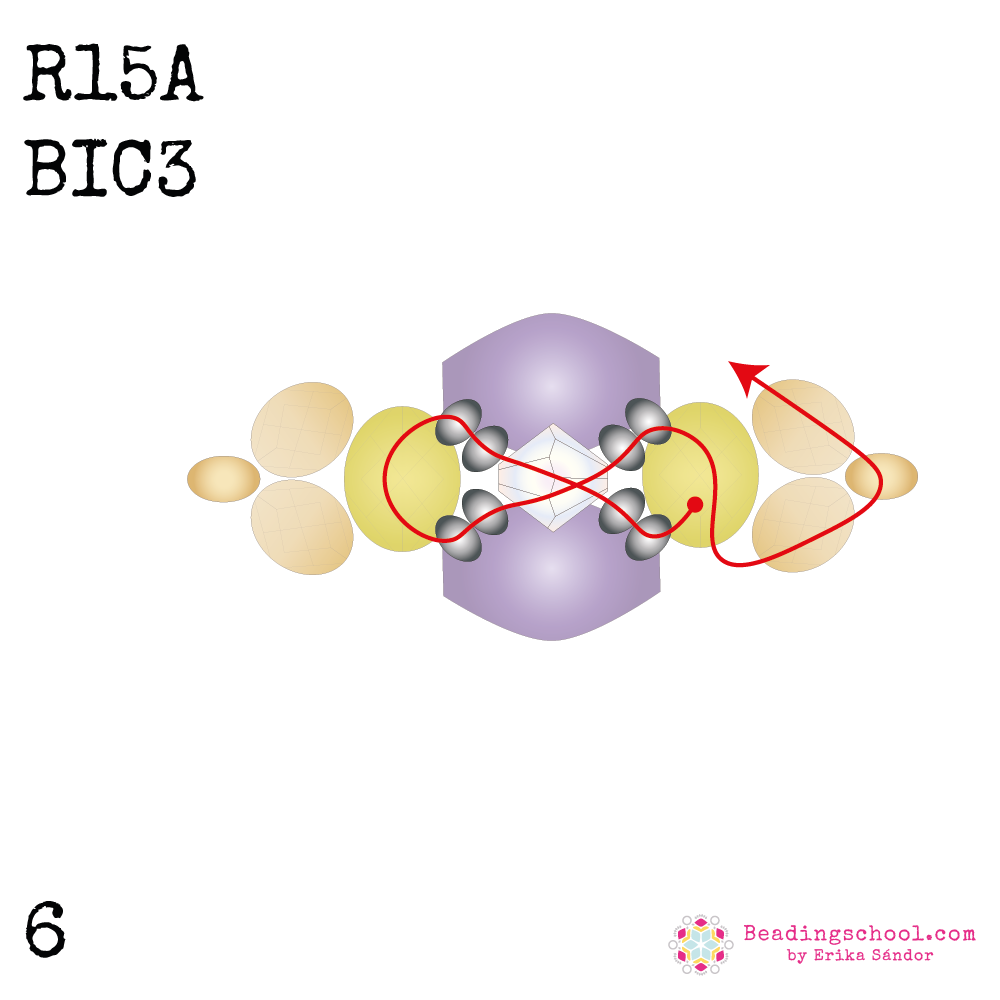
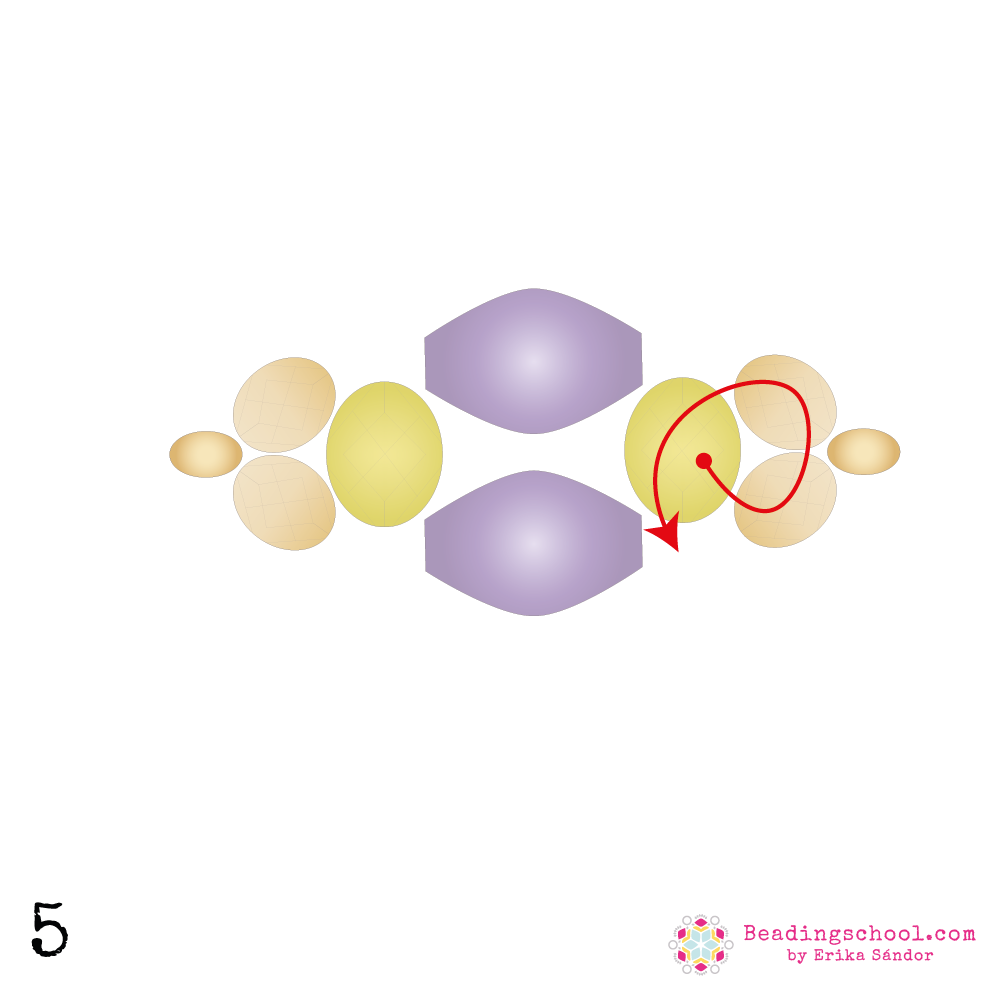
Pick up (2) R15A + BIC3 + (2) R15A.
Bead through the FP4 on the opposite side of the rectangle. The new beads should form a diagonal between the (2) FP4.
Pick up (2) R15A.
Bead back through BIC3.
Pick up (2) R15A.
Bead through the FP4 that you were exiting at the beginning of this step.
Bead through FP3 + R11 + FP3.
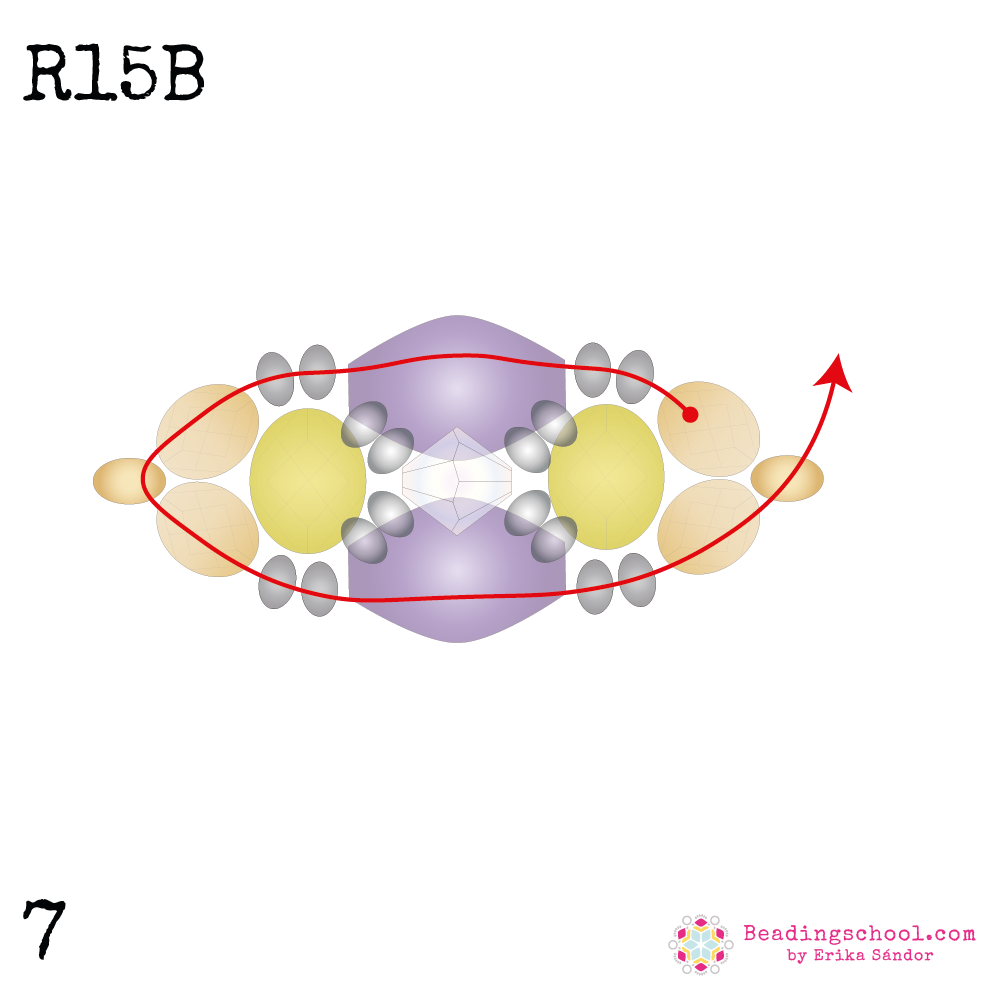
Pick up (2) R15B.
Bead through OLI4x6.
Pick up (2) R15B.
Bead through FP3 + R11 + FP3.
Add groups of (2) R15B in the same way, and finish by beading through FP3 + R11.
The first motif is finished.
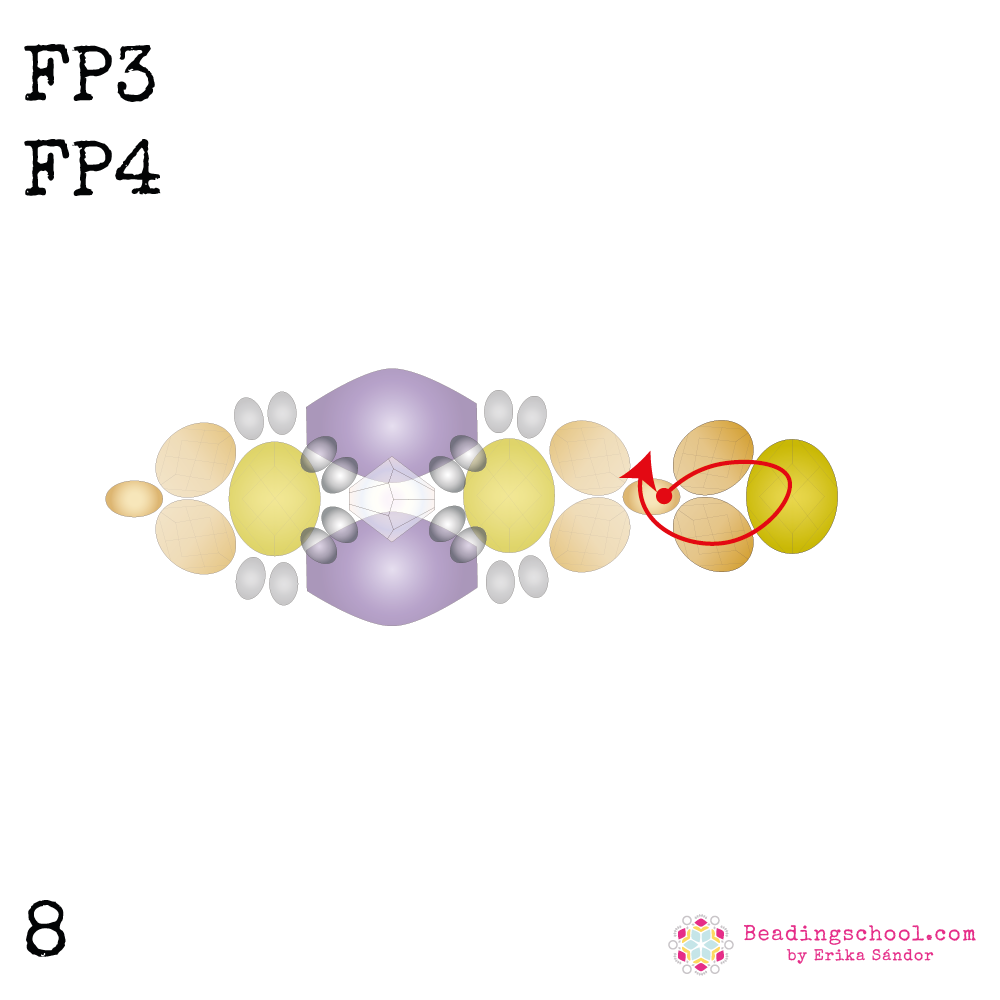
Start beading the second motif.
Pick up FP3 + FP4 + FP3.
Bead through the R11 one more time.
Complete the motif by repeating steps nr. 2-7.
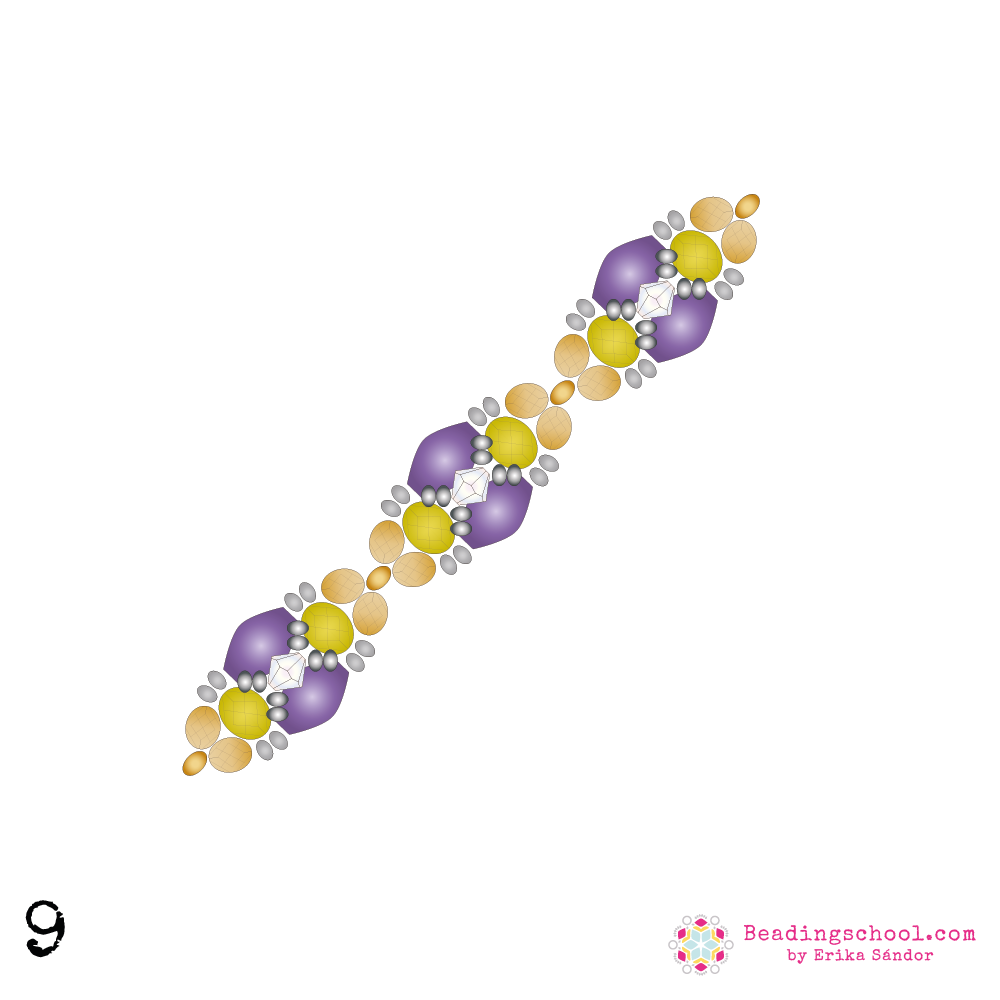
Keep beading more motifs until you have sufficient length.
Attach the clasp. Secure and trim thread ends, and enjoy your bracelet!
xxx Erika
PS: What do you think about a super long bracelet wrapped around your wrist several times? 🙂

Thank you for this tutorial. So fun with the Fiesta beads.
Thank you for beading and sharing the bracelet with us, you chose beautiful colors! 🙂
Can’t wait to try this, love all that you do, thanks so so much
You’re more than welcome Ann, I’m glad you like the pattern! Enjoy it very much 🙂
Oh how lovely and generous! I must run off and order more beads to reward us both.
Thank you so much! Please, share your finished jewel in the comment below, or in the Beadingschool Club on Facebook! I’d love to see it 🙂
Wow looks so fun and beautiful I just order the rice beads so this will have to wait a bit something to look forward to.
Thank you for your support, dear Annie! Enjoy the beads when they arrive and share your finished jewelry with us!