It’s been some time since I wanted to collect as much knowledge, hints, and tips about (living on the) edge of bead embroidered motifs! My idea was to inspire you on how to finish your bead embroidery projects beyond the basic stitching and picots. Join me to explore the possibilities!
How to finish the edges in bead embroidery?
Here is the virtual library dedicated to bead embroidery:
- The BIG Bead Embroidery Handbook
- Bead embroidery tutorials
- Bead embroidery lesson on Youtube
- Bead embroidery tool kit
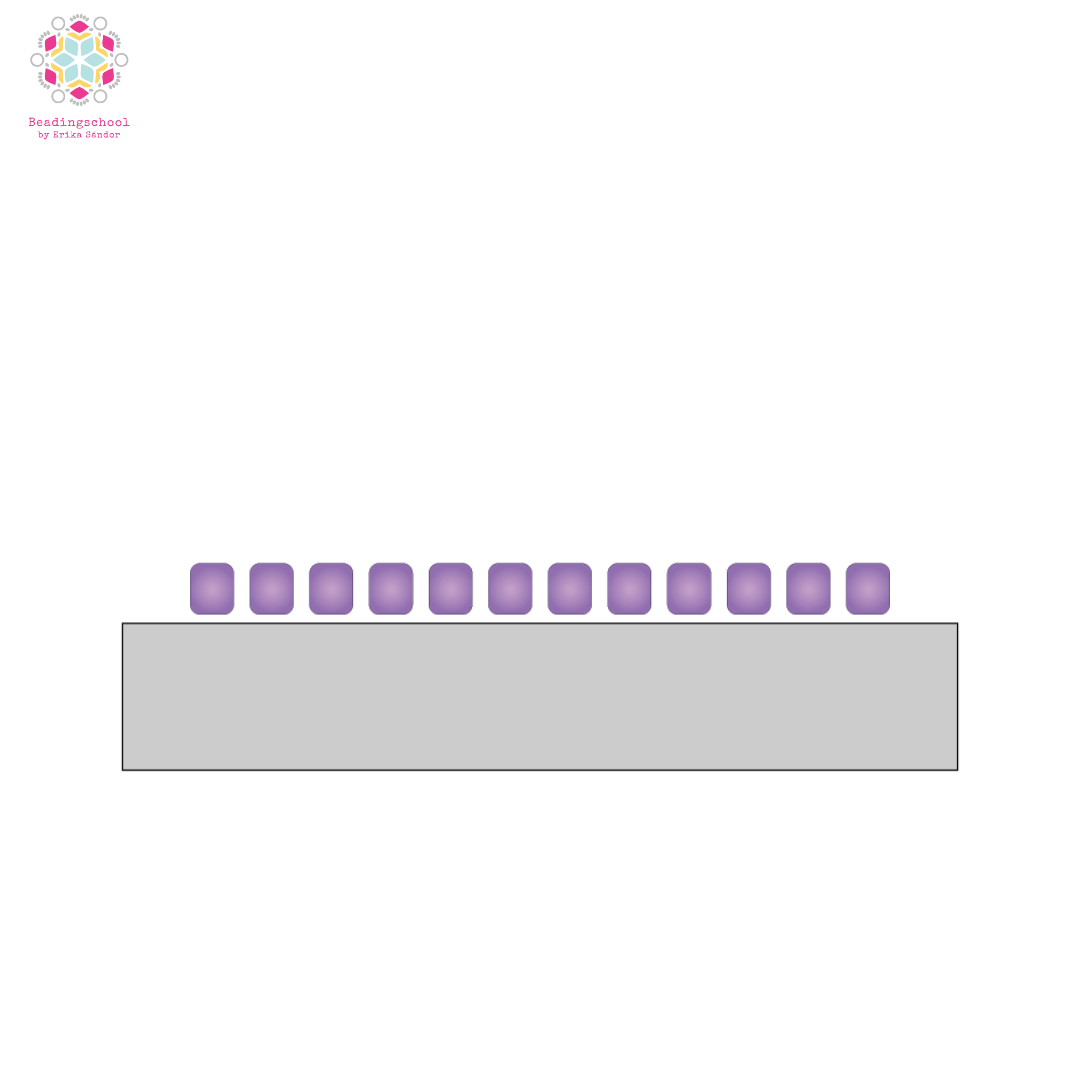
The base we’re starting is the beaded edge, when you use Delicas, R15 or R11 to finish the edge. These beads form a starting row you can decorate.
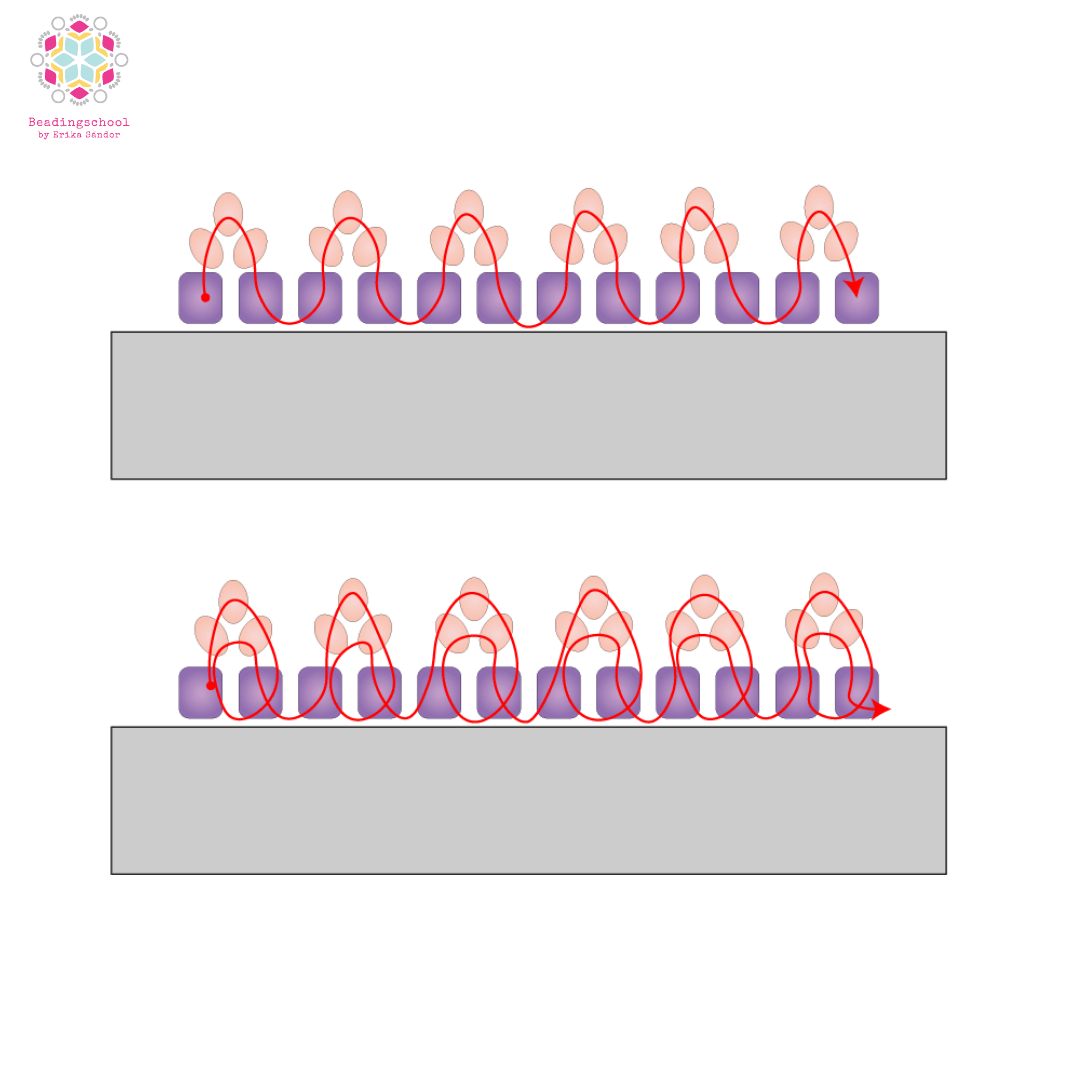
Picots
This is the easiest way how to add embelisment to the edge. You’re picking up groups or (3) R15 beads and follow the pattern below. You have 2 options for your threadpath.
Tip – when the beadcount in the initial row is odd, add only a single bead to the C11 that is left.
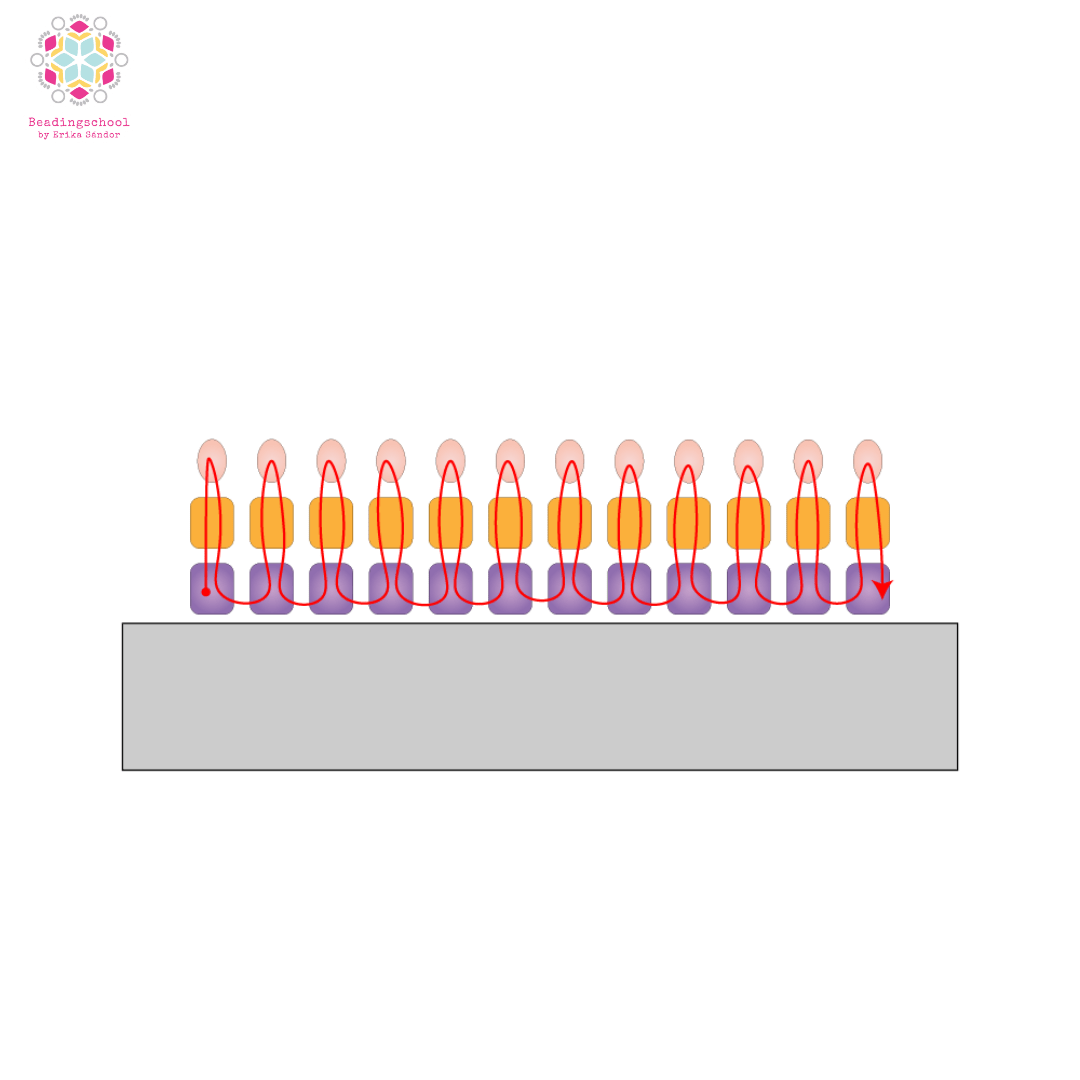
Layers of various beads
Exiting a C11 (or other bead in the base row), pick up C11 + R15 and bead back through (2) C11.
Tip – you can change a beadshape, too. Pick up 3 mm Bugle bead + R15 and enjoy a different look!
Combine several methods
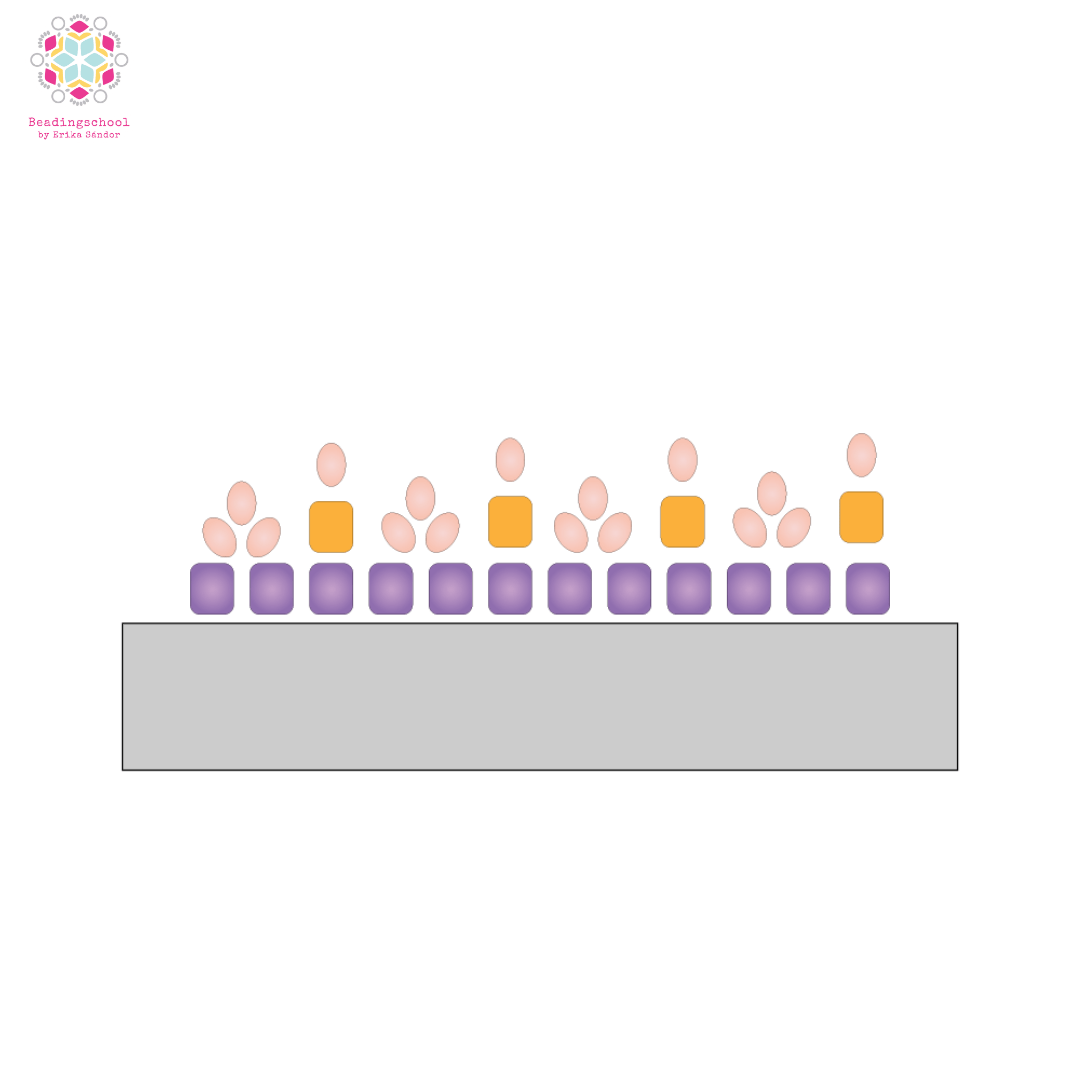
To add more texture to the edges, add different beads interchangeably.

For adding extra sparkle
You can also add 3 mm bicone beads to the edges. Make sure to use C11 and R15 beads that cover the sides of the BIC3, so if there’s a sharp edge, your thread will not be cut.

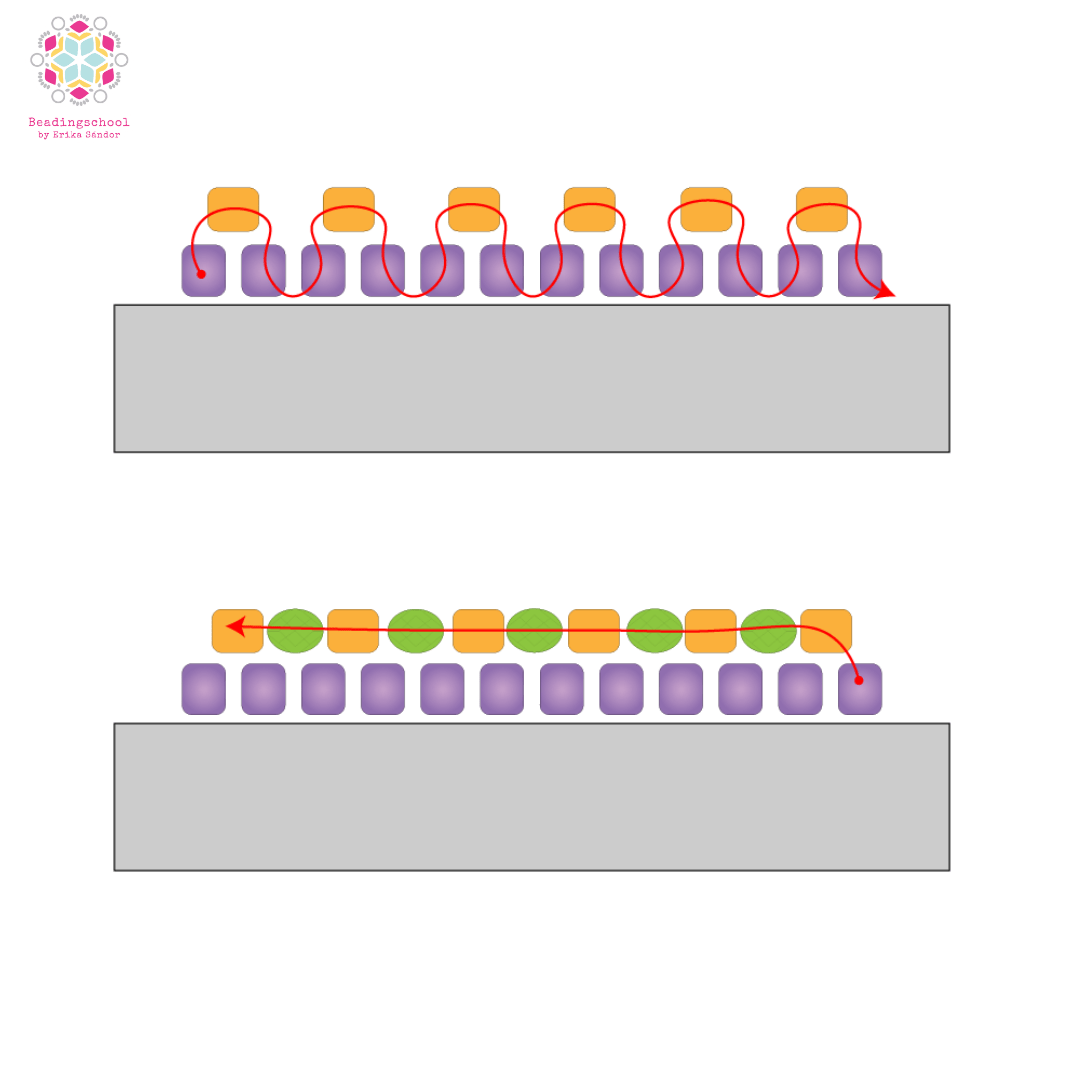
How to add an extra row of beads?
First, add C11 on top of 2 neighbouring C11s.
Then, add True2 to fill the gaps between the newly added C11.
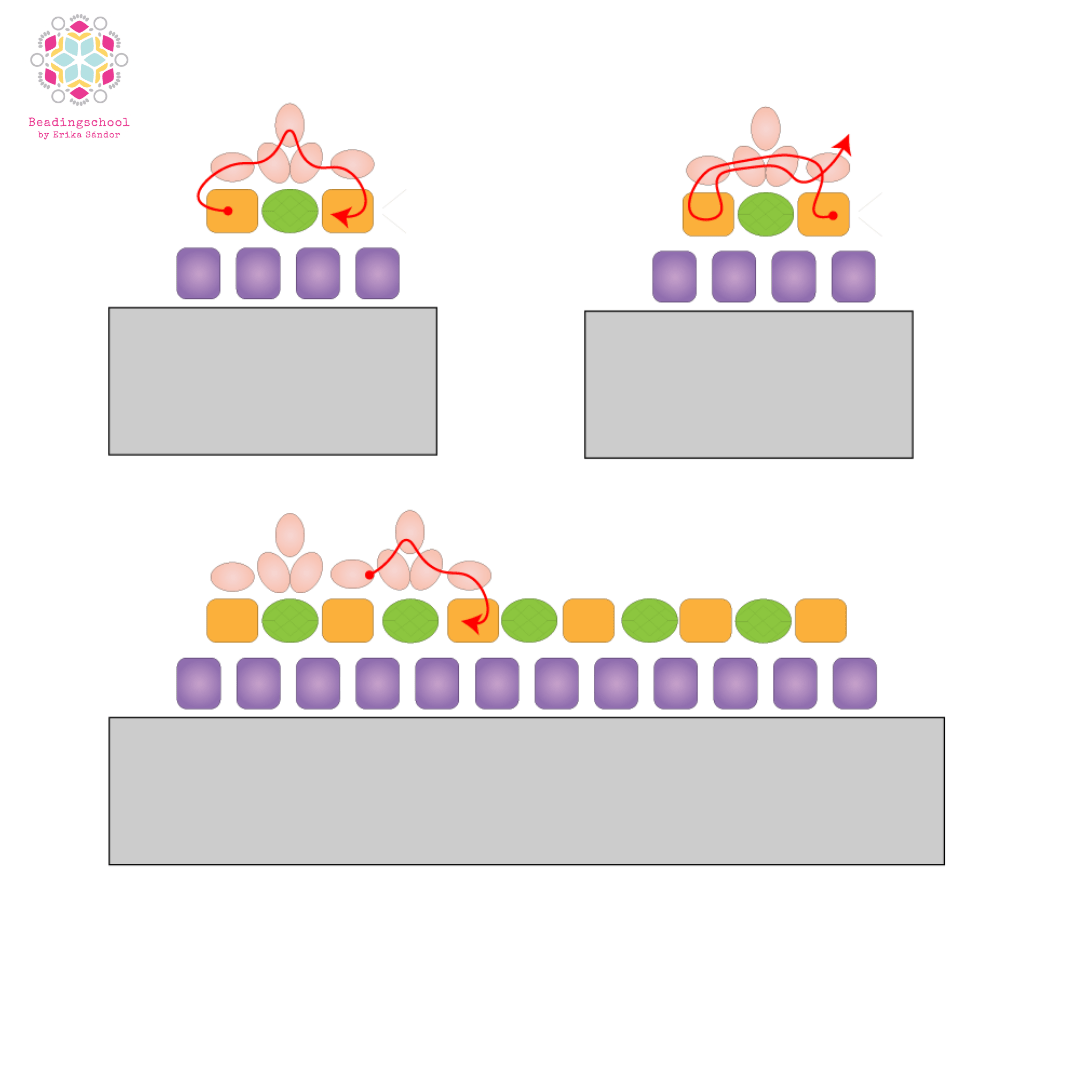
Add more R15s to decorate
Follow the diagrams to add R15 beads.
For more details watch the enclosed video where I showed all the stitches!
Happy beading lovelies!
Leave a Reply