No offense, but in The Netherlands I can’t rely on sunlight. It’s why I got used to biking in rain, enjoying a beer outside even in December, and also why I decided to upgrade my photo shooting accessories. Truth to be told, there weren’t many before, and I didn’t have a lot of money to invest. However, I managed to find several helpful things which dramatically altered the quality of my images. Now I would like to share them with you, together with some tips and tricks to improve your jewellery photography.
Besides the camera with the lens (which I got for my birthday last year) the whole upgrade cost cca. 99 EUR (111 USD).
This article is the first part the mini-series ‘How to take better pictures about jewellery’.
In the up-coming articles I would like to share with you my experience about the following:
- settings on your camera which can improve the quality of your pics dramatically,
- (free) programs to enhance your pictures,
- how did I take photos about for the Battle of the Beadsmith competition this year and payed nothing for it.
Stay with me and share your experience and let’s learn together!

/Please note, that I’m not a professional photographer. I learn thanks to books, tutorials and tips from my friends interested in photography (I’m grateful to Monika, Miso and Tully for sharing their wisdom.), and I try to improve my images by trying, making mistakes and finally finding solutions which work better. I would also like to point out, that the article contains some affiliate links. It means that if you decide to purchase something after clicking on a link, I will earn a small commission. It will help me to cover the costs of this website./
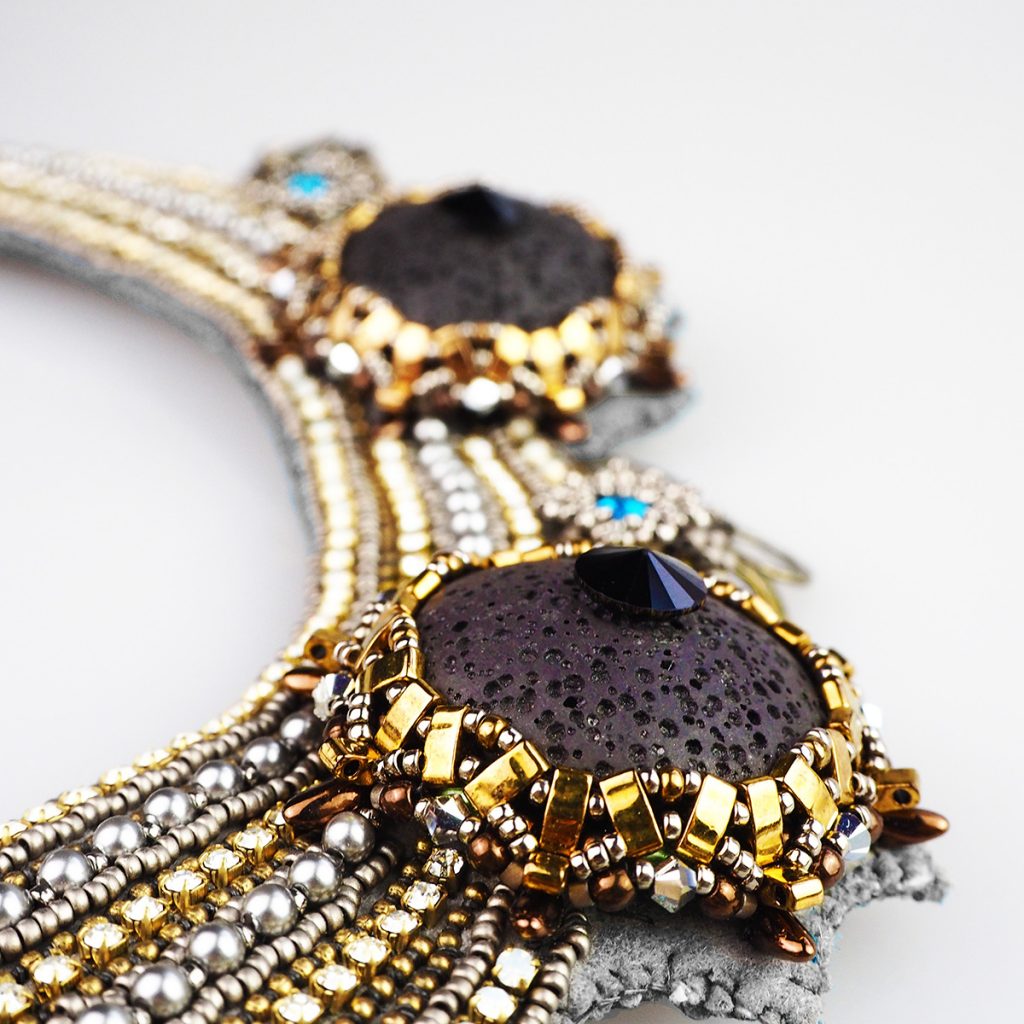
I would like to show you one of my recent pictures, so you can decide if it’s worth reading further.

The detail of the Safekeeper necklace made for the Battle of the Beadsmith ’16 competition.
You can see the beads, and even the stitches and the holes in the lava stone! I could focus with the lens on the motif I wanted to show and blur the parts behind it. The background is smooth, there is no distracting pattern. I left a bit of shadow to show the jewel more realistically. It was shot in the middle of the night, relying only on my skills and the equipment I have.
I use an Olympus OM-D E-M10 camera, which is a compact with interchangeable lens. It means that it doesn’t have the fancy, expensive mirror mechanism, but it enables you to customise it with different lens (for example for portraits, macro etc.). It’s very light, so I take it basically everywhere I go.
I don’t have special macro lens yet. I bought a macro converter for my camera, which is attached to my basic M.Zuiko Pancake lens.
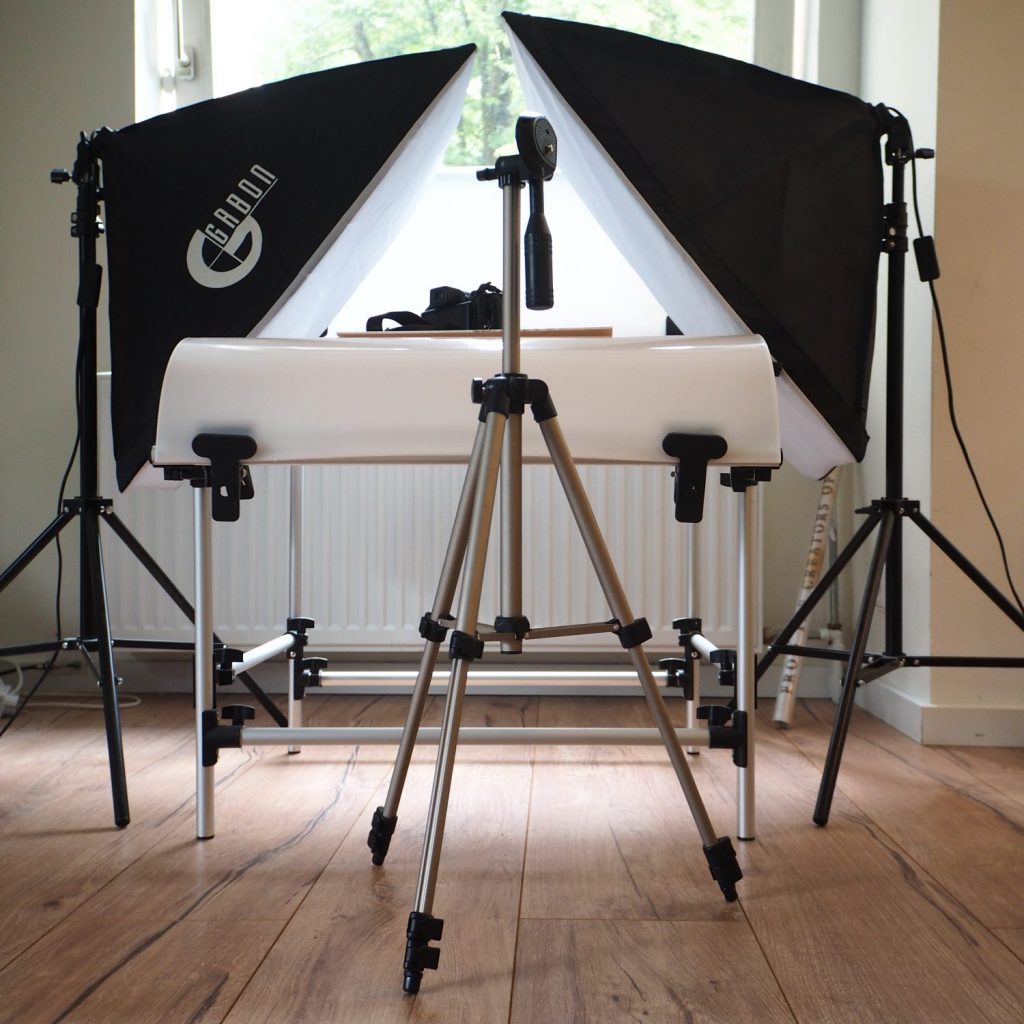
I got my tripod some 10 years ago, when as a 19-year old student I invested all my money in my first digital camera. I had a simple reason to go further: I also wanted to be on the pics! Thanks to my brother-in-law’s advice I didn’t go with the cheapest, smallest tripod, so I have a stabile one with adjustable height from cca. 30 to 150 cm.
When I started to make (and shoot) jewellery, the first thing I learned is that I can’t rely on the steadiness of my hands. Even if I try to hold my breath and don’t move at all, it’s just not enough. The beads always went blurry. With the help of the tripod I could eliminate the impact of my respiratory system on the quality of my images.
BACKGROUND (cca. 5 EUR / 5.6 USD)
I was looking for the right background for a long time. I experimented a lot: I used a brick, a piece of paper, my mum’s table cloth, a glass with a white-looking sheet under it. There were always distracting, uneven effects on them. Sometimes it was too shiny, sometimes way too dark. A year ago my friend, Terka Drabkova of TDbeads advised to look for plexiglass. So far I stayed with the white version, but Terka uses black and white, too. Her pictures look truly professional and elegant!
If you decide to buy it, go for the biggest version. The price difference is not so big, and it will enable you to take pictures about bigger pieces of jewellery, too.
PHOTO SHOOTING TABLE (cca. 40 EUR / 45 USD)
The plexiglass helped a lot, but it wasn’t enough. For flat objects it’s perfect and I still love it, but I had problems when I wanted to take pictures about bulkier pieces (for example the Cobble Tiles bracelet). The solution was a photo shooting table, so the plexiglass could be under and behind the jewel, too, and I could have an ‘eternal background’. The only downside I found is the space it takes up in the living room, since unfortunately it’s not possible to dismantle it every time I want to put it away.
The most important piece of equipment I got are the lights. If I had to choose only one thing from this list, then definitely they would be the one to go. (Ok, maybe after the tripod). Thanks to them I can take pictures immediately after I finish a piece, even during the night, and I don’t have to wait for a sunny day. (Or spring in the worst case.)
The bulbs produce white light, so the colours of the beads on the photos are natural and very close to the colours in reality.
I also tried my hands with some softlight reflectors (different colours), but didn’t really get the hang of it. I think they will come more useful while taking portraits.
In the future I would like to upgrade my photography gear with proper macro lens (they have to wait, since they are above my budget currently) and a tripod arm, which comes handy when you want to take a picture about bigger pieces of jewellery from above. Currently I can do that only with smaller pieces because of the limitations of a tripod.
Share your wisdom in a comment, if you have any experience with taking pictures about jewellery! Have you tried any of the above, or do you have a different method to brighten your pictures?


Leave a Reply