This is the second part of the series ‘How to take better pictures about jewellery’. I would like to share my experience, and would also love to hear your opinion and read your comments about the matter. While in the first part I wrote about the accessories I use in my little home studio, today I would like to collect some thoughts about the preparation before shooting. Give it a go, if you would like to improve your pictures! I will be here to help you. But please remember, that experimenting and learning will take time.
It’s important to not get disappointed if something doesn’t go as smooth as expected.
Keep going, try again and drop me a line at [email protected] if you need help.
I am still learning, too, but will do my best to get you over the difficulties.
/Please note, that the article contains affiliate links. It means that if you decide to purchase something after clicking on a link, I will earn a small comission. It will help me to cover the costs related to the website, such as webhosting and the domain./

 First thing first: it’s essential to know your camera! Why?
It’s possible to take pretty awesome pictures even with a basic camera and lens (or your mobile phone) – if you know how to make the most out of it. Before I got my Olympus for my birthday last year (and fell in love with it), I used a very old version of Nikon Coolpix to take pictures about jewellery, and a Nokia Lumia mobile phone to capture memories while traveling. (I decided to purchase the later after reading Nora Dunn – The Professional Hobo’s review about it several years ago.
You can have expensive equipment, but if you don’t know your gear, you will not be able to leverage the force of your machine. Truth to be told, I wasn’t particularly impressed with the quality of the images when I just started to use the Nokia then the Olympus. I wasn’t sure I took the right step when I decided to rely on my own skills and equipment instead of a professional. Until recently, when I got nostalgic and went back to some of my photos from several years ago. Now I see the difference, but it was a long journey with its ups and downs, not one huge step taken at once. I still have a lot to learn of course, but it’s great to sea that all that practicing was already worth it.
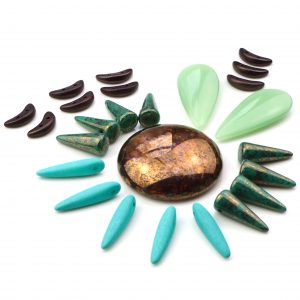
if you are like me, you want to shorten the time spent with taking pictures and return to your bead mat as quickly as possible. I could spend several hours playing with sharpness, lights, placing the jewels on the background in different ways, blurring the background etc. But well, most of the time I don’t want to… Unless it’s a big piece or I plan to enter a competition, I don’t need more than 3-5 images about a necklace, bracelet, earring or booch. I aim to take as few as possible and use the best settings I can find, without pushing the button too many times. This way I spend very little time deleting unnecessary and unsuccesfull photos, and I can post my jewellery without a lot of post-processing.
Prepare in advance!
The most important thing is to know what kind of images you need. Without knowing what should the result look like it’s pretty hard to take the necessary steps, isn’t it? Different people are impressed with different images, and you need to know who are you “talking to.” Try to answer the following questions to make your vision clearer:
Who is my audience? Where and how do I plan to use the images? Do I need to impress the committee of a prestigeous competition? Or do I need work-in-progress pictures? Do I want to sell in a luxurious gallery or a craft studio in the countryside?
Believe me, it’s quiet frustrating when you have to stop shooting to look for a piece of jewel you accidentally misplaced, or in worst case start anew another day because you realise your battery or lamp is dead. Prepare in advance every piece of equipment or tool before you actually start shooting. Here are some of the things I like to check:
Make sure your battery is charged, and if possible, keep an extra one, too. You never know how long will the photo shoot take or what kind of ideas will jiggle your mind when you start working. Get into the habit of charging your battery immediately when you see that it’s low on power.
- Clean the surface you will use. If you do your job right, the photo could show not only the beads in your jewel one by one, but also every speck of dust and piece of hair. If you use a wet cloth to clean the area, wait until it dries completely.
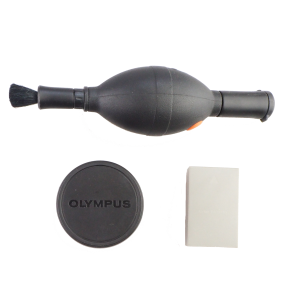
- Clean the jewellery, too. A polishing cloth is useful not only when cleaning the metal parts, but also when you are taking care of the cabochons. An air blower can also come handy. It helps you to clean delicate parts of your beadwork without the risk of scratching or tearing it. (Make sure to blow several times just in the air before you direct it to your piece to get rid of any mess it may have collected internally.)
- Clean the display of your camera and the lens. You can use the same polishing cloth and blower as for your jewellery, and also special cleaning swabs or liquids. They will help you to get rid of fingerprints.
Prepare the props in advance, if you decide to use some. They can add special atmosphere to your images. But if you sell online, remember, that your customers have very limited possibilities to get familiar with your product. Props can be distracting, on the other hand an image with white background focuses attention on the jewel itself. (And with a simple, white background it’s easier to make the images transparent, so you can play with them – I will show you later, how.)
- All of the above takes time, of course. Some of them only half a minute, but it all adds up. I found it the best to work in batches, and wait until I have several pieces prepared. I have special boxes dedicated to jewellery in
different phases: one for the jewels waiting only for a new owner, one for the pieces I want to keep because of workshops in the future, one for jewellery waiting the pictures taken or the tutorial written, and sadly, the biggest container holds unfinished pieces. - While it’s important to be prepared as thoroughly as possible, don’t forget to be creative and spontaneous! For example take a picture about a collection of jewellery or somewhat similar pieces together, include the tools you use, or show the beads and components in the picture. You can also try to hold the smaller earrings, bracelets, beaded beads in your hand to show their size more accurately. Have fun!
Now I would like to walk you through the process step by step.
(Pin for yourself the checklist on the right, so you can easily find it.)
Set up the background!
Prepare the photo shooting table or cover your desk with wallpaper. Remember, that white backround reflects most of the light instead of swallowing it, so it helps your jewellery to shine! On the other hand black scenery adds a luxurious touch to your images. Aim for a simple background without texture. A fluffy bead mat or a woven piece of textile is usually very distracting.
TIP: use plexiglass for a mirror-like background! It costs close to nothing and makes your images look professional.
Arrange the jewels on the shooting table!
It sounds easy, but it’s not always so straightforward, believe me. Some of the pieces look better when shot directly from above (you may need a tripod arm to do that) and sometimes you want to show your jewel from an agle to make the layers visible. What is important: I try to place the piece in a way so it fills most of the frame. Of course it’s possible to crop the image afterwards, but less post-processing equals more beading time.
TIP: Earrings look the best if the two pieces are 100% identical. So when taking pictures about earrings, I place only one of them on the shooting table. Afterwards I get rid of the backround with a program (I will talk about it later) and place one more earring on the picture simply by using ctrl+C and ctrl+V.
Prepare the lights!
To produce realistic colours your best choice is natural light or special daylight bulbs, which create white colour. In the first case you will need to wait for the sun to appear of course. The best time to shoot is in the afternoon, when the rays are not too strong, so your pics won’t be overexposed. While shooting this way I used to stand between the jewel and the sun, so I could produce an even light and eliminate the shadows. I used to be satisfied with the images, but it was frustrating to wait for the ideal circumstances all the time.
Moving to The Netherlands resulted in a lower number of sunny hours and a lot more rain. I couldn’t let weather to effect my precious studio time so much, so I decided to invest in special lamps: daylight bulbs in combination with softboxes. The lamps are covered with a special textile, which diffuses light. It helps to eliminate shadows, especially if you have at least two of them.
TIP: your camera works the best, if it has to deal only with one kind of light. Do not mix different types of lights!
Place your camera on a tripod!
While taking pictures about tiny objects it’s essential to keep a steady hand. However, the best results are produced when using a tripod. To eliminate all of the movement set the camera on auto-shoot with a 2s time frame. This way you will not actually be pushing the button (hence moving the camera) when the picture is taken. Also, this way you don’t have to worry about the length of the exposure. The newer models (for example the Olympus O-MD EM-1) are capable of multi-exposure. They take many images about the same piece of jewel, with differently set focus. Afterwards the software of the camera combines all the images into one: using the sharpest part of every one of them.
Finally, turn on the camera and push the button 🙂
While writing this article I realised that there is a lot more to say about taking pictures of jewellery, and I decided to leave the settings for the next article. Stay with me – I am looking forward to learn together!
After publishing all the articles in the “How to take better pictures about jewellery”
I will summarise everything into a handy little e-book with checklists, infographics and additional information.
To make sure you get it sign up here:

 Make sure your battery is charged, and if possible, keep an extra one, too. You never know how long will the photo shoot take or what kind of ideas will jiggle your mind when you start working. Get into the habit of charging your battery immediately when you see that it’s low on power.
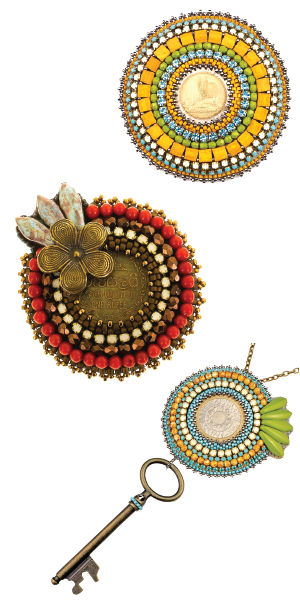 Prepare the props in advance, if you decide to use some. They can add special atmosphere to your images. But if you sell online, remember, that your customers have very limited possibilities to get familiar with your product. Props can be distracting, on the other hand an image with white background focuses attention on the jewel itself. (And with a simple, white background it’s easier to make the images transparent, so you can play with them – I will show you later, how.)


Leave a Reply