Article from guest blogger and beader Zuzi Hake for Erika Sandor – The Storytelling Jeweller.
It has been one year since Erika presented heart-shaped art cabochons. I fell in love at first sight. I made several pieces as love has always been around in some form.
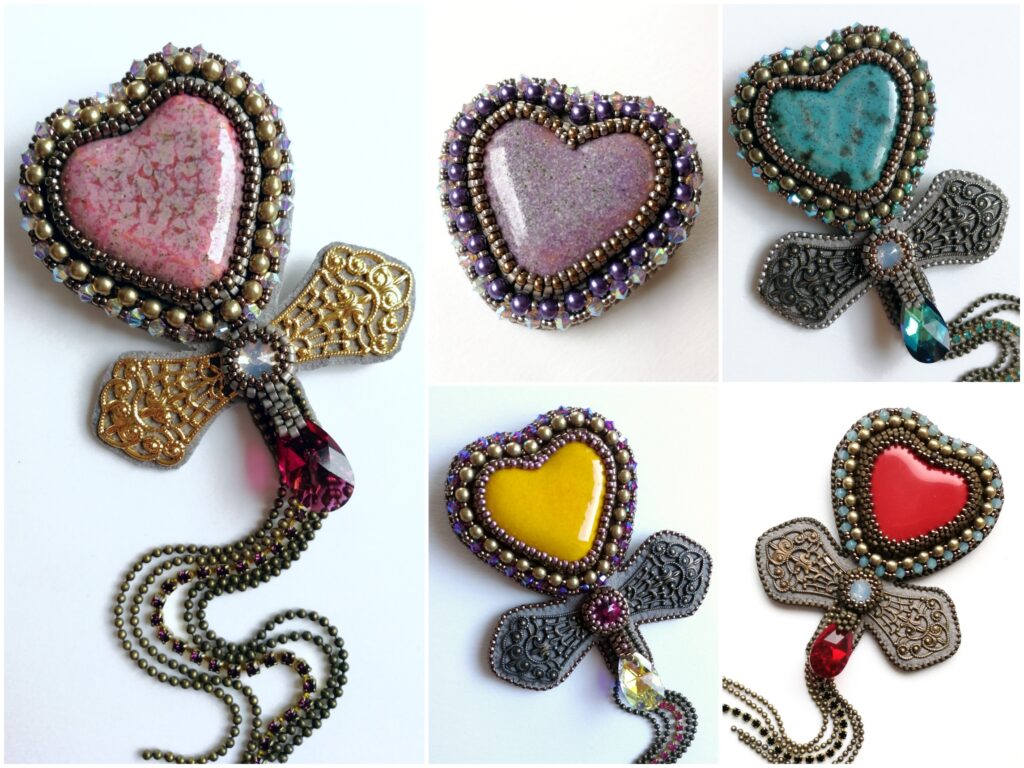
Once a little child manages to draw a circle, she continues with drawing a heart. At least my kids did. It is symbol that everyone understands.
What will you need to make this brooch/pendant?
Material list
- Heart-shaped Beadingschool art cabochon (I used white color)
- Ultra Suede, (light gray for foundation, brown for the backing. Leather is also an option.)
- 2mm fire-polished beads, (I used Milky amethyst – Celsian)
- 2.1mm Preciosa rhinestone cup chain, (I used Rose Opal in raw setting)
- 11/0 Miyuki Delica beads, (2 colors)
- 15/0 Miyuki round seed beads, (2 colors)
- 11/0 Miyuki round seed beads,
- Miyuki Slender Bugle beads, (2 colors)
- Brooch and pendant holder in one (or any other component to suit the choice of jewel you want to create)
Tools
- 0.12 mm Fireline,
- beading needle,
- glue (I used E-6000 or F-6000),
- bead mat,
- sharp scissors,
- cardboard paper. (I used hard paper from chocolate.)
Useful links and tutorials:
- Rock my heart tutorial – I strongly recommend this to take your design further and get even more inspiration. You will learn how to include a bezeled rivoli and filigrees in your beadwork and Erika has another way how to manage the heart shape bezel so your beads fit perfectly. Also, it doesn’t always have to be a heart cabochon, Beadingschool art cabochons are available in beautiful oval, square, drop shapes you can use instead!
- Backstitch, Attaching Preciosa rhinestone cup chain and Beaded edge – bead embroidery tutorials by Erika.
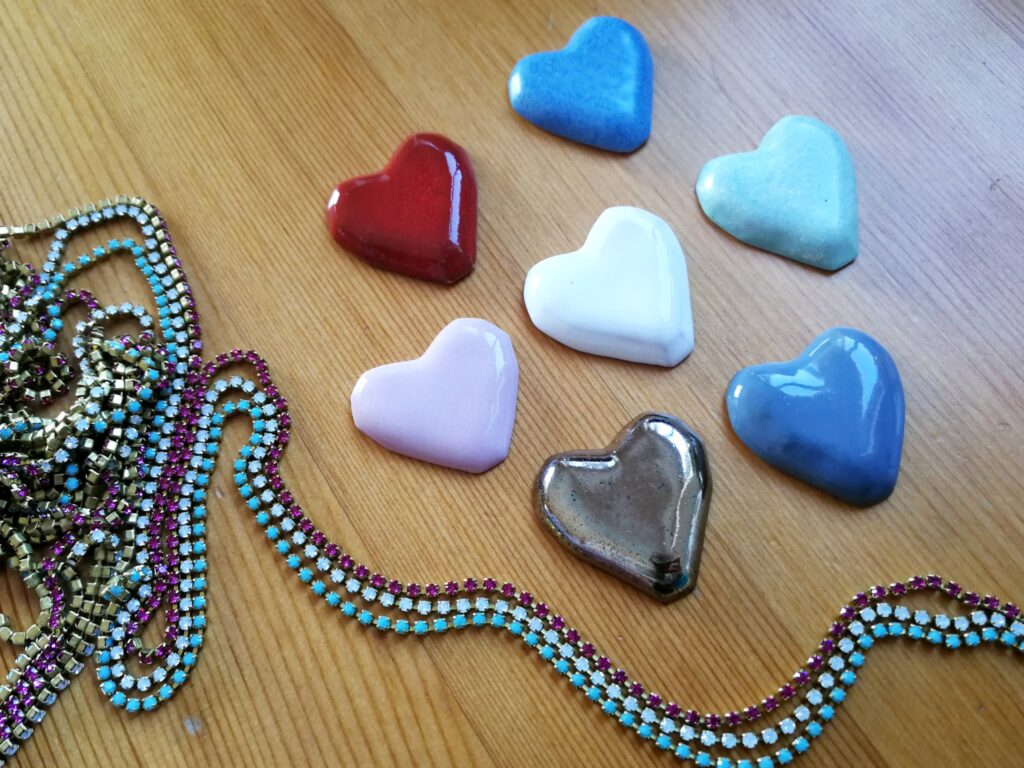
Inspiring material you can include:
- Tassels
- Glass drops
- Beads for decorating edges (I recommend bugle beads, bicones, mini daggers. They can point out as in my brooch, or you can also create sparkly fringe.)
How to make your brooch?
Tutorial
- Glue your cabochon using E6000 to a piece of Ultra Suede that comfortably fits your hand. The size of the final beadwork isn’t too big.
Tie a knot on your Fireline and stitch from back to front. Start in the center of heart shape. Add 2 pieces 11/0 Delica beads using backstitch (check Erika’s video tutorials on the Traveller pendant for guidance), going all around the cabochon in this way. Finish with an even number of Delica beads. This is important so you can continue with peyote stitch in the next steps.
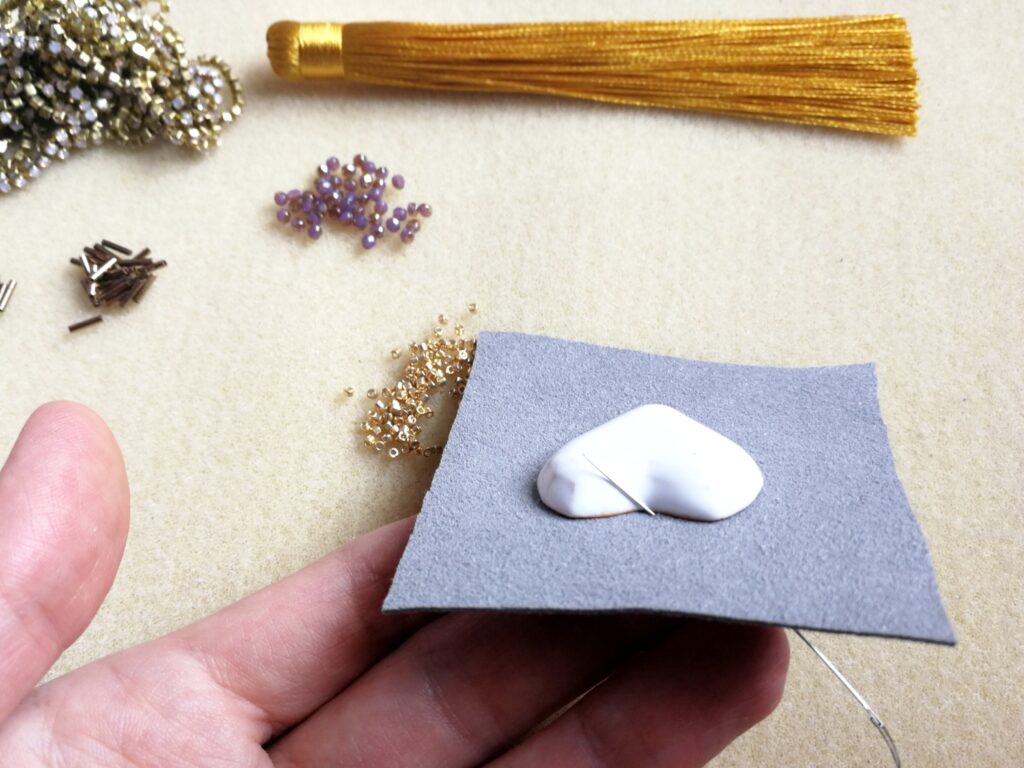
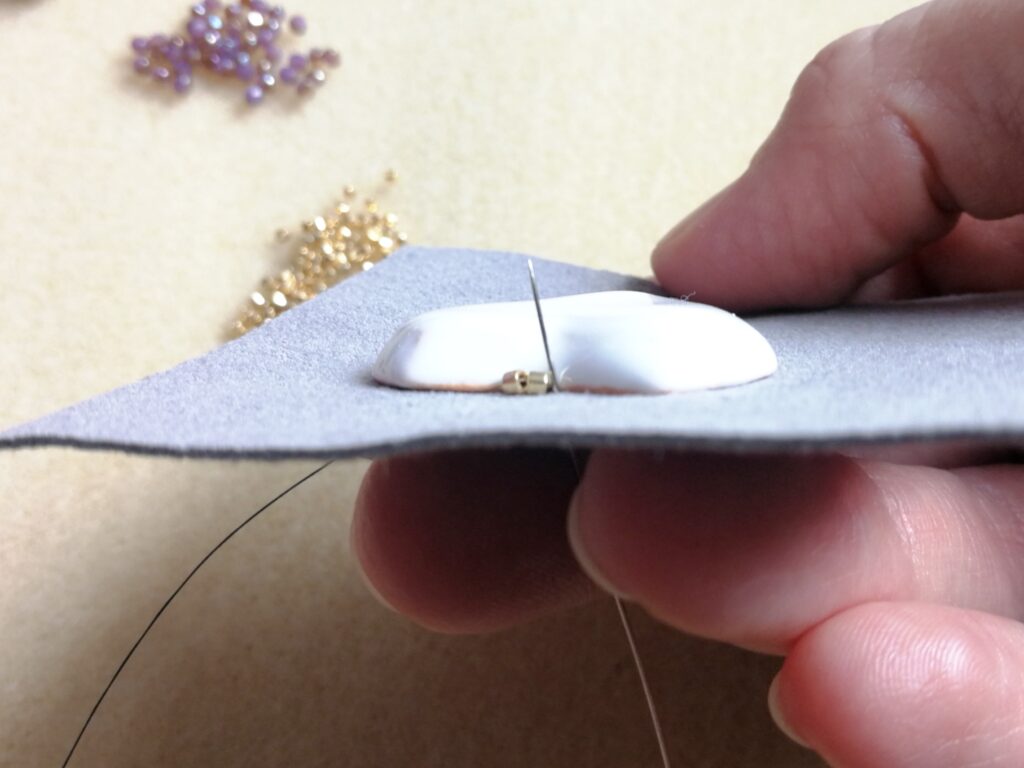
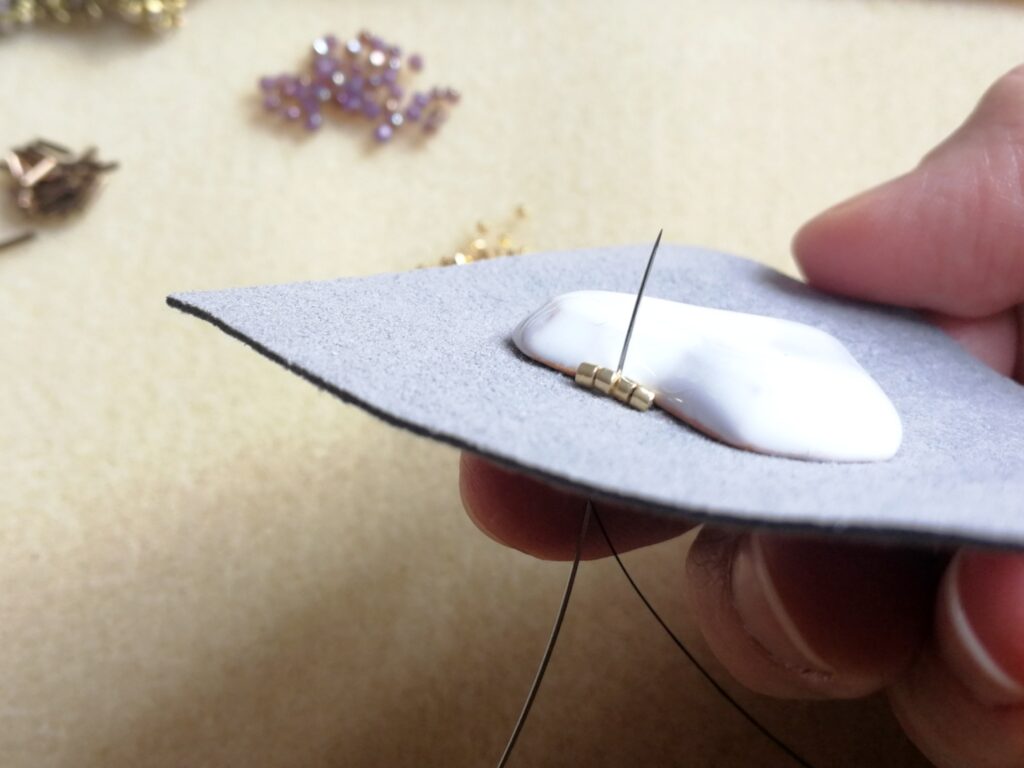
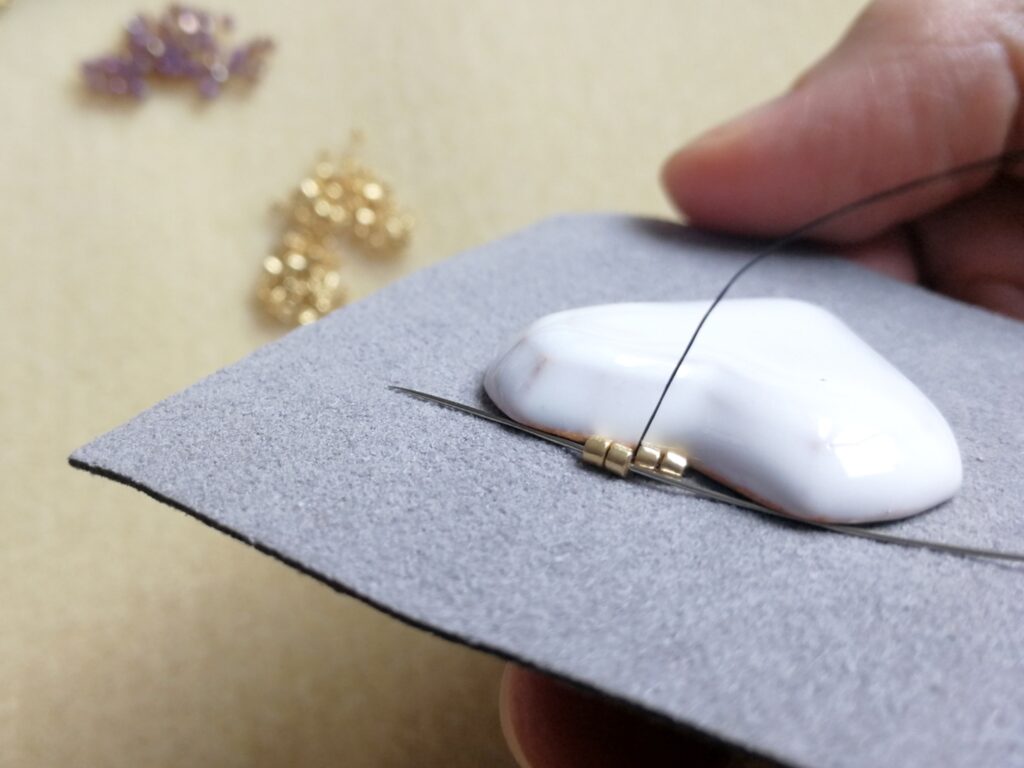
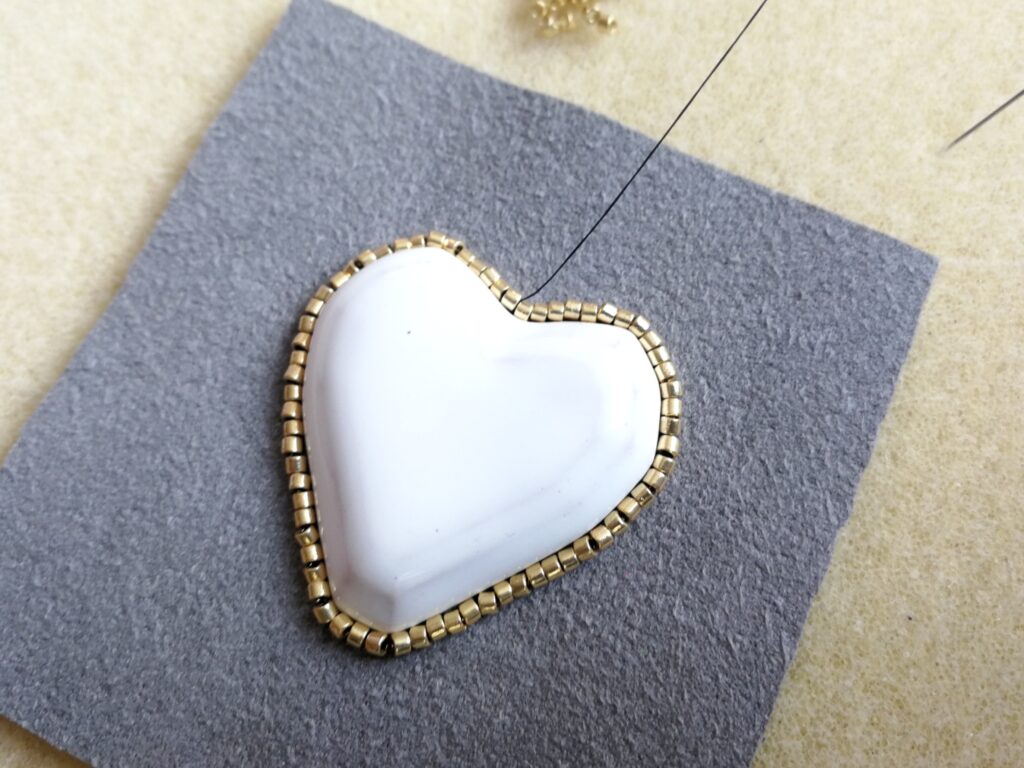
2. Use peyote stitch, adding one 11/0 Delica bead to every second bead from the first row. When you finish this step, exit the first Delica bead as you see in the picture, so you can start a new row. I added 2 more rows of Delica beads in this way. The number of rows depends on the cabochon you have. They are handmade, sometimes their thickness or size may vary because of the clay/porcelain or glaze that was used.
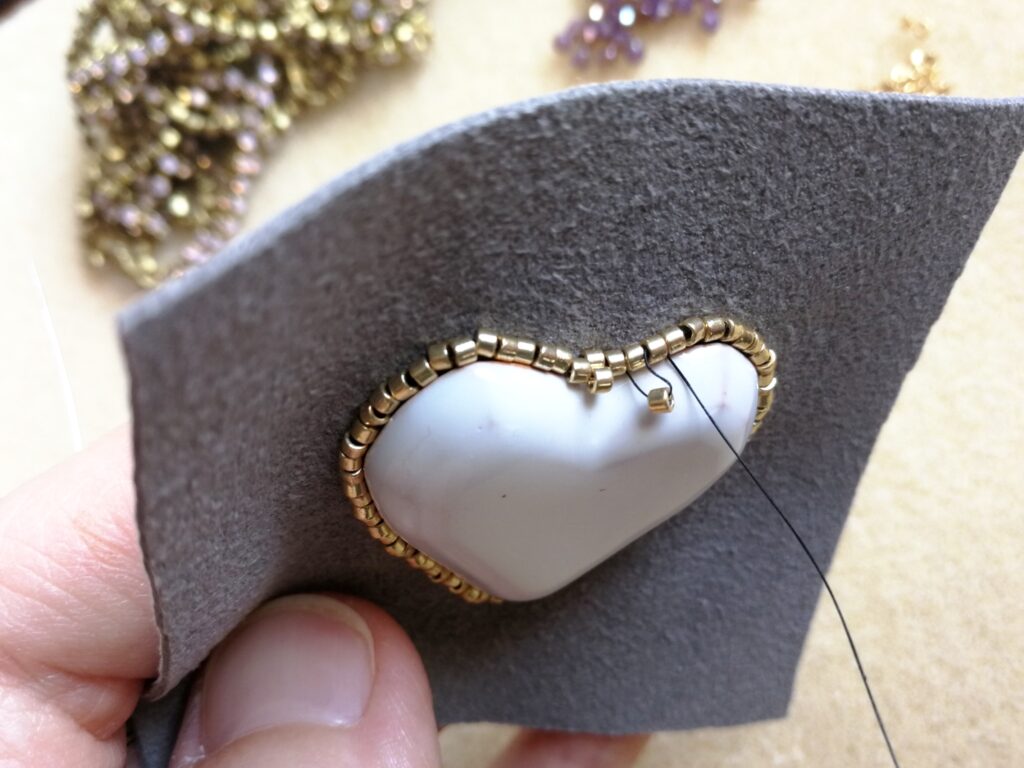
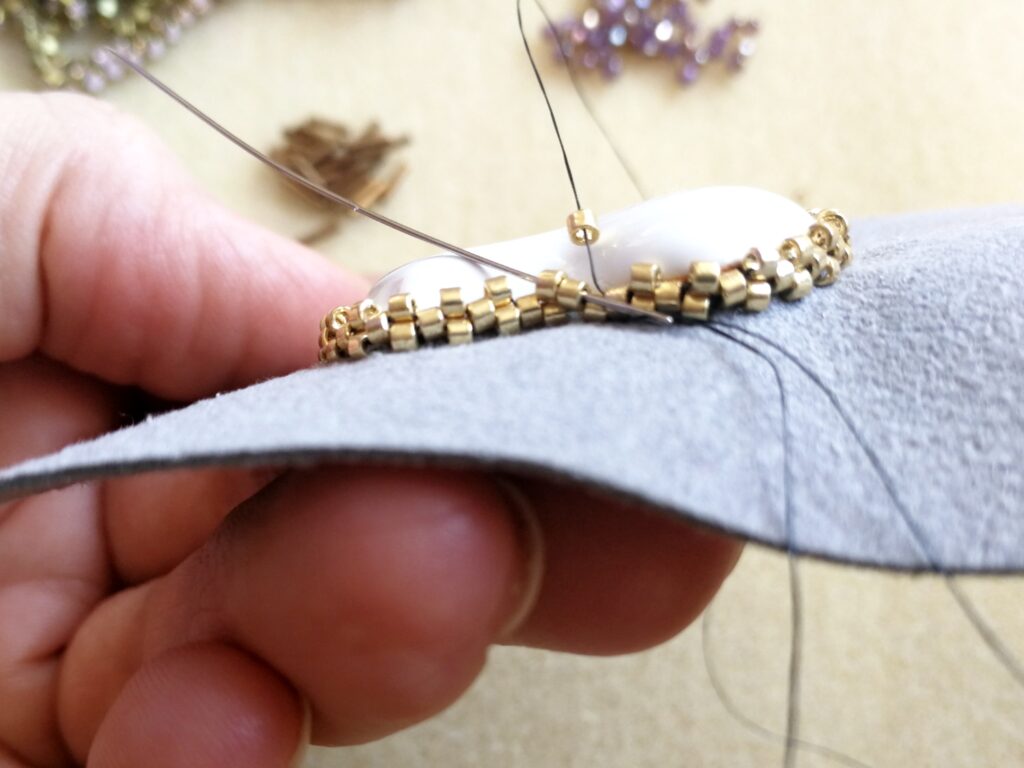
3. Add one row of 15/0 round seed beads. When you finish your row, you can turn direction through Delica beads (your thread won’t be visible, check pictures below) and add 1 piece of 11/0 seed bead in the center of your heart cabochon. Connect the 11/0 seed bead with the 11/0 Delica bead above it by making a loop. The beads fit nicer in this way. Use thread path through beads to get to your foundation. Tie a knot.
I suggest checking Erika’s tutorial Rock my heart for seeing other options on bezeling this cabochon.
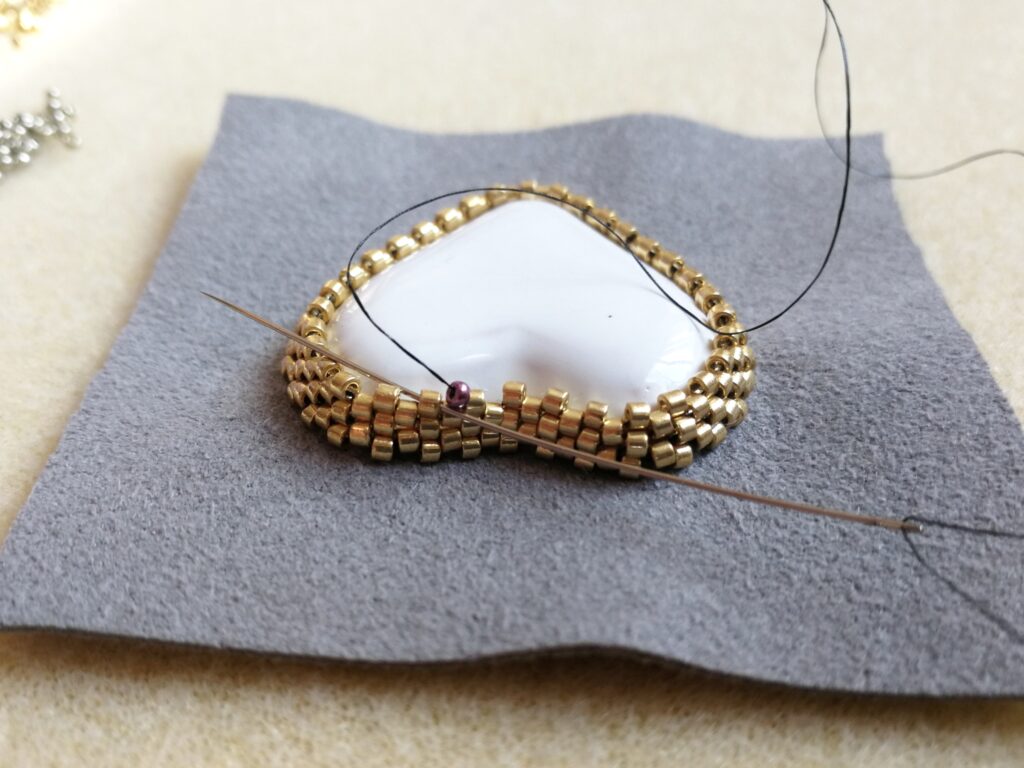
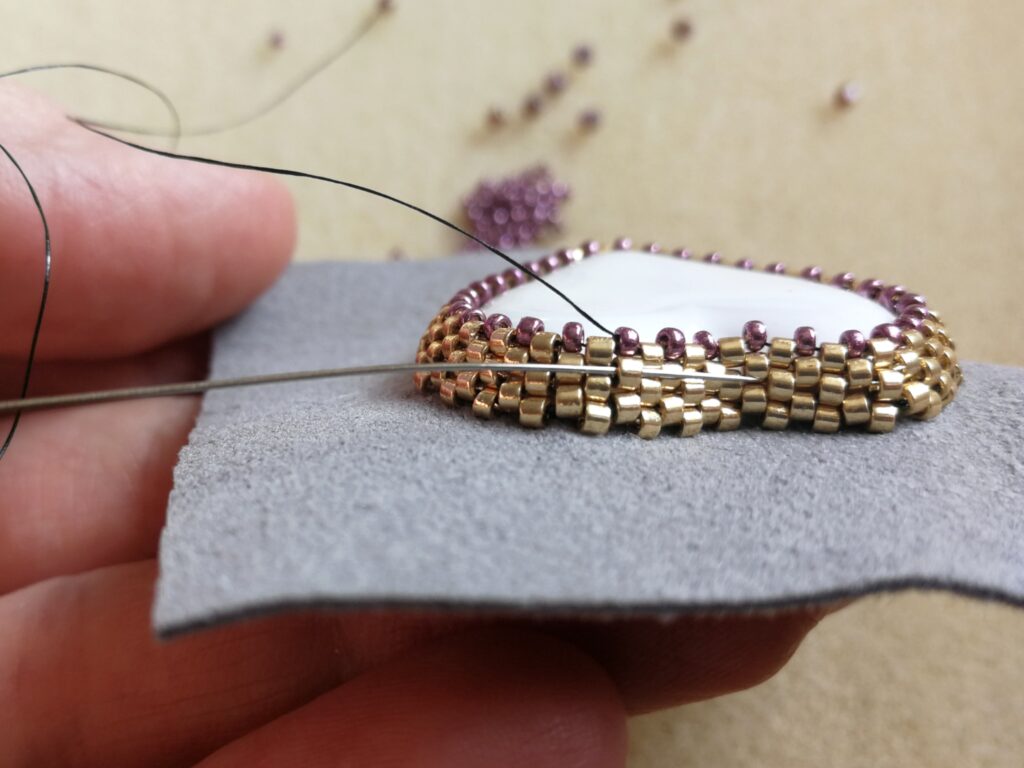
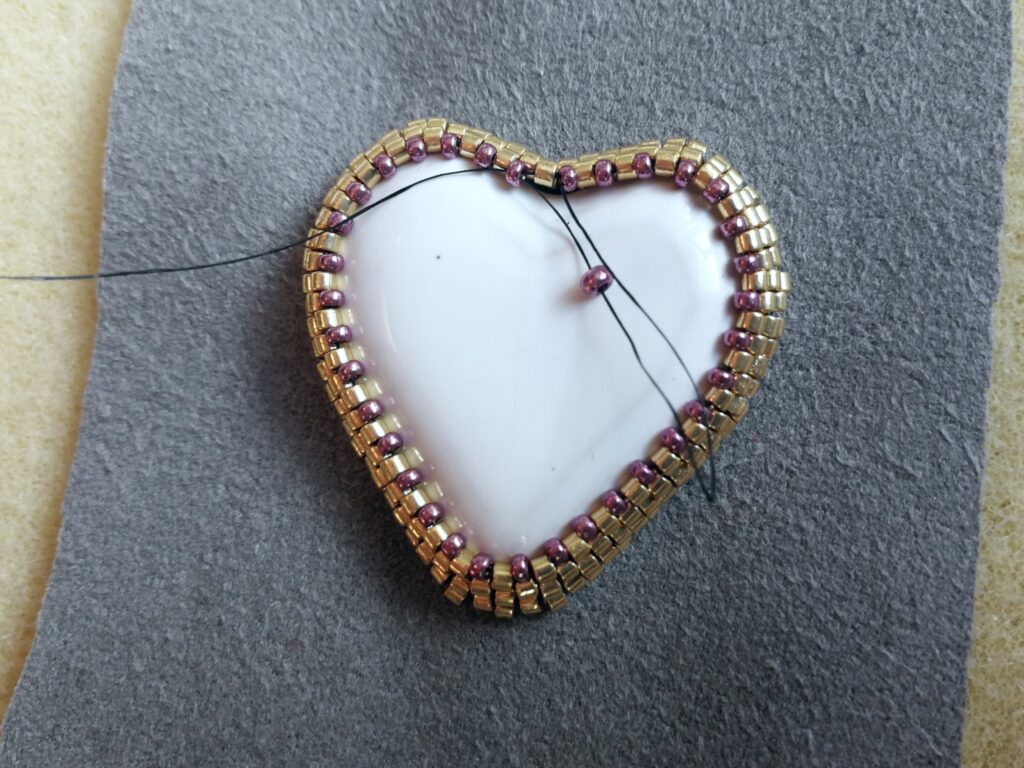
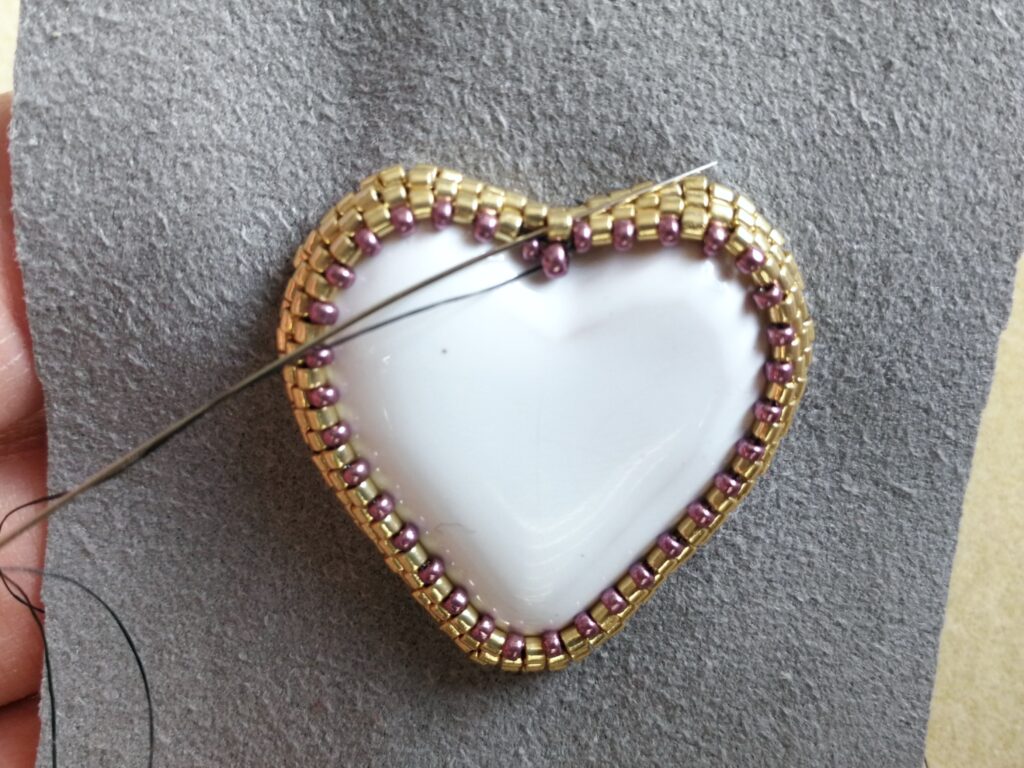
4. Add a row of 2 mm fire-polished beads using 2-bead backstitch. Pick new beads in pairs and then sew through them. The number of beads doesn’t need to be even at the end. When you finish your row, you may need to repeat the thread path through all newly added beads. It depends on your thread tension, stitches, beads you used. Tie a knot on the back of foundation and stitch to the front for next step 😉
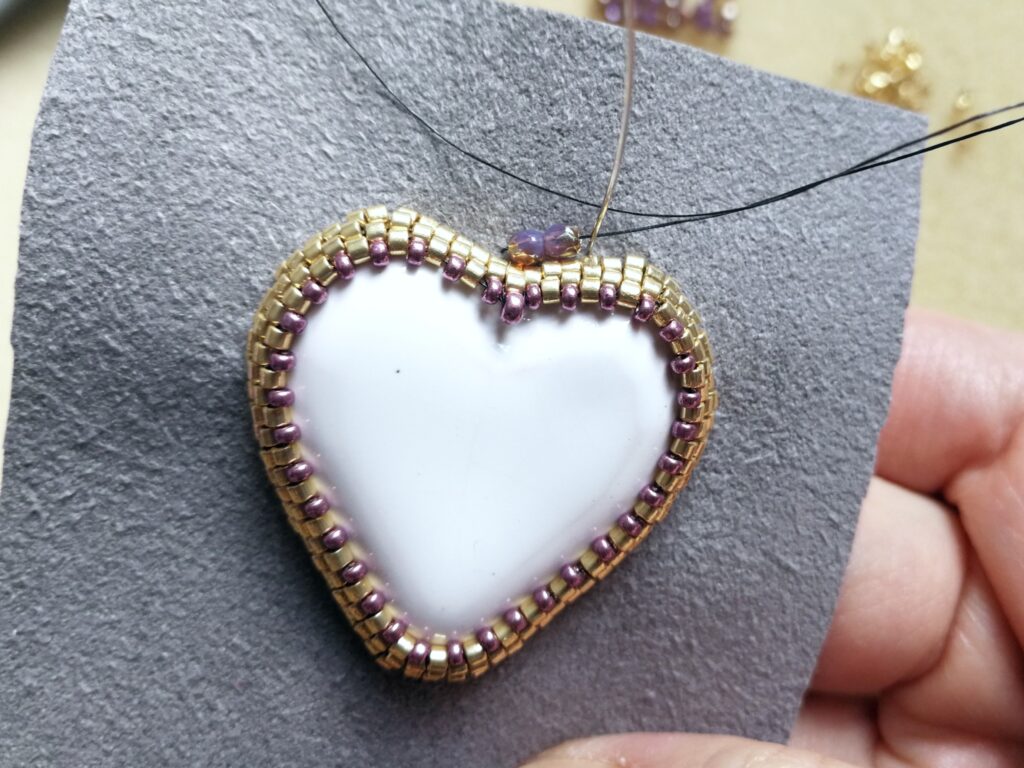
5. Prepare your rhinestone cup chain. I usually start on the side, so the first and last crystal fit nicely and it’s also easier to manage the imperfections that may appear while sewing. Don’t cut the chain until you sew the last pieces of rhinestones.
Your thread goes from back to front, through 2 crystals, and down to the foundation. Crystals are connected with a flat metal chain, this is the component you need to attach. Tie a knot on the back again and cut your thread.
If needed, use F6000 with a precision tip to glue the first and last crystal to fix them on the foundation.
(Erika’s note: you can use a toothpick to apply the glue if you don’t have a version with a precision tip.)
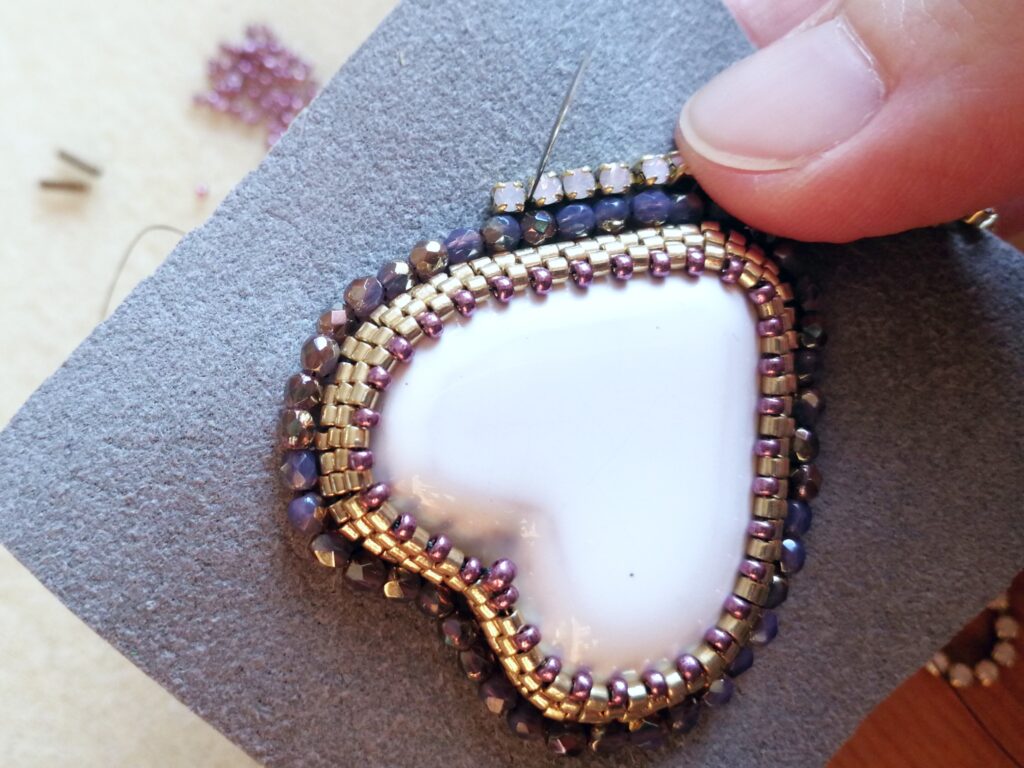
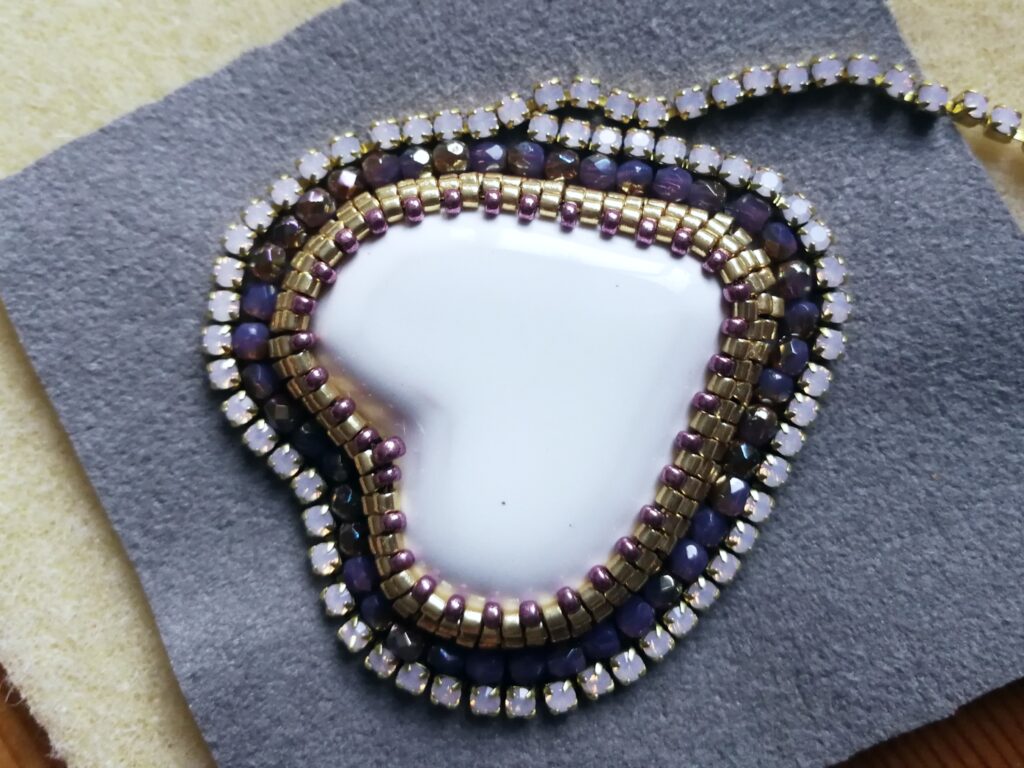
6. Cut your beadwork and glue it on a piece of cardboard paper. Let it dry and cut it all around again, leaving only a 0.5 mm edge.
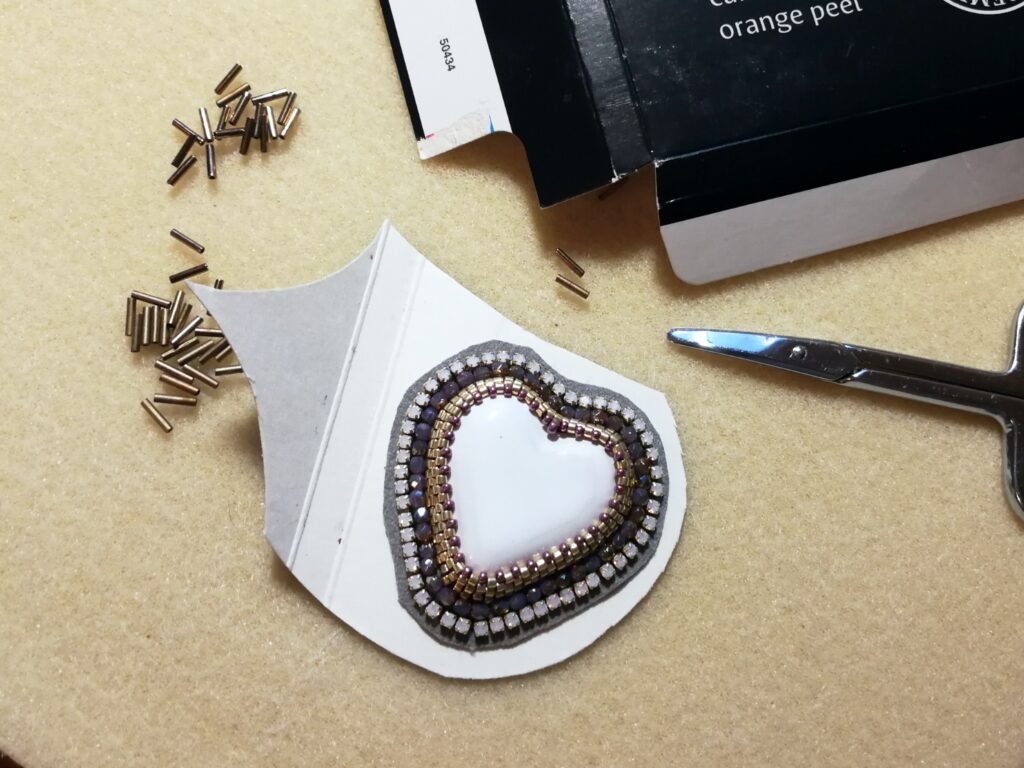
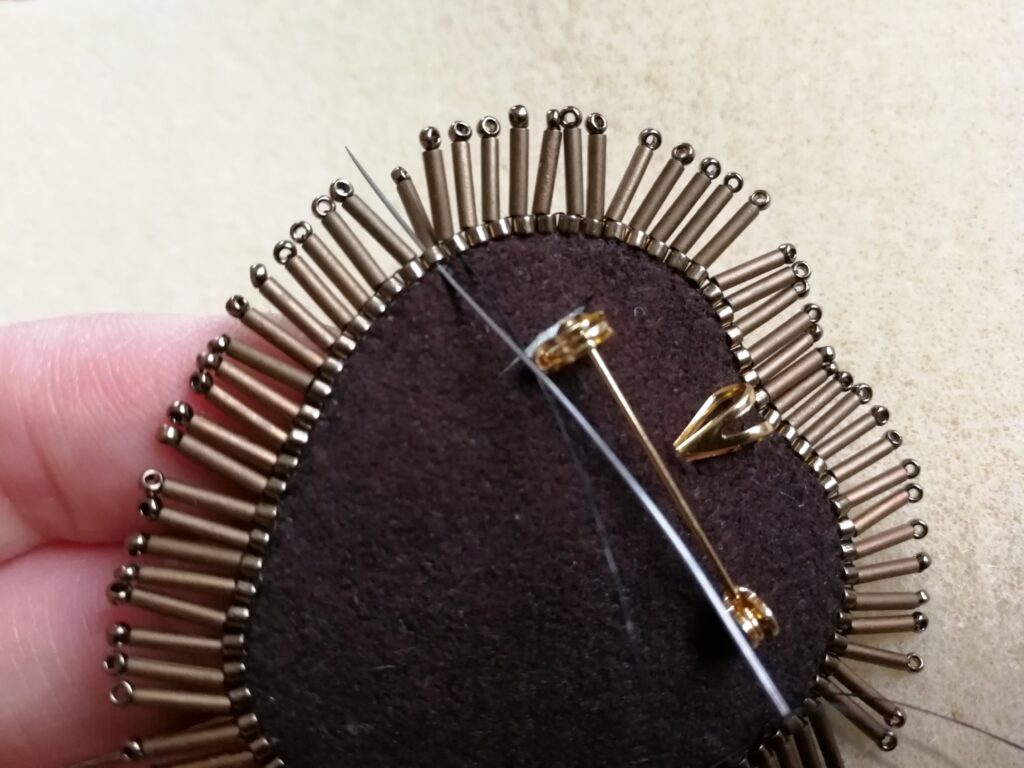
7. Adding brooch/pendant component, cutting and gluing the backing – this is how I do it. Place the component on your beadwork and make marks with a pen to see where you want to attach it, this will help you to glue it correctly. Then, do the same on backing Ultra Suede or leather – make marks with pen followed with 3 cuts into the backing – holes for holder and pin. Add glue to your beadwork and metal component and connect these two. Leave it dry and cut the extra Ultra Suede on the edges.
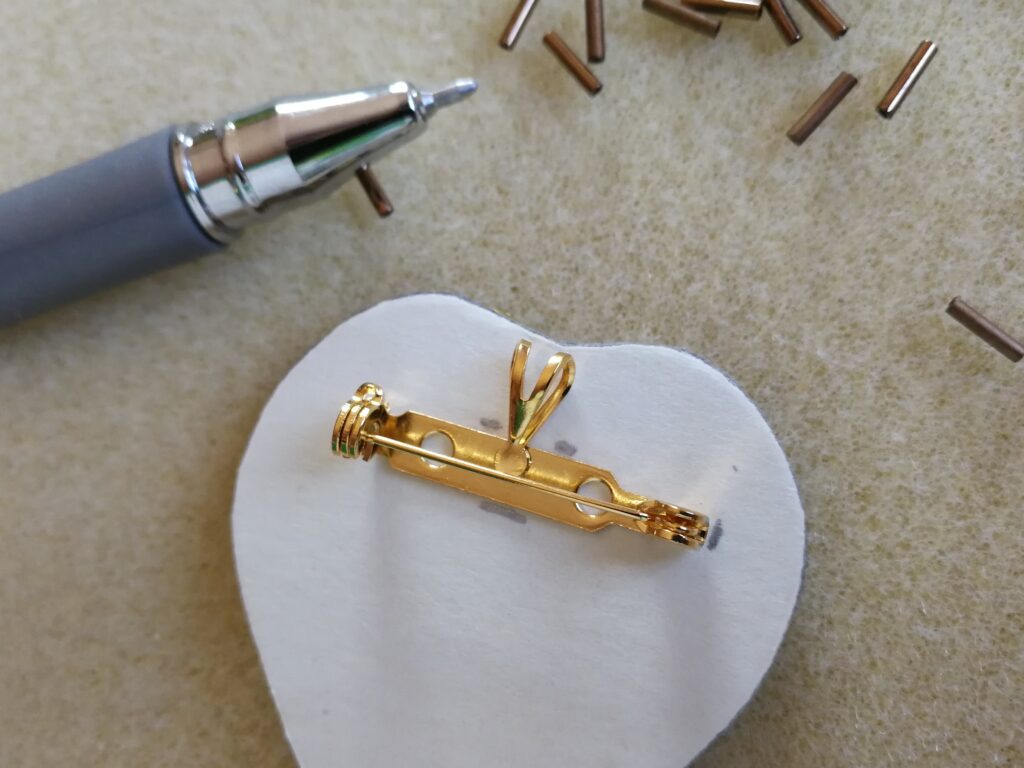
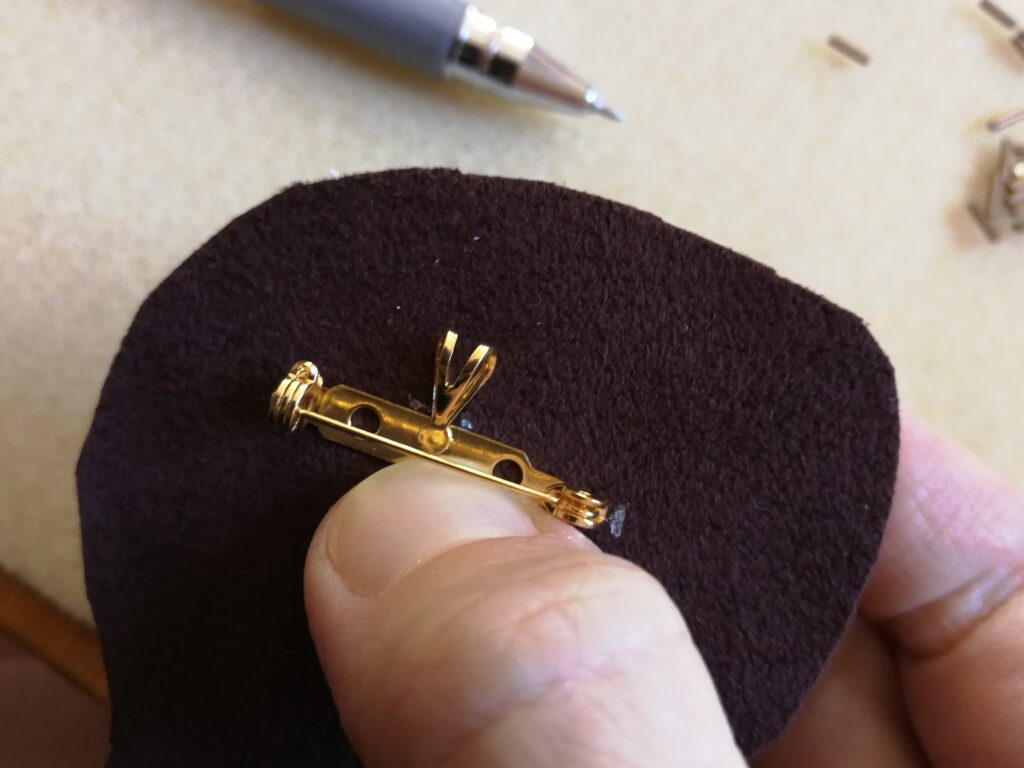 7
7
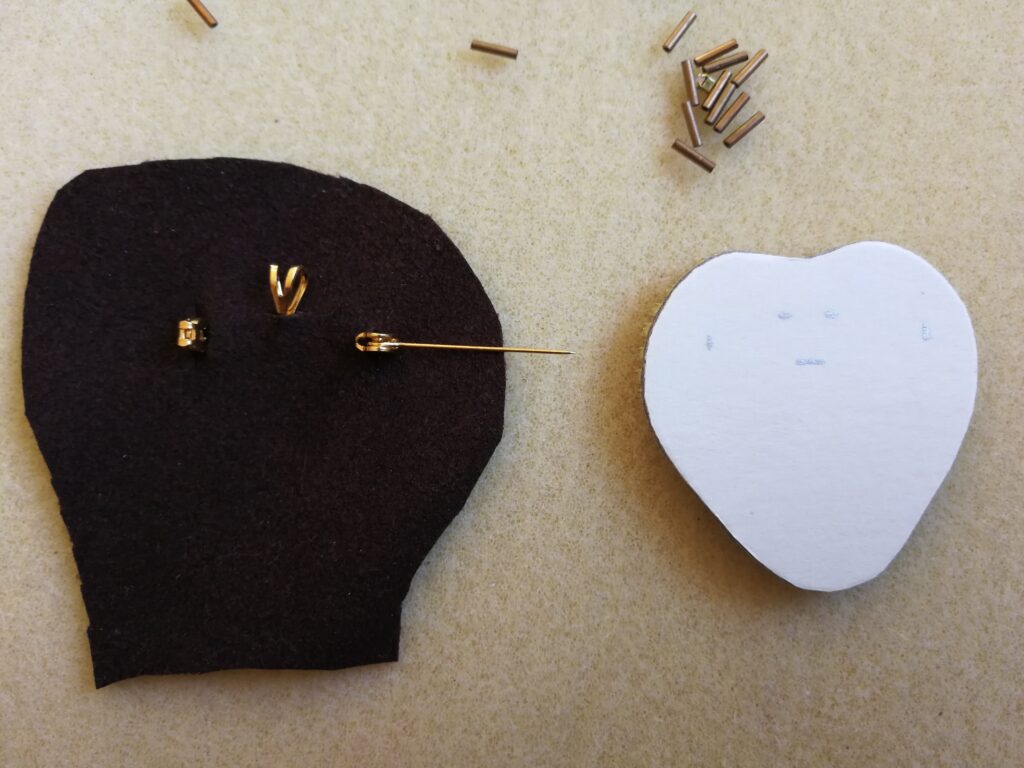
8. Connect all 3 layers (foundation, cardboard paper, backing) by making an edge with a simple Delica row. It starts with 2 beads, you stitch back through the second bead and continue adding single Delica bead per stitch until the very end. Connect last bead you added with the very first bead, with single stitch without adding beads. (See Traveller series for more details about edges.)
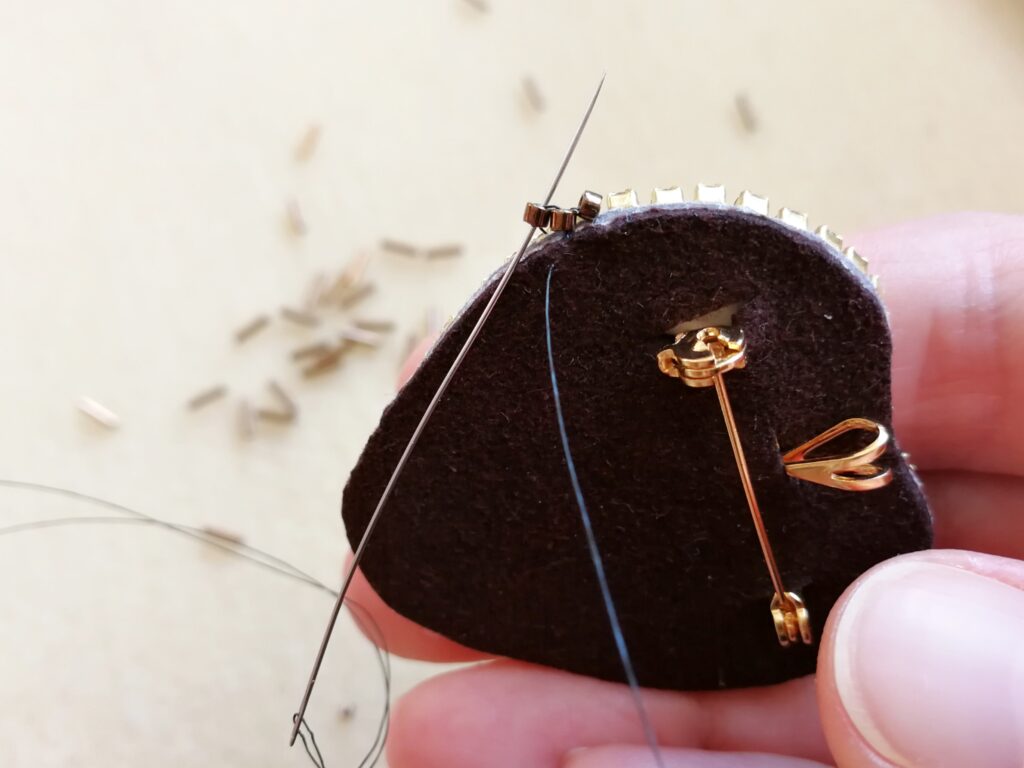
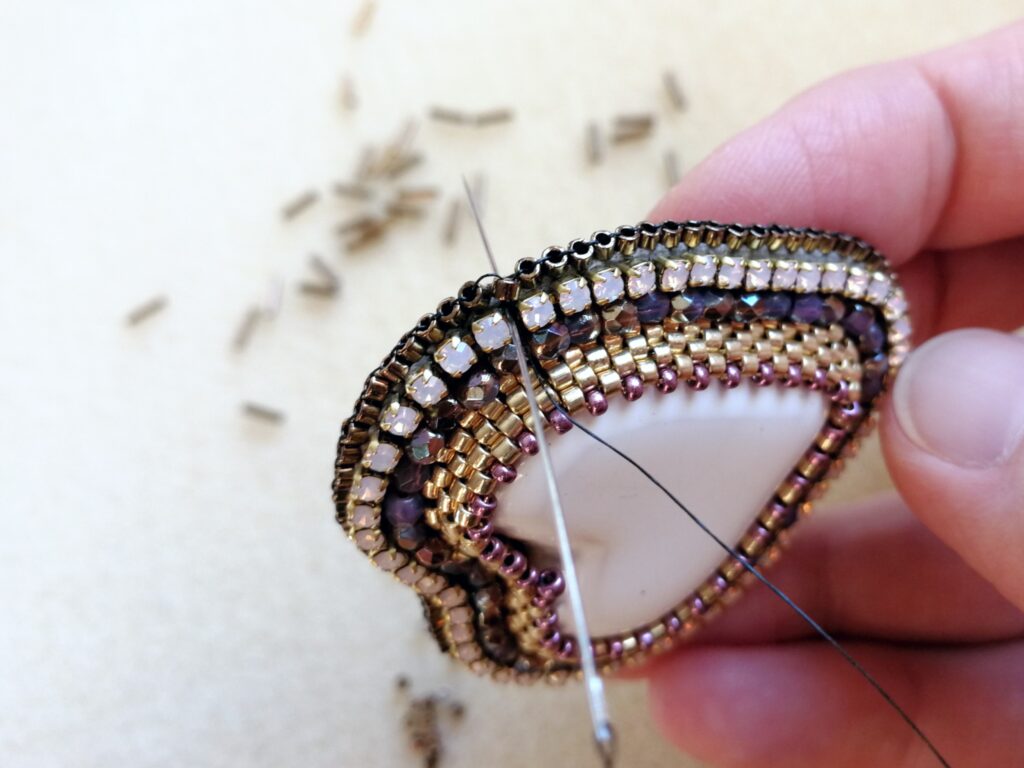
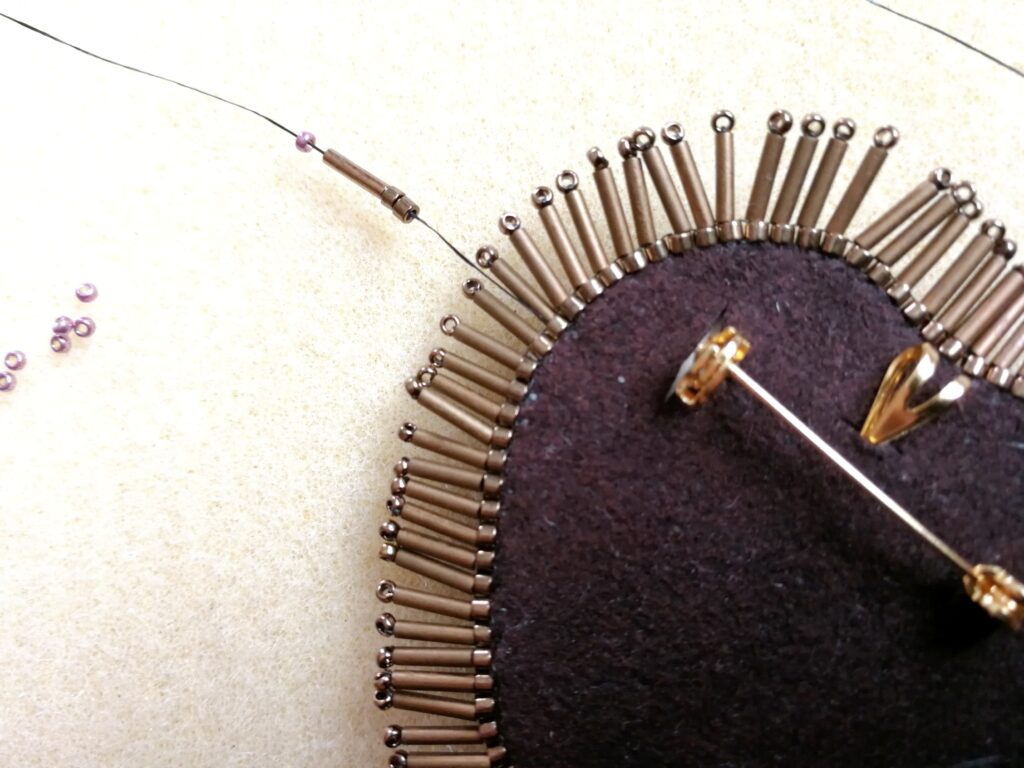
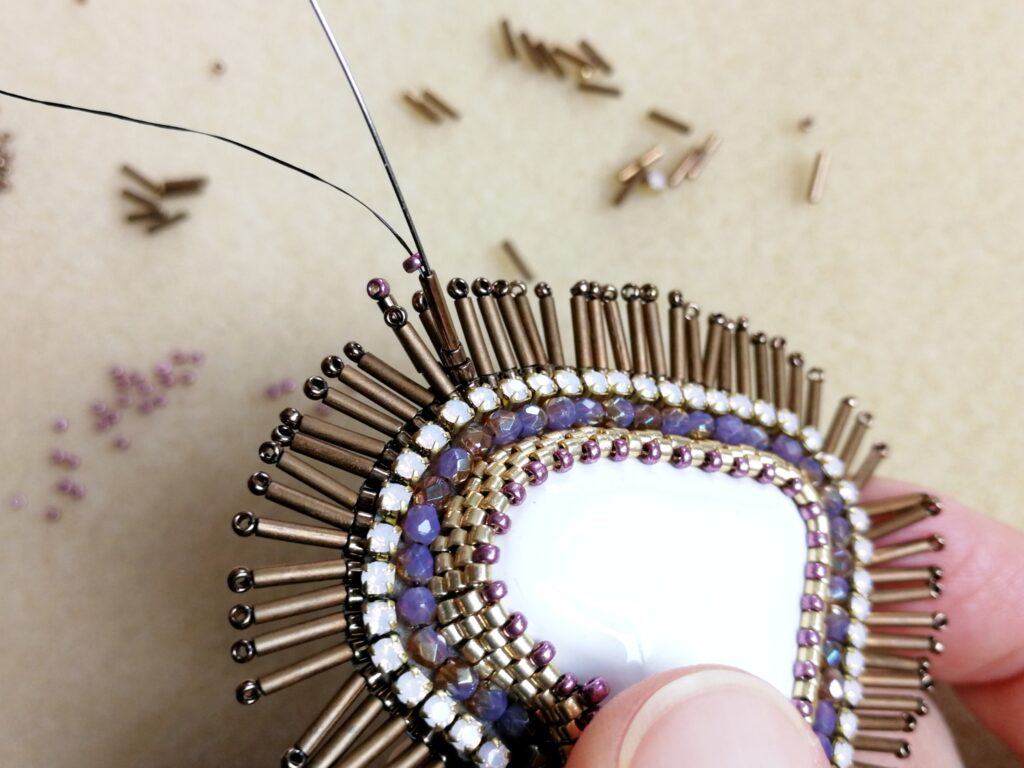
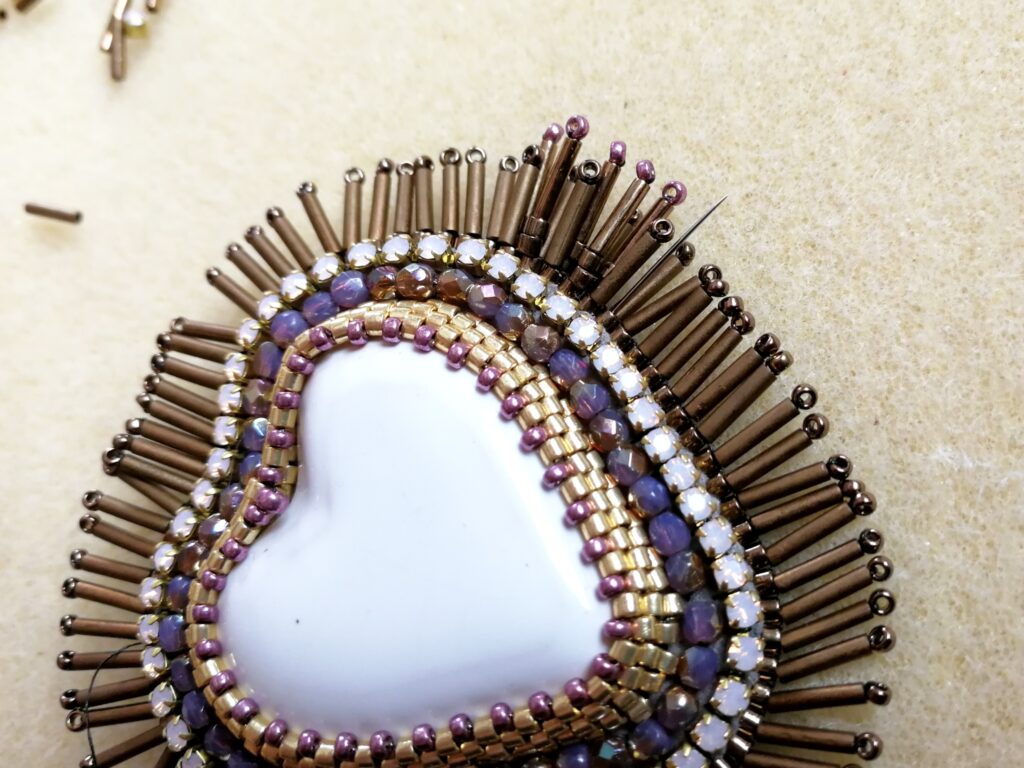
9. Adding decoration from Miyuki slender bugle beads – exit a Delica bead, pick up a bugle bead and a 15/0 seed bead. Bead back to bugle bead and Delica. Decorate the edge in this way until the last Delica bead. I really hope you like what you see on your bead mat 🙂
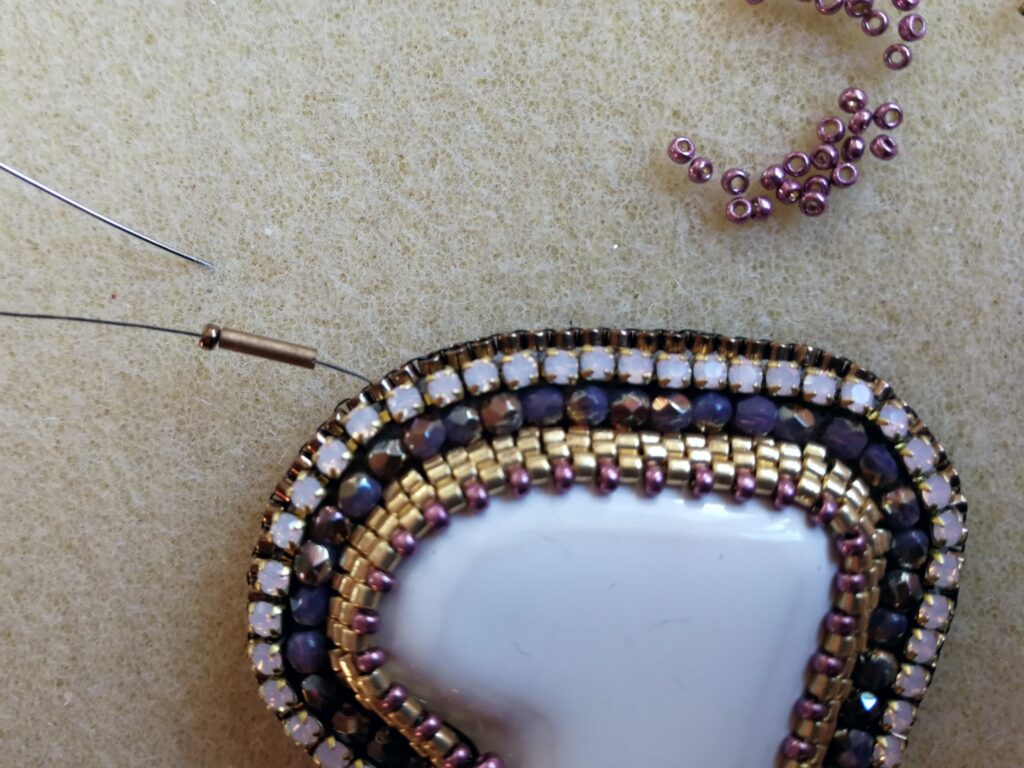
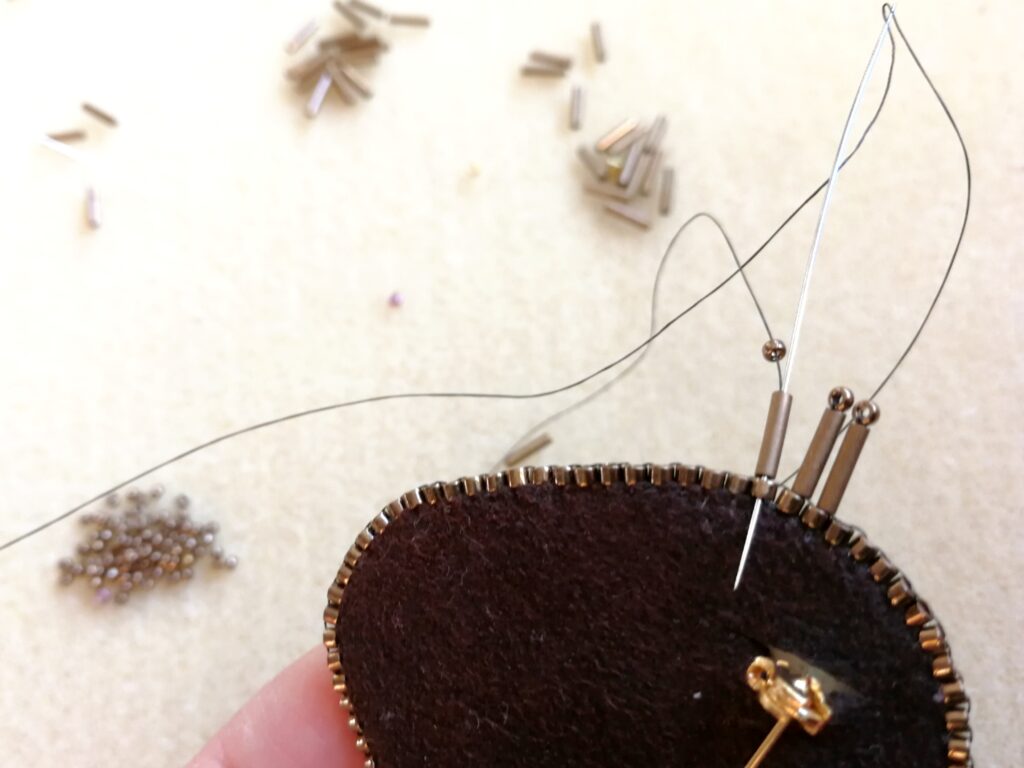
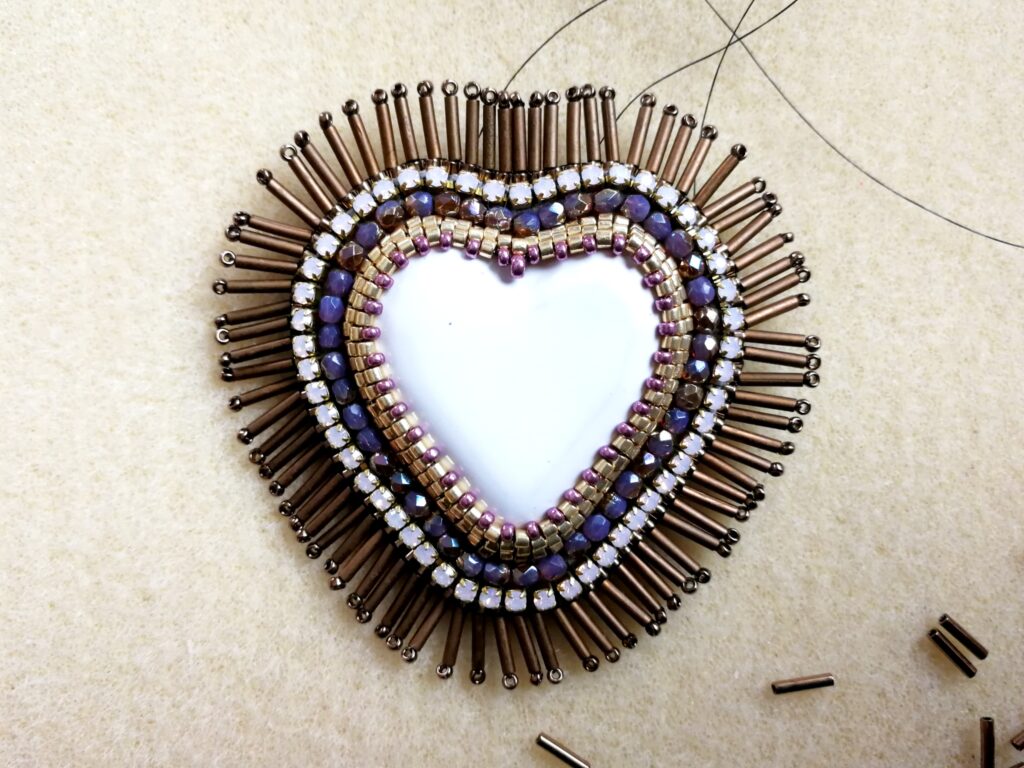
10. Adding one more row of decorating beads. This makes the final, pointy-popping look. I used more beads to add size and also contrast with the color and finish. Exit Delica bead and pick 2 Delicas, slender bugle bead, 15/0 seed bead and stitch back through slender bugle, 2 Delicas, and Delica from the edge. Add these beads to the front and back interchangeably all around to create an even stronger 3D effect. Don’t forget to control your thread tension, so the bugle beads stand strong. This part needs a bit more patience and time, but it’s definitely worth making. Finish your beadwork with a knot and cut the thread.
Congratulations! Your brooch is finished!
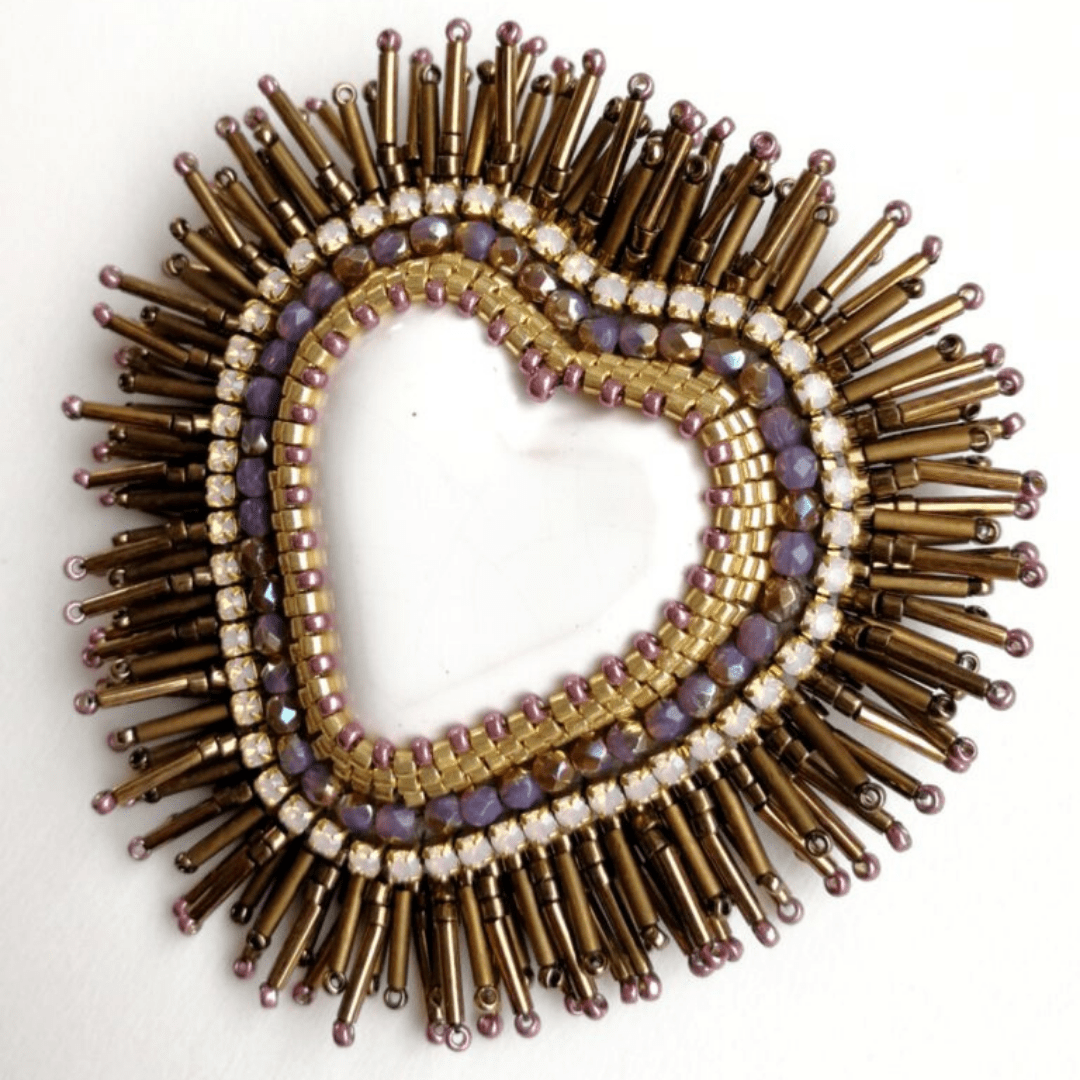
Enjoy your new brooch and share it with us in Beadingschool Club!




I just wish I could download this as I only get intermittent Wi-Fi in the bush and it keeps vanishing.
Also, can I use Swarovski cupchain instead of Preciosa?
Hello Hazel, yes, you can use any other cup chain for this design. Since this was a design by fellow beader and guest blogger at the time, we didn’t make a downloadable file.
Hi Hazel,
Have you tried right clicking and saving it as a PDF. That way you have your on copy if your Wi-Fi goes out.
Hope this is helpful.
I just wish I could download this as I only get intermittent Wi-Fi in the bush and it keeps vanishing
Zuzi, thank you so much for this amazing tutorial. I am working on it already and I absolutely love it! It is so much fun to make and your instructions are super clear! So much appreciate all the work and time you put into inspiring and guiding us! 🙂
Thank you very much for one more wonderful tutorial and the inspiration!
Thank you Kata, likewise! <3
You are amazing, such an inspiration for us!
Thank you so much Vania! I’m happy to bead with you all 🙂
Thank you so much for this tutorial.It is beautiful and will have to wait to
order the heart until I sell something. Zuzi I can’t wait to get the heart but
will be exciting when I do.
Thank you so much Deb! I totally understand and I look forward to your jewel once it’s finished 🙂
Zuzi, you are a treasure. Thanks for this gorgeous design!
Thank you Diane, now I’m really blushing 😉
Thank you for a beautiful Tutorial! What a charming design.
You’re very welcome Chelsea, enjoy! 🙂
Thank you so much. It’s such a beautiful brooch.
Thank you Eva, I’m very happy you like it! Please, get inspired and show us your brooch when you finish it 🙂
Thank you for the pattern
You’re welcome Kathy, enjoy!
Zuzi je to skvost 💕 ✨ výborný, zrozumiteľný návod … uz len sa odhodlať 🤗 Ďakujem 😘
Dakujem Ti Ludka 🙂 som si ista, ze by to usila raz-dva, naozaj to nie je narocne. Ako pises, uz len sa odhodlat.
Zuzi- thank you so much for this easy to understand tutorial. It’s a beautiful work of art.
Thank you Kim, I’m flattered! Enjoy!