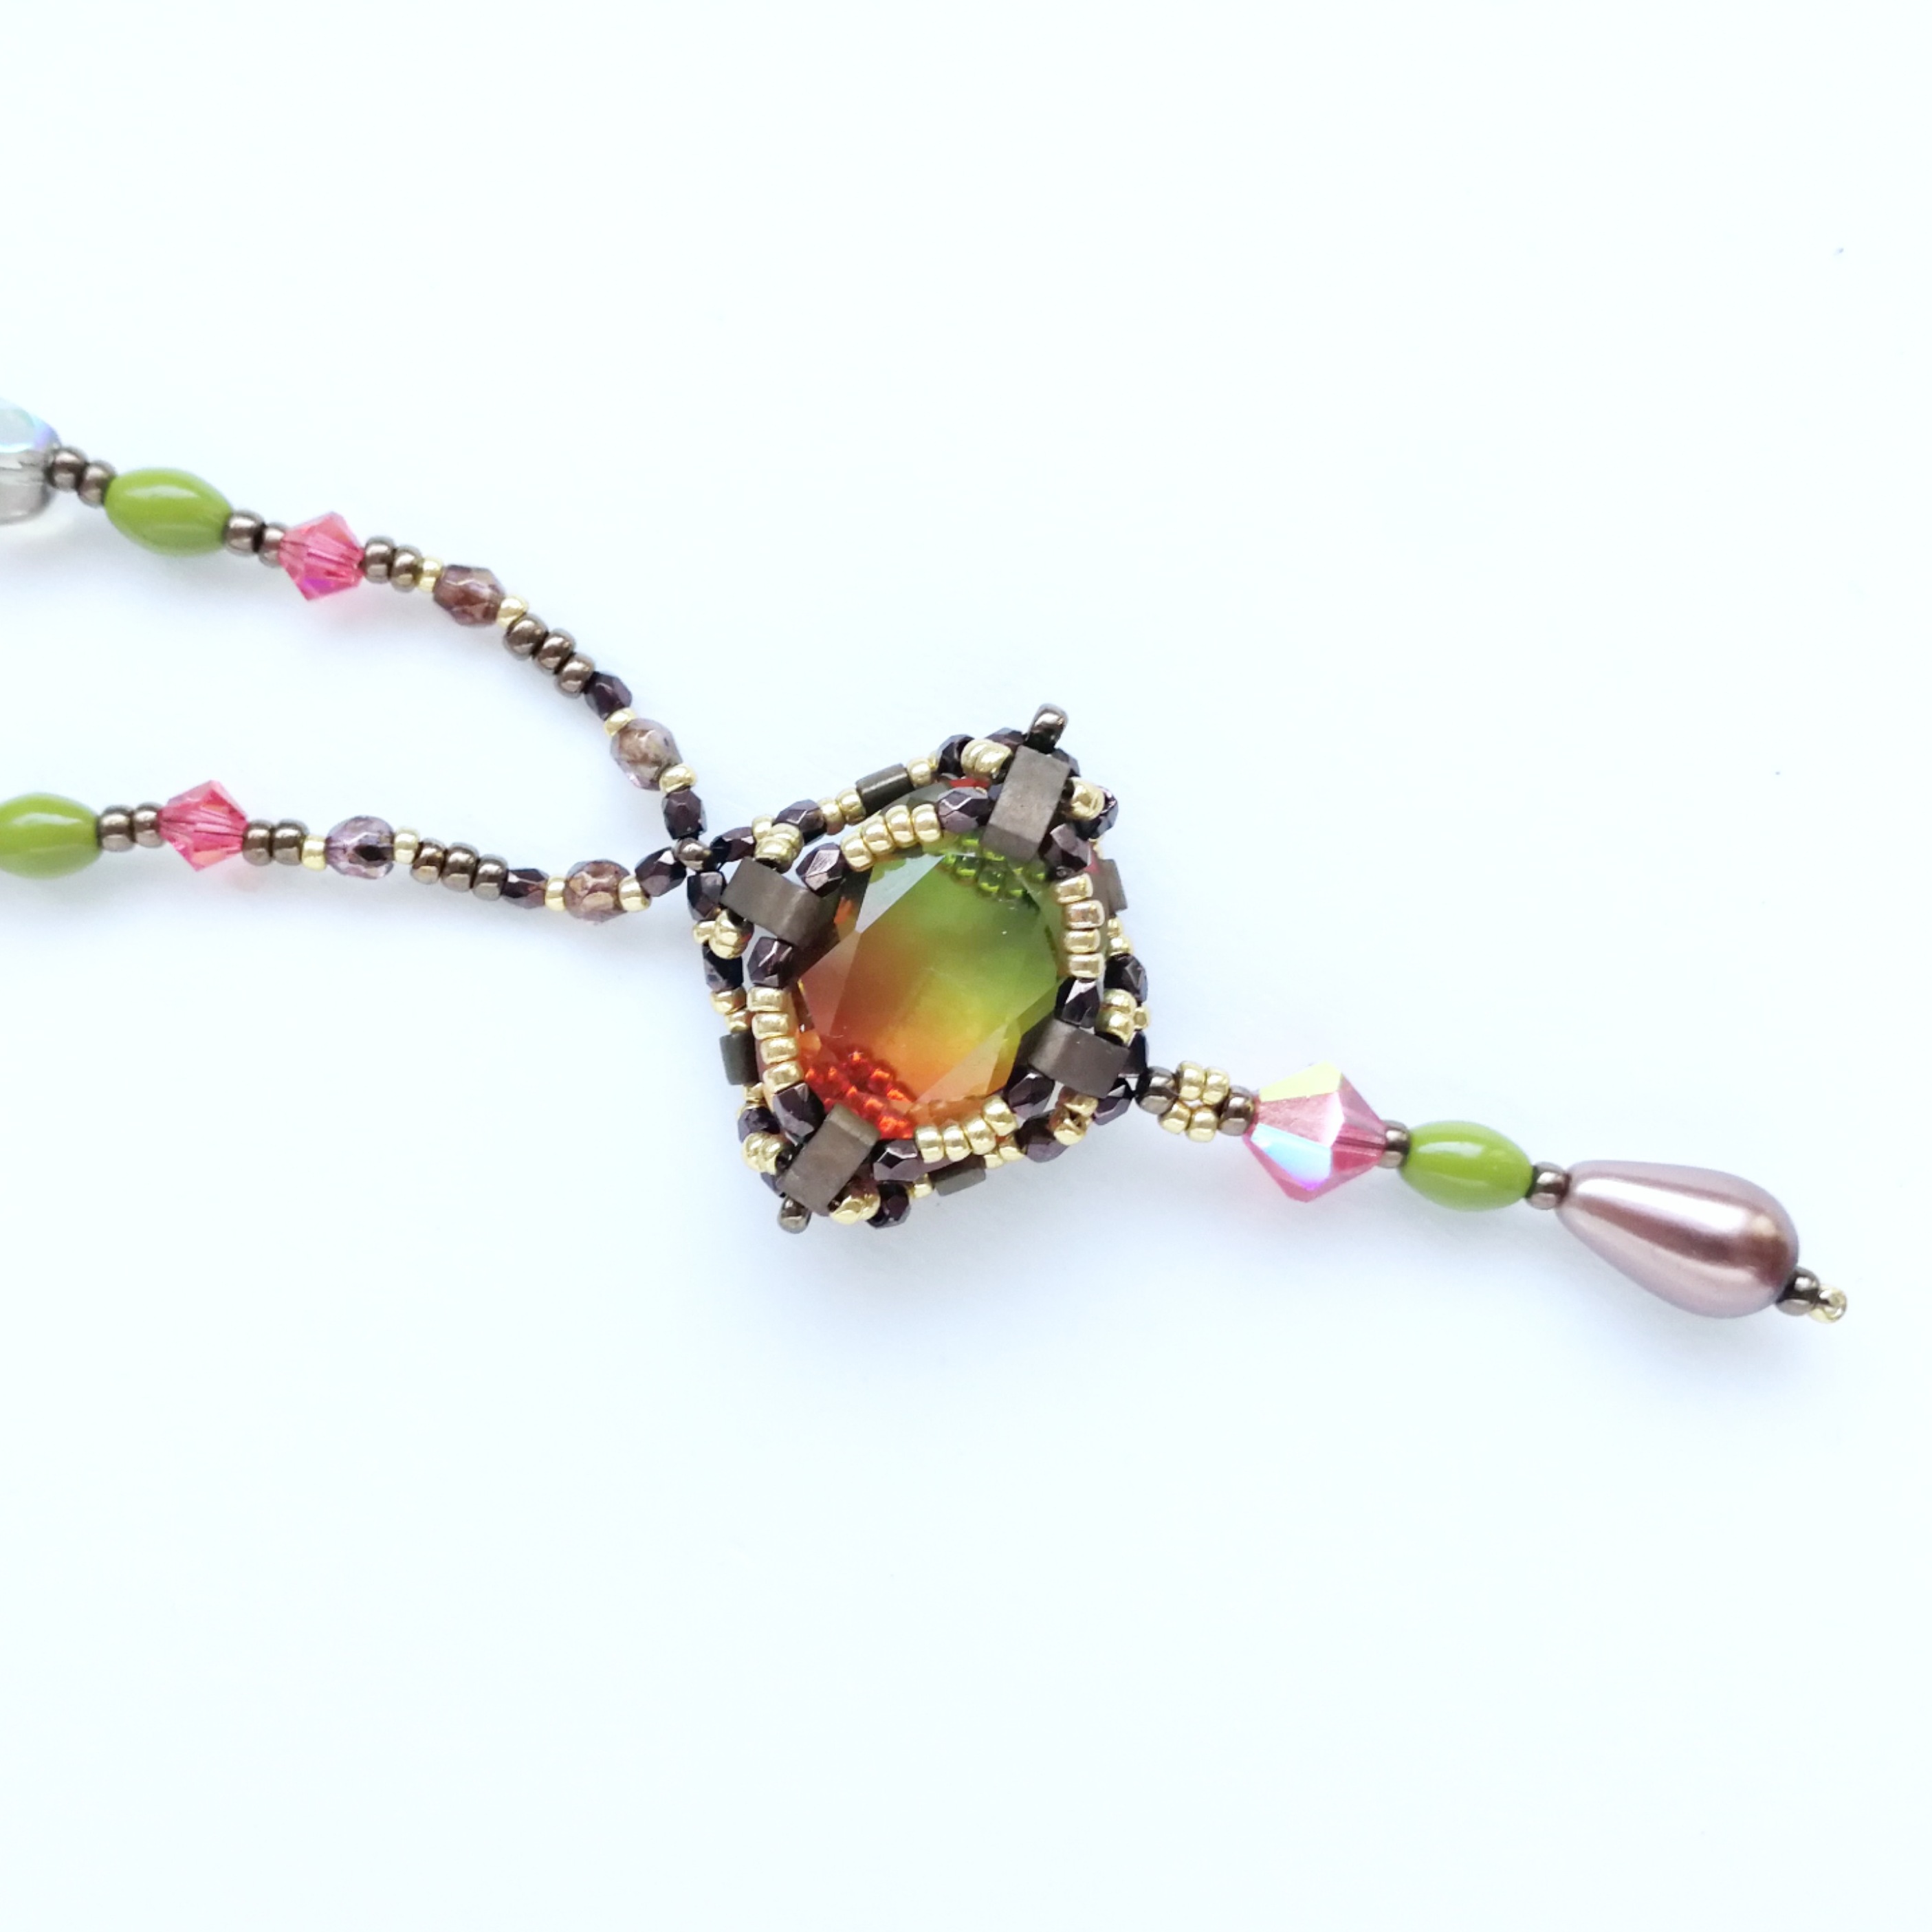

Tanta Earrings – Photo Tutorial
Tanta earrings were designed by Eva Kalman for Beadingschool by Erika Sándor. This jewel originally complements oval rainbow cabochons that are transparent and fuse different colors. It is fairly fast to bezel, using different shapes of our favorite beads. Tanta beautifully shows the cabochon.
Tanta design is very versatile, you can also make:
- single pendant,
- connect more elements into a necklace or bracelet,
- sew the element into the filigree base to make a brooch.
For one pair of earrings you need:
CAB – 2x 13x18mm oval rainbow cabochons
HT – 16x Miyuki Half Tila
FP3 – 16x 3mm firepolished beads
True2 – 50x True2 2mm firepolished beads
DROP – 2x Drop Bead cca. 10-12mm drop (vertical hole) beads
BIC – 2x 6mm BIC bead – or other large rounds/square beads
R11 – 11/0 Miyuki seed beads
R15 – 15/0 Miyuki seed beads
Would you like to get a bunch of free beading tutorials?
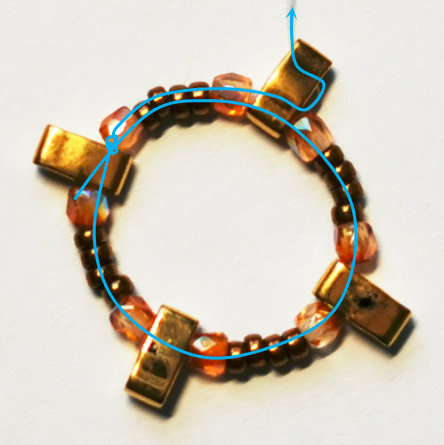
INSTRUCTIONS:
1.
Pick up HT-True2-R15-R15-R15-R15-True2 four times. Tie them into a tight circle with a knot (with a tight bezel I don’t like leaving a tail for finishing off later, as it has to remain completely tight all the time during beading). Stitch through the next few beads again till you reach HT. Step up into its upper empty hole.
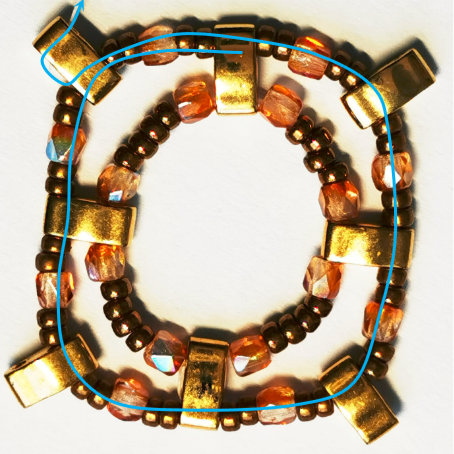
2.
Pick up R15-R15-True2-R15-R15-HT-R15-R15-True2-R15-R15 and stitch through the empty hole of the next HT. Repeat this three more times to complete the circle. Stitch through the next few beads again till you reach an HT. Step up into its empty hole.
IMPORTANT NOTE: You can use also Preciosa oval cabochons, but you need to adjust the number of beads in this step, reducing R15 used. Preciosa cab isn’t as tall/chubby as the Rainbow cabochon. You pick R15-True2-R15-R15-HT-R15-R15-True2-R15.
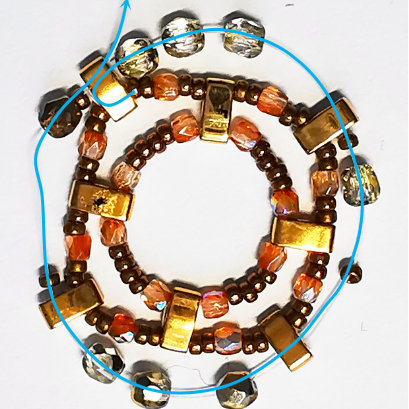
3.
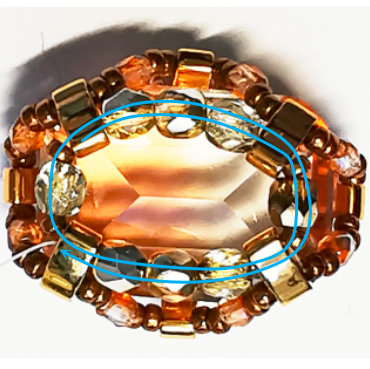
Connect the empty holes of:
- the first and the second HT with FP3-FP3-FP3;
- the second and third HT with R15-FP3-R15;
- the third and the fourth HT with FP3-FP3-FP3;
- and the fourth and the first HT again with R15-FP3-R15.
4.
Put your cabochon inside the bezel with its face down, and pull the beads you added in the previous step completely tight (the thread can not be visible between them). If necessary go through all beads in the inner circle again to keep the tight tension.
5.
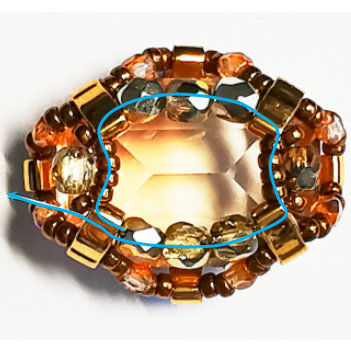
To make the bezel more tight and stable we connect the HT beads again:
- between the second and third with R15- R15- R15- R15;
- between the fourth and with R15- R15- R15- R15.
Make sure that when you pull these beads tight they sit tight beside the FP3 beads and toward the center of the bezel. Stitch through the beads again until you stitched through the three FP3 beads and the HT next to them.
6.
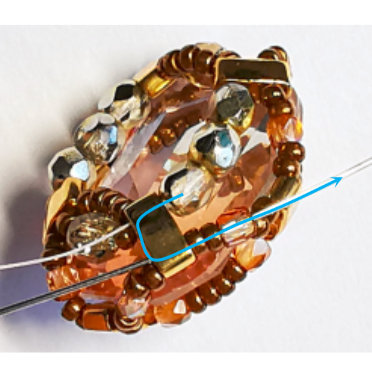
Stitch through the other hole of the HT, and the R15-R15-True2 next to it.
7.
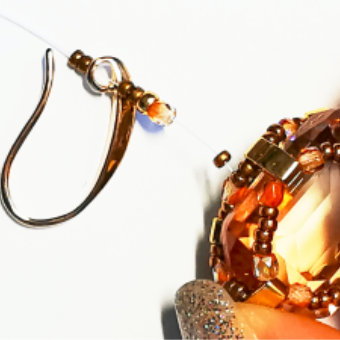
Pick up R15-True2-R11-R15-R15 then the earhook/earwire and two more R15.
NOTE: you can skip adding the earhook as long as its hole is big enough and can be opened so you could put it into the loop of R15 beads later. I prefer adding it in this step, as it is much quicker and the earwires’ loop stays tight and unscratched.
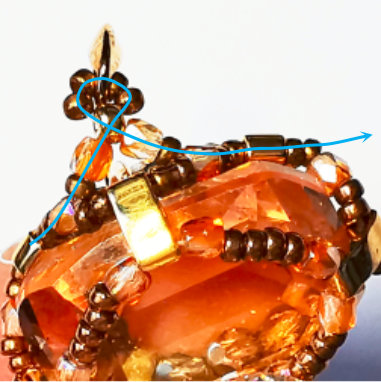
8.
Pull all these beads down next to the True2 you exited. Stitch through again the R11 to make a tight circle around it.
Pick up True2 and R15 and connect this arch to the True2-R15-R15 before the next HT.
The top is done now.
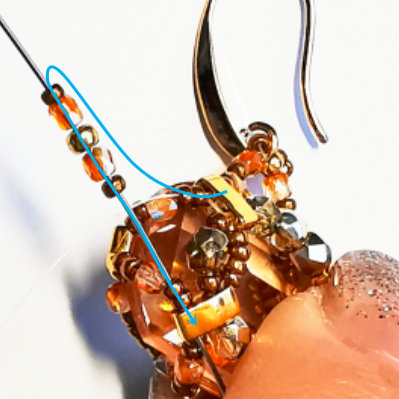
9.
Stitch through the HT and the next two R15.
Pick up R15-True2-R11-True2-R15.
Connect these through the R15-R15 right before the next HT.
Stitch through also the HT and the R15-R15-True2 next to it.
(In the picture the back side of the bezel is to the right.)
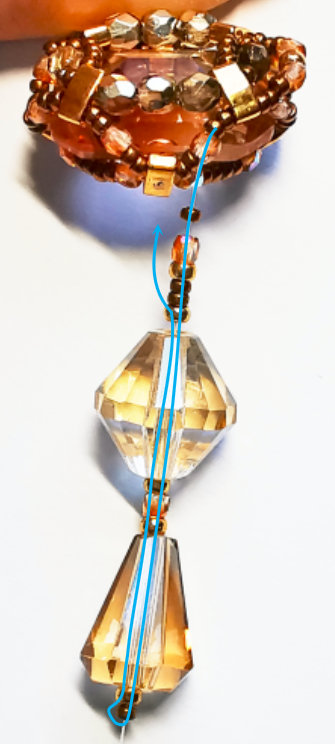
10.
Between this True2 and the one before the next HT we make the fringe.
Pick up R15-True2-R11-R15-R15-R11.
From this it is up to you what you pick up, this is a good spot to use some nice leftovers you have from other projects.
What I suggest to keep in mind when choosing the bigger beads for the fringe:
- make sure the size is not too big, so the cabochon is still the center of the attention.
- the material and color should match the cabochon and/or the bezel (for example: choose stone drops only if you added beads made of the same stone also in the bezel – I think the FP3 can be switched with 3mm round stone beads).
As our goal here is to show off the gorgeous rainbow cabs, I wouldn’t add too many colors in the design so the cab still pops out.
- The drop should be at least as big as the other big bead or bigger. If you put a bigger bead under the cab it also distracts the attention from it.
So, pick up the larger bead (for e.g. 6mm BIC) that goes under the cab, then R11-True2-R11, then the DROP, then R11-R15.
Stitch through again the R11-DROP-R11-True2-R11-BIC-R11.
(In the picture the backside of the bezel is on the top.)
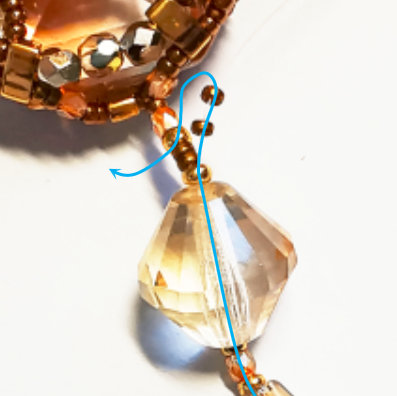
11.
Pick up R15-R15 then stitch through the R11 added first in step 10 from the top towards the DROP.
(In the picture the back side of the bezel is on the top.)
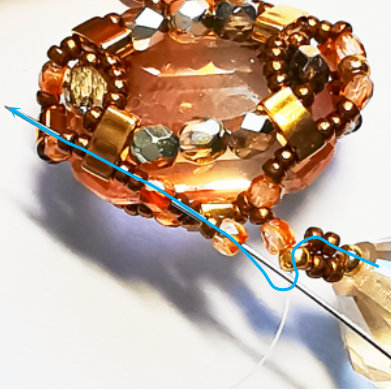
12.
Pick up True2-R15 then stitch through the True2-R15-R15-HT-R15-R15.
Pull the beads of the fringe just as tight that no thread is visible, but it won’t be too tight and can dangle nicely.
(In the picture the back side of the bezel is on the top.)
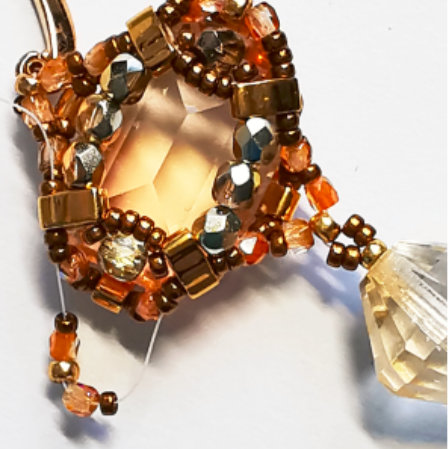
13.
Pick up R15-True2-R11-True2-R15.
Stitch through the R15-R15 before the next HT and the HT itself.
I stitched through the next beads towards the earloop and stitched through the loop around it to make sure it will be secure. Lead your thread to FP3, and secure it with a knot and finish off the thread. I always make the knot beside a bead with a bigger hole so it won’t be visible.
(In the picture the backside of the bezel is on the top.)
Make the second earring 🙂
Congratulations, your Tanta is finished!
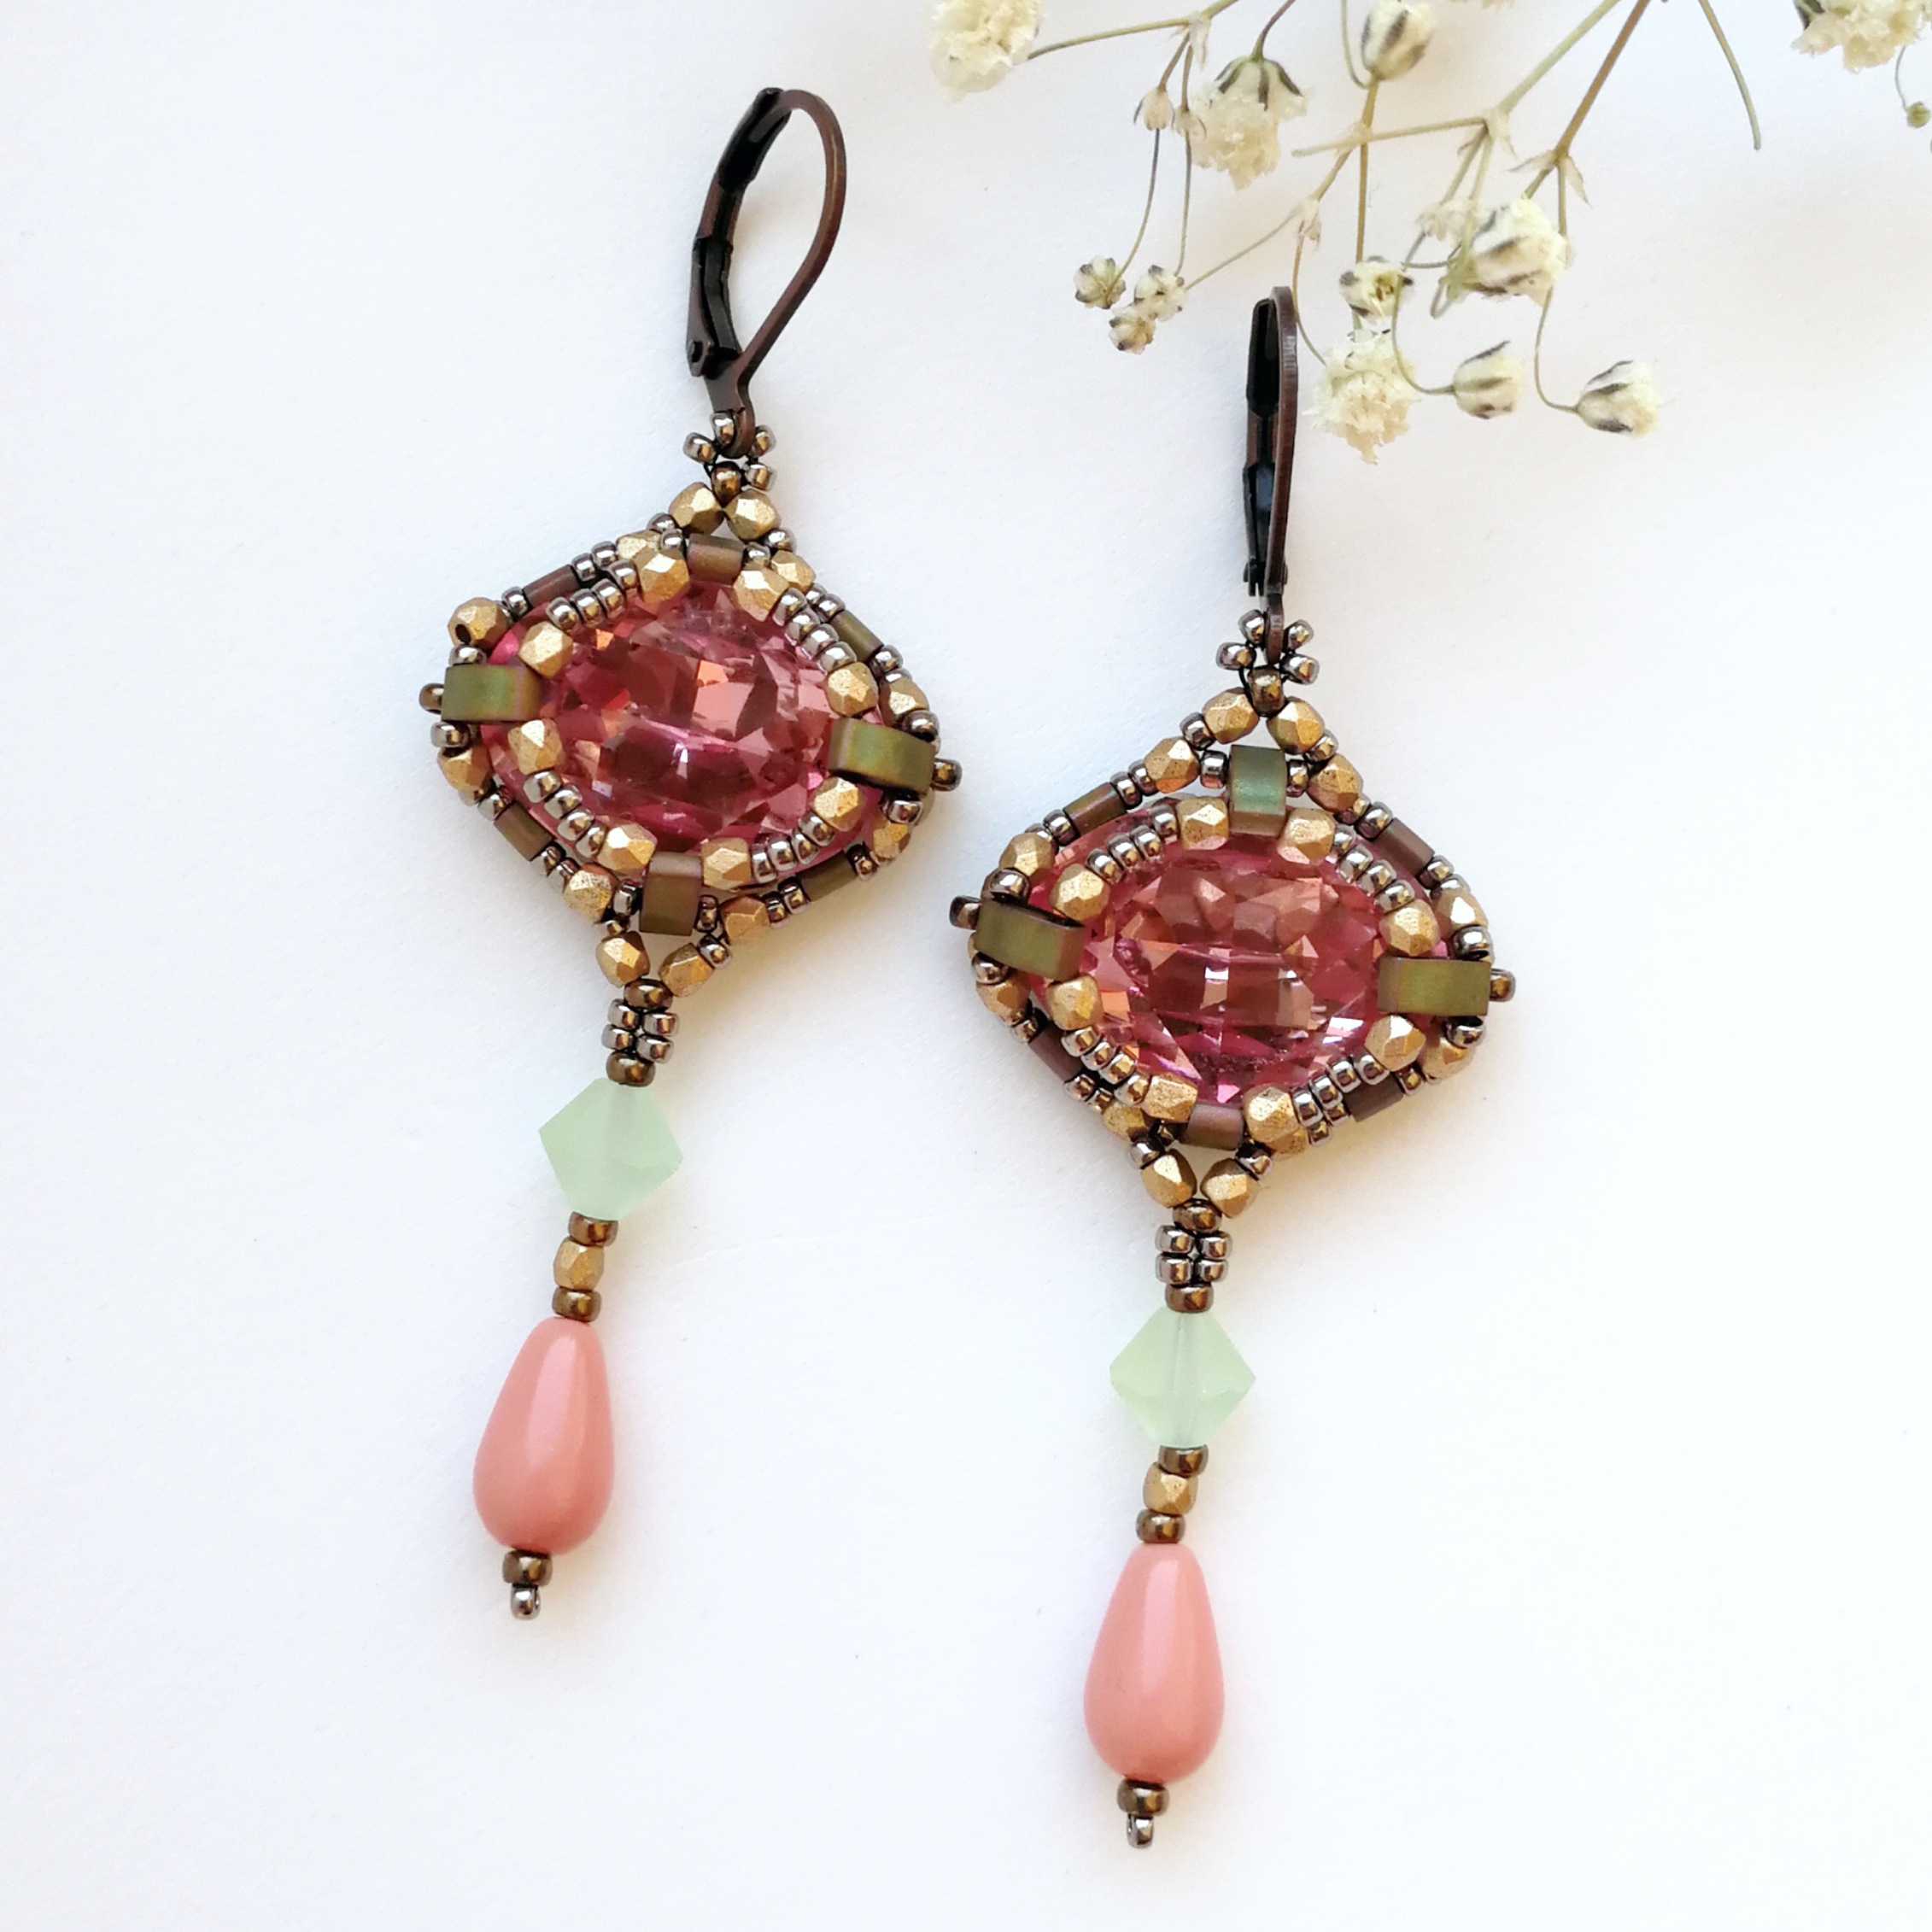
Tanta Earrings with Preciosa, beaded by Zuzi Hake
Few tips by Zuzi:
- Adjust number of R15 in step 2 as described above,
- If you find the bezel still loose, tighten it with passing beads all around, skipping R11 on sides.
I absolutely loved to bead my Tanta earrings! It is wonderful project you can finish in one evening.
You can share your finished Tanta earrings in the comments below and in the Beadingschool Club!


My Tanta earrings. A fast project, perfect for the beautiful rainbow cabochon. Thank you Eva for the design.
Thank you for sharing with us your beautiful version! 🙂
My version of Tanta Earrings. Used Preciosa Cab. I got use for some things in my Magic Garden Box. Love how the Roses came out
They came out beautifully! Thank you for beading with us, Lotta 🙂
Och, zle čítam , ďakujem Zuzi za upozornenie 🤗 …. Eva ‘Vica’ Dobos ospravedlňujem sa 😘 vytvorila si krásu 🤩😍
Zuzi sú nádherné 😍💖 ďakujem za tento super návod 😘😘
Ďakujem Ludka! Eva “Vica” Dobos created the whole design and instructions, I just proof-beaded it and transformed it into this blog post. It’s absolutely lovely jewel and fairly quick to bead. I love it!