There are many reasons why I like working in collections (= Themes of the Beadingschool Academy). They enable me to dig deep into a source of inspiration, to try lots of ideas that I have regarding specific shapes of beads, so I learn more, but also, because in the meanwhile, I create a bunch of jewels in matching colours and style that I can freely combine with each other. One day it’s a bracelet with statement earrings, another day with a small pendant – matching my mood, the event, the clothes that I wear.
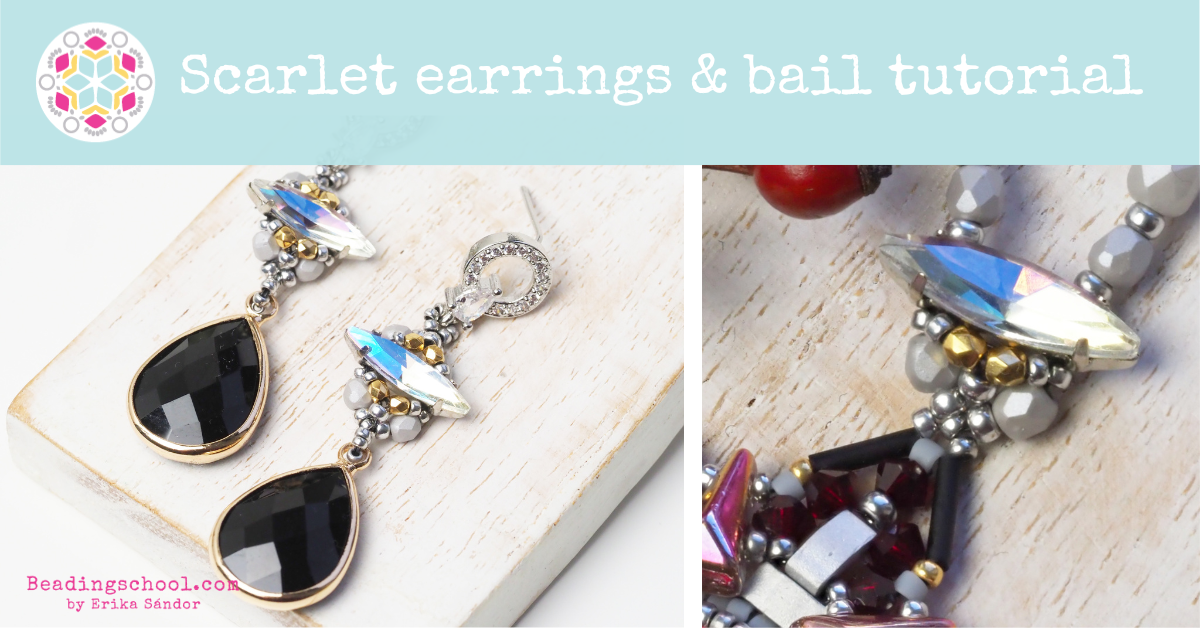
Scarlet earrings and matching bail beading tutorial
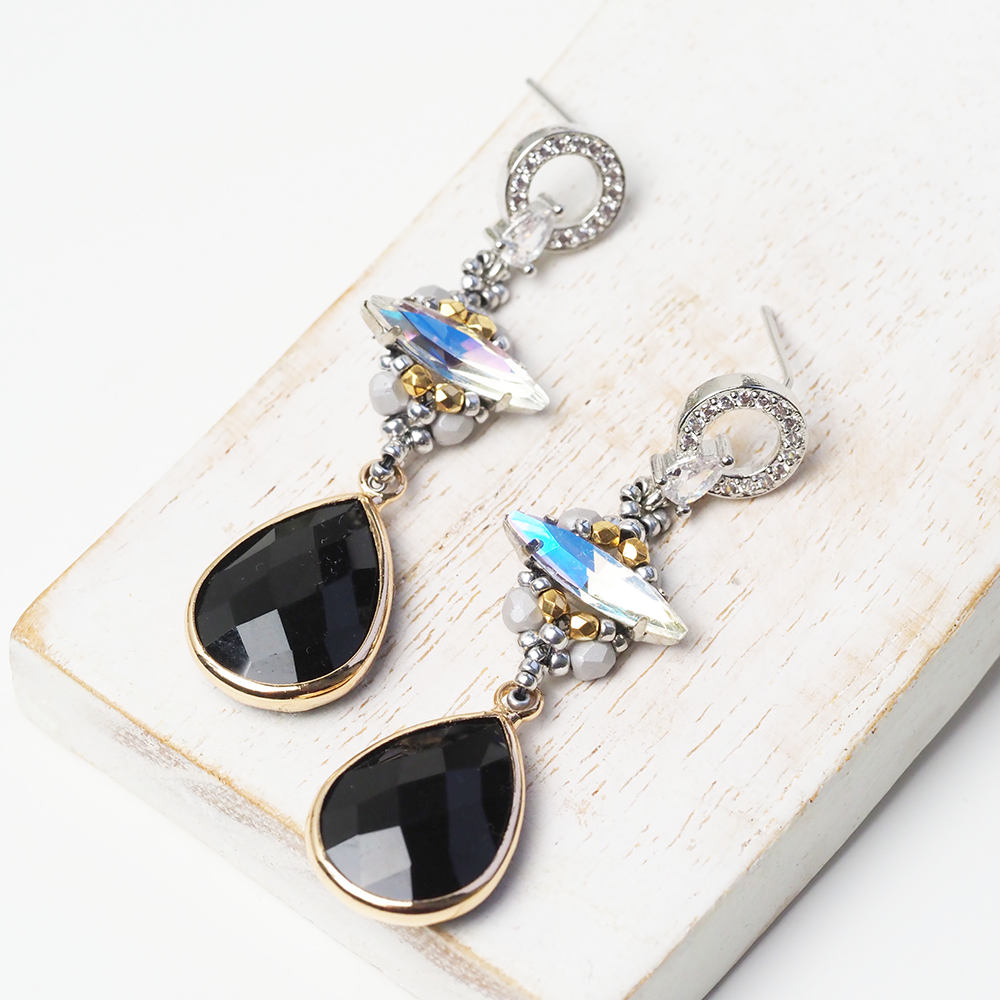
During the Lucia’s Light Theme of November-december 2020 I created a set of matching jewels called Scarlet. Since all that time I was woking with shades of red, grey, silver, and gold, I decided to name my jewels after shades of red.
According to WikiPedia, “scarlet is a bright red with a slightly orange tinge. According to surveys in Europe and the United States, scarlet and other bright shades of red are the colors most associated with courage, force, passion, heat, and joy. In the Roman Catholic Church, scarlet is the color worn by cardinals, and is associated with the blood of Christ and the Christian martyrs, and with sacrifice.”
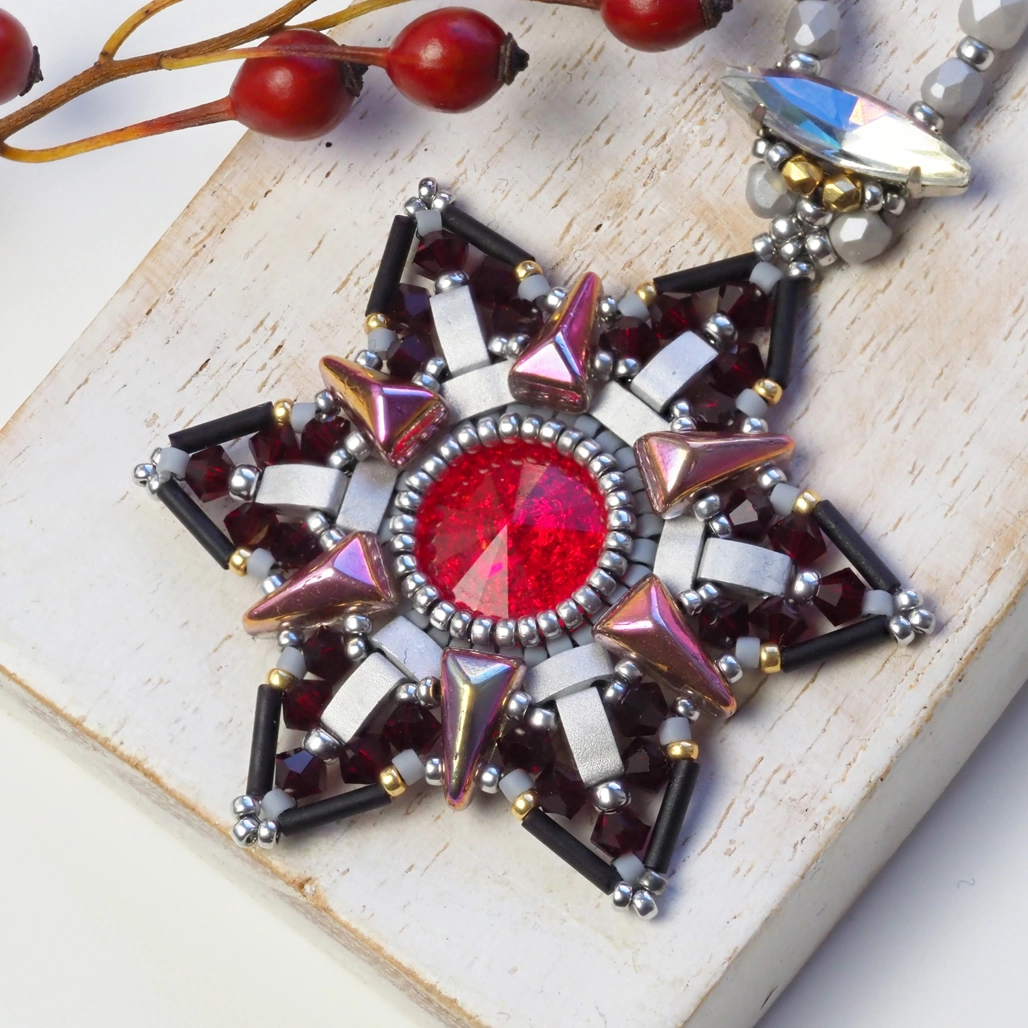
My Scarlet set consist of two pairs of earrings (a shoulder-duster and a shorter but blingier), and two pendants. One of the pendants hangs on a beaded bail, that actually later evolved into the blingy earrings. That motif could also become the perfect bracelet, and today I’d like to share the tutorial with you.
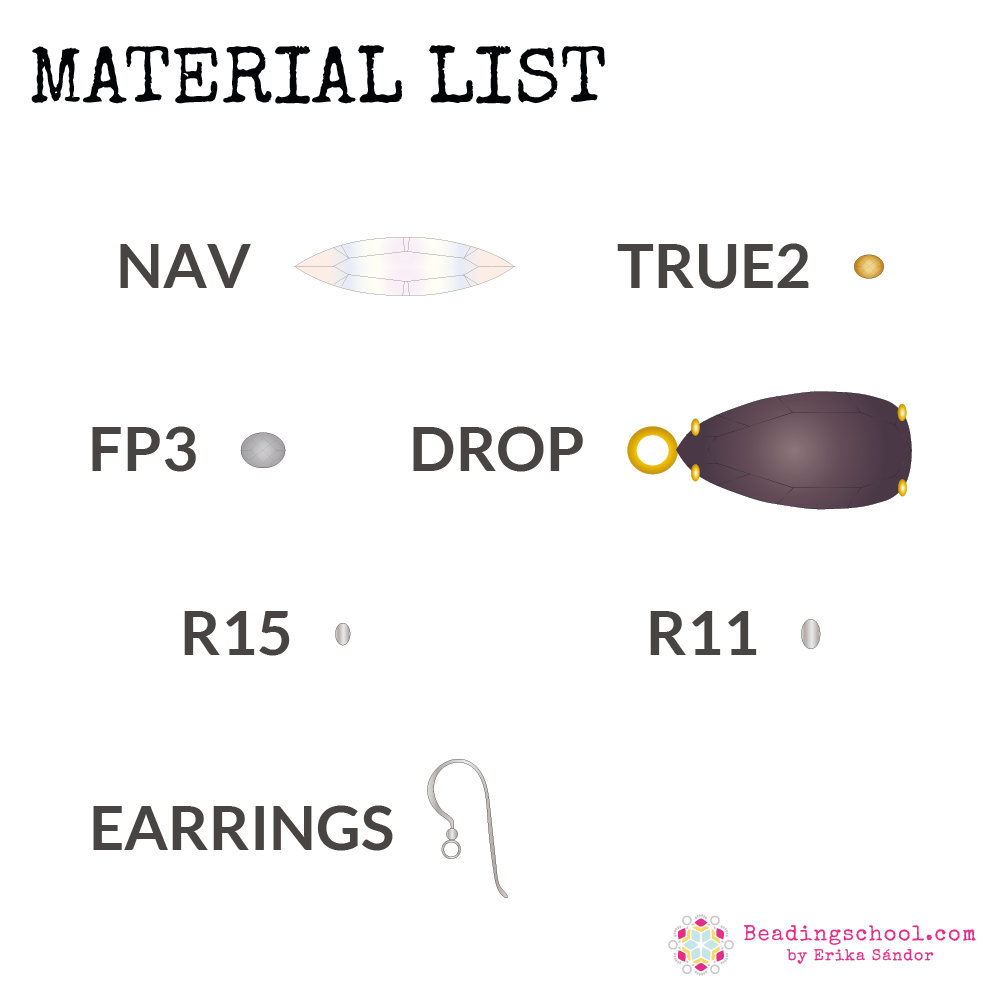
For the earring / bracelet motif and the bail you need the same type of beads:
- NAV 4×15 mm navette cabochon
- TRUE2 2 mm True2 fire-polished bead
- FP3 3 mm fire-polished bead
- R15 15/0 Miyuki round seed bead
- R11 11/0 Miyuki round seed bead
- optional: drop pendant
- metal findings: earrings, clasps, depending on the type of your jewel.
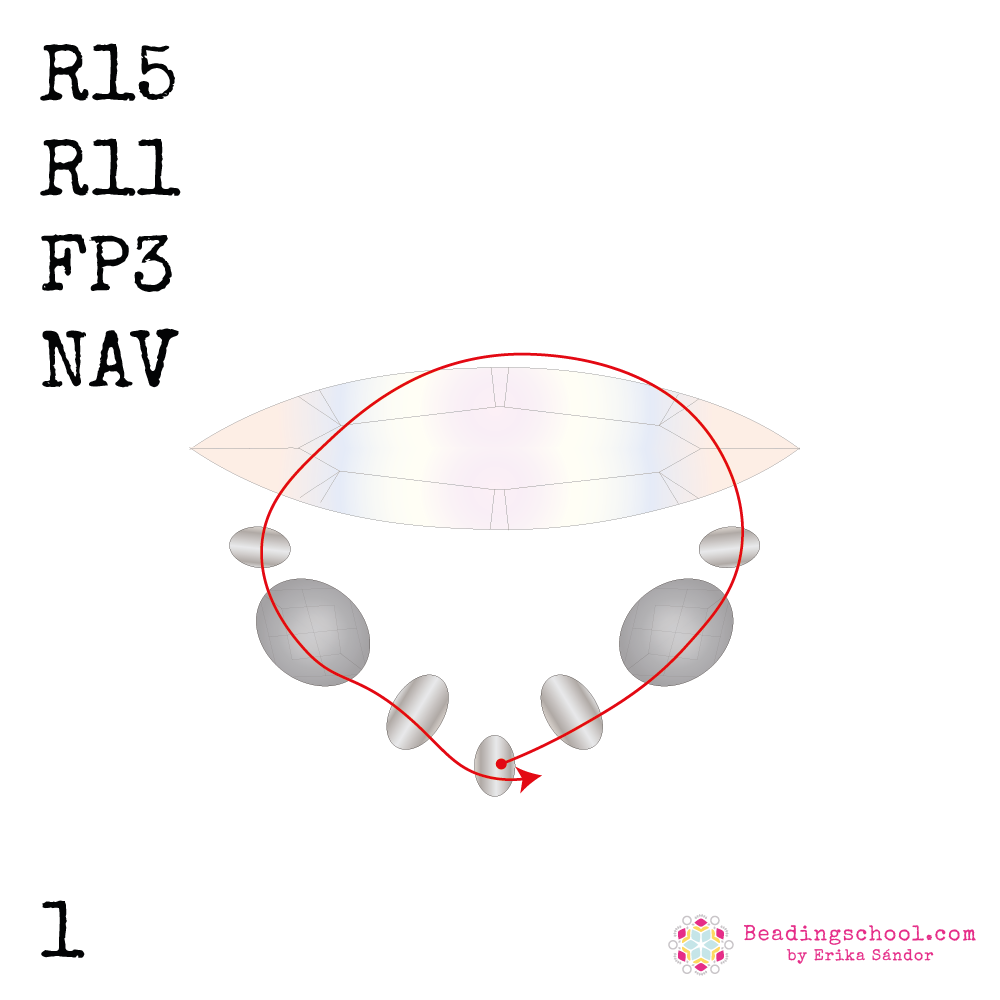
Let’s start with the bail that you can see on the picture above!
Pick up R15 + R11 + FP3 + R15 + NAV.
Bead back through the second hole of NAV.
Pick up R15 + FP3 + R11.
Bead one more time through the first R15.
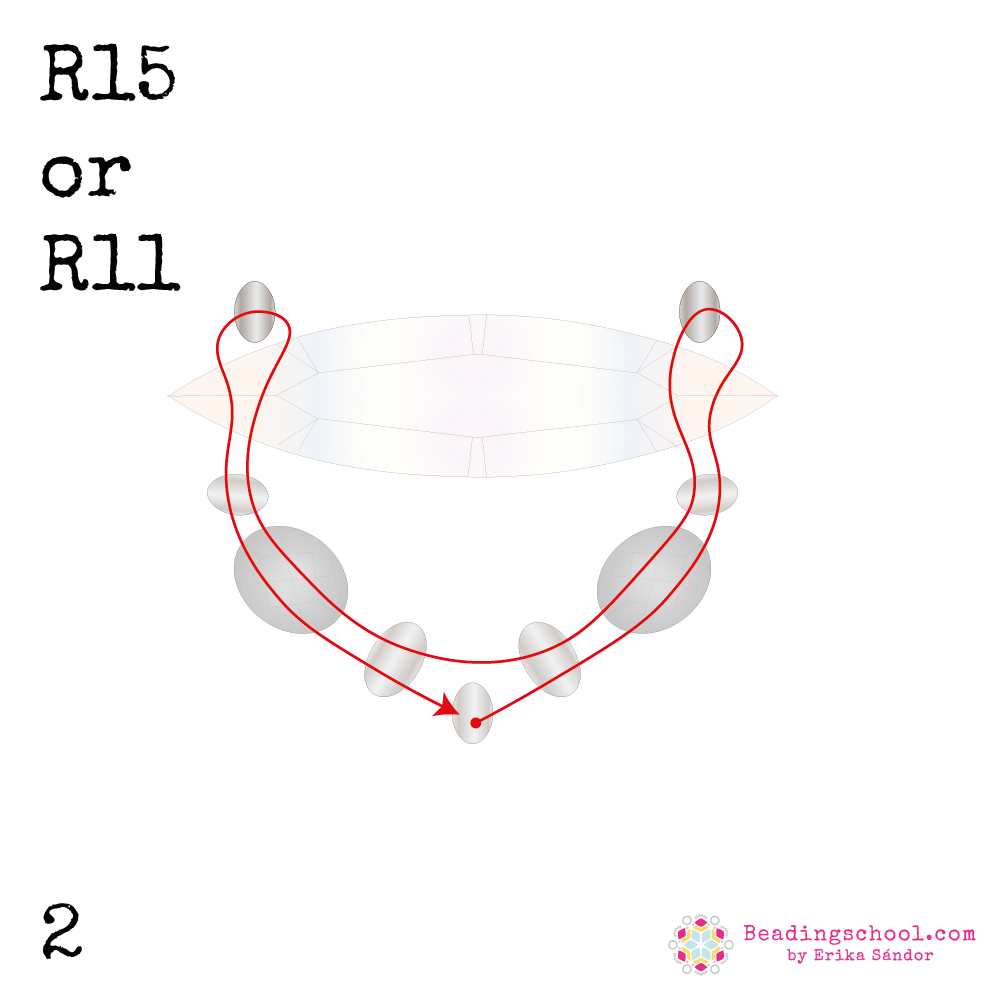
Bead through R11 + FP3 + R15 + NAV.
Pick up an R15 (or R11).
*Bead back through NAV + R15 + FP3 + R11.
Skip R15 and repeat from * on the other side.
Finish by beading through R15 in the middle.
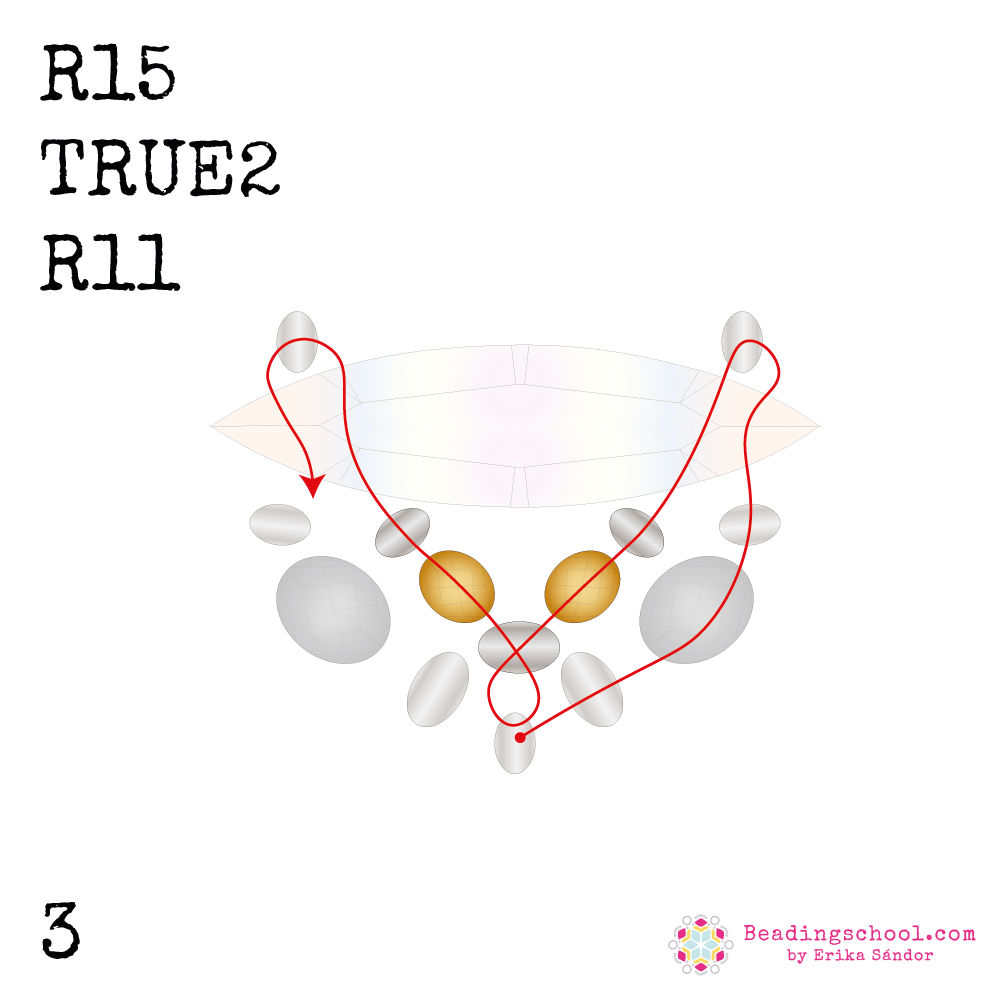
Bead through R11 + FP3 + R15 + NAV + R11.
Bead back through NAV.
Pick up R15 + TRUE2 + R11.
Bead through R15 in the opposite direction + R11.
Pick up TRUE2 + R15.
Bead through NAV + R15 + back through NAV.
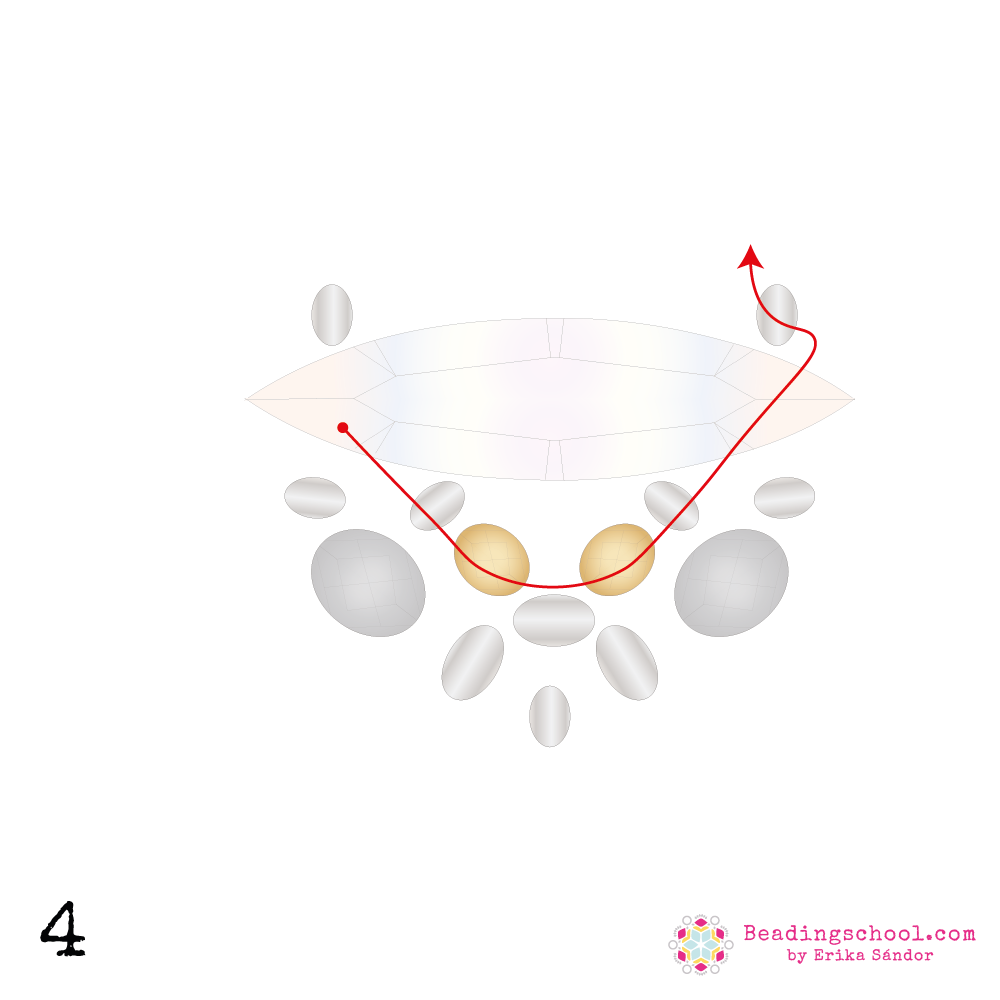
Bead through R25 + (2) TRUE2 + NAV + R15.
The bail is ready. You can attach the rope to the R15 / R11 on top of the NAV, and the pendant to the R15 in the bottom middle.
Secure and trim all thread ends.
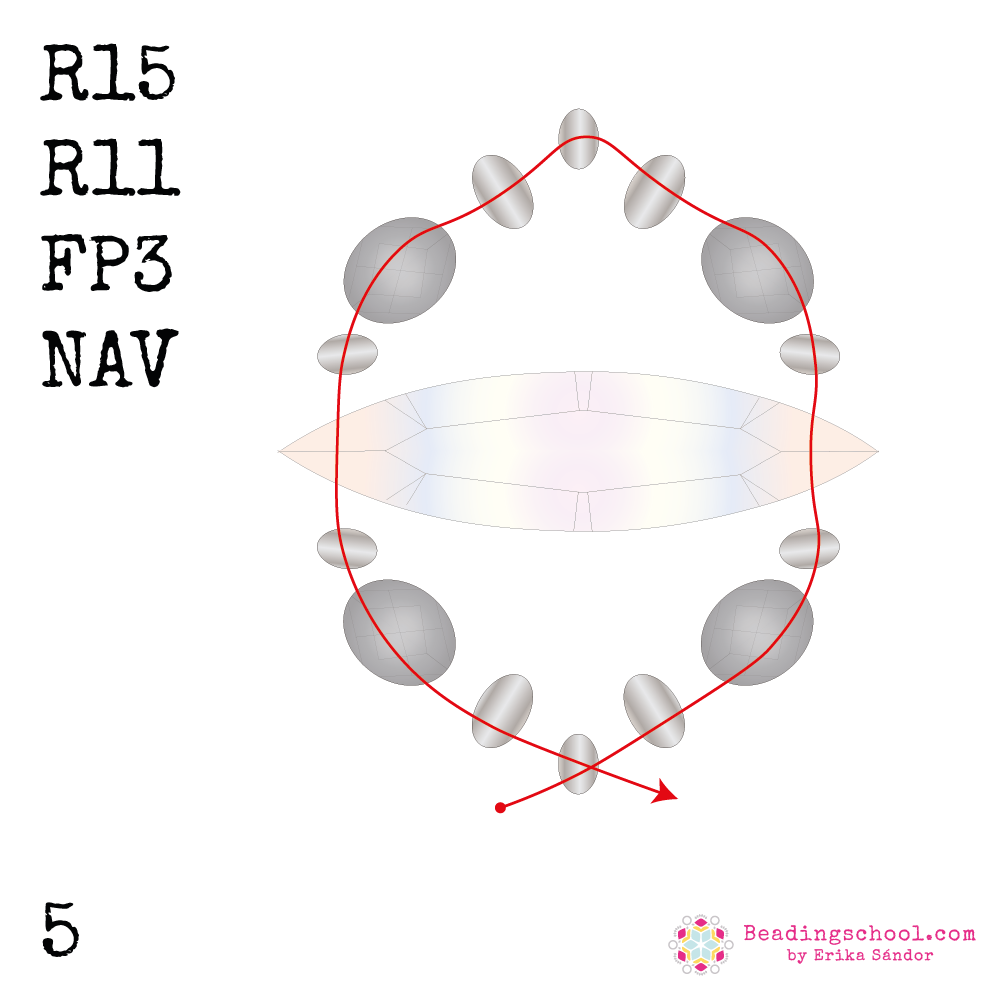
Let’s continue with a pair of matching earrings!
Pick up R15 + R11 + FP3 + R15 + NAV + R15 + FP3 + R11 + R15 + R11 + FP3 + R15.
Bead through the second hole of the NAV.
Pick up R15 + FP3 + R11.
Bead one more time through the first R15.
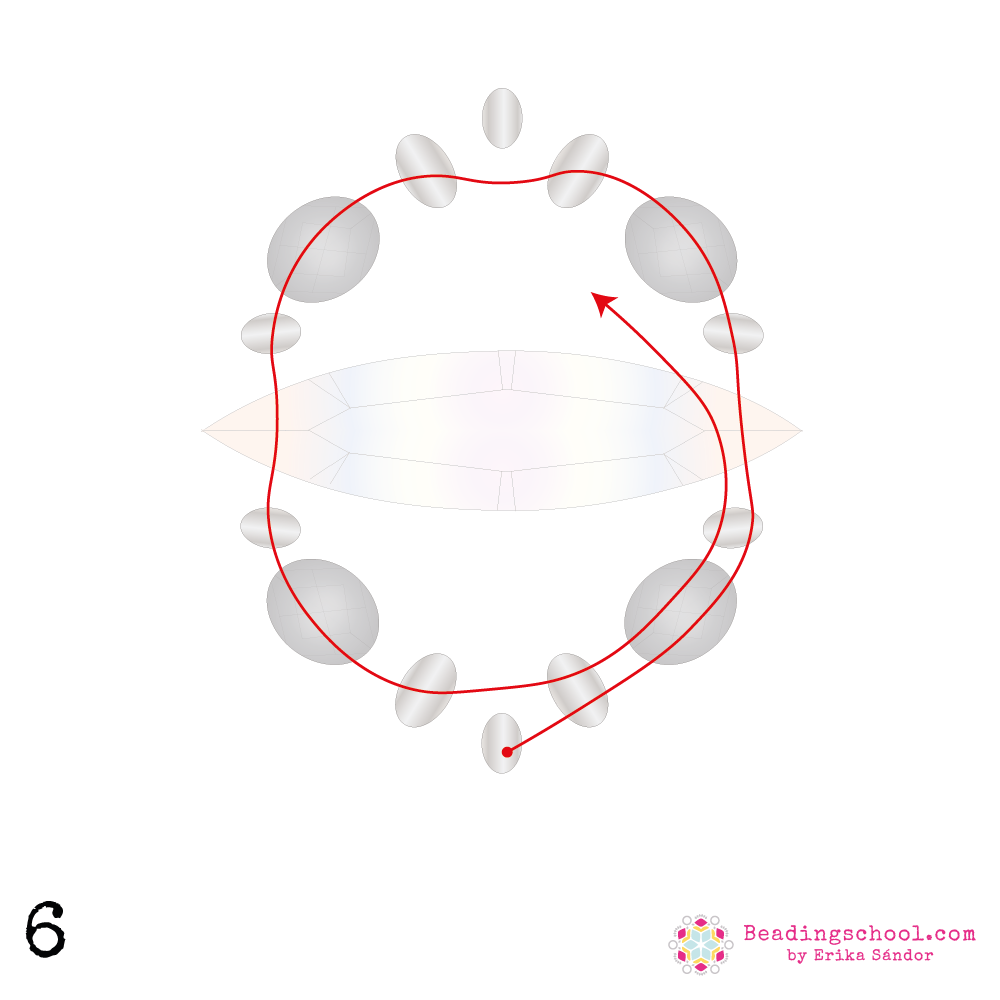
Repeat the thread path, skipping the R15 at the very top and at the bottom in the middle.
Finish by beading through the first hole of NAV.
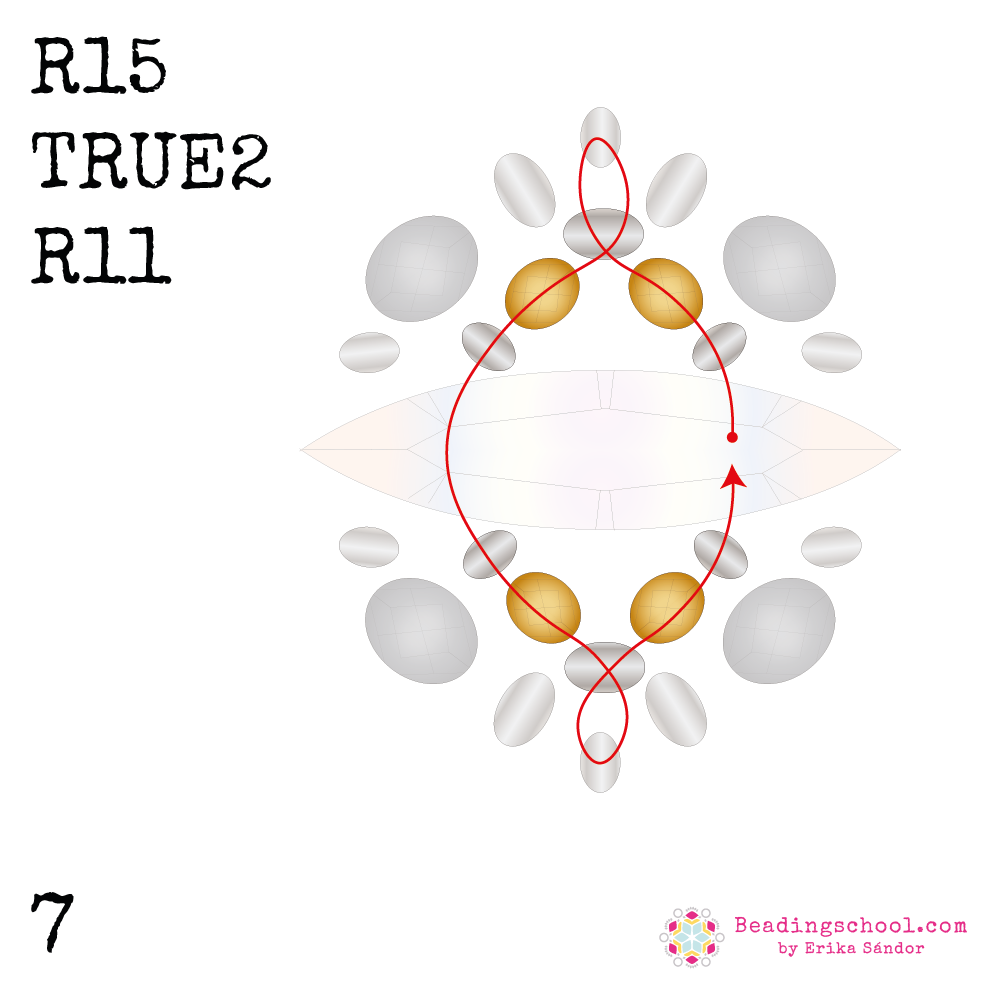
*Pick up R15 + TRUE2 + R11.
Bead through R15 in the opposite direction + back through R11.
Pick up FP3 + R15.
Bead through NAV.
Repeat from *.
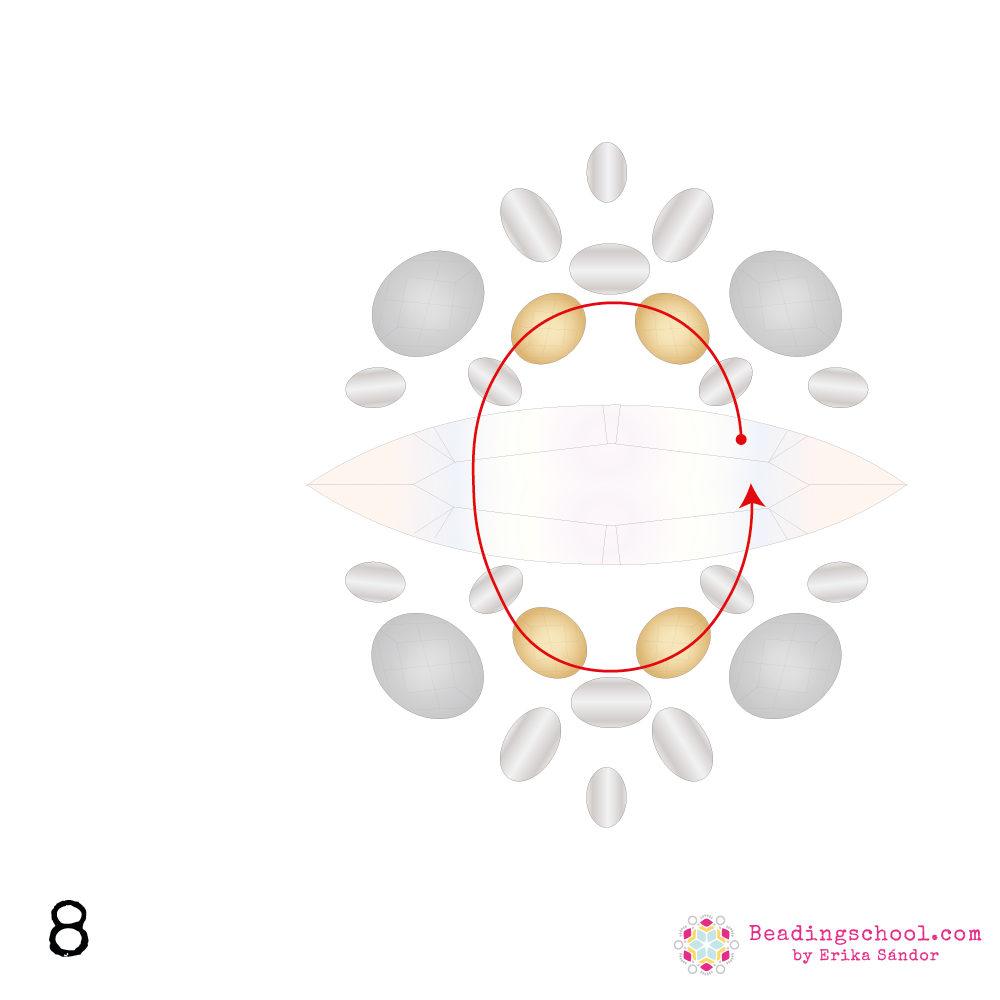
Bead through R15 + (2) TRUE2 + R15 + NAV + R15 + (2) TRUE2 + R15 + NAV.
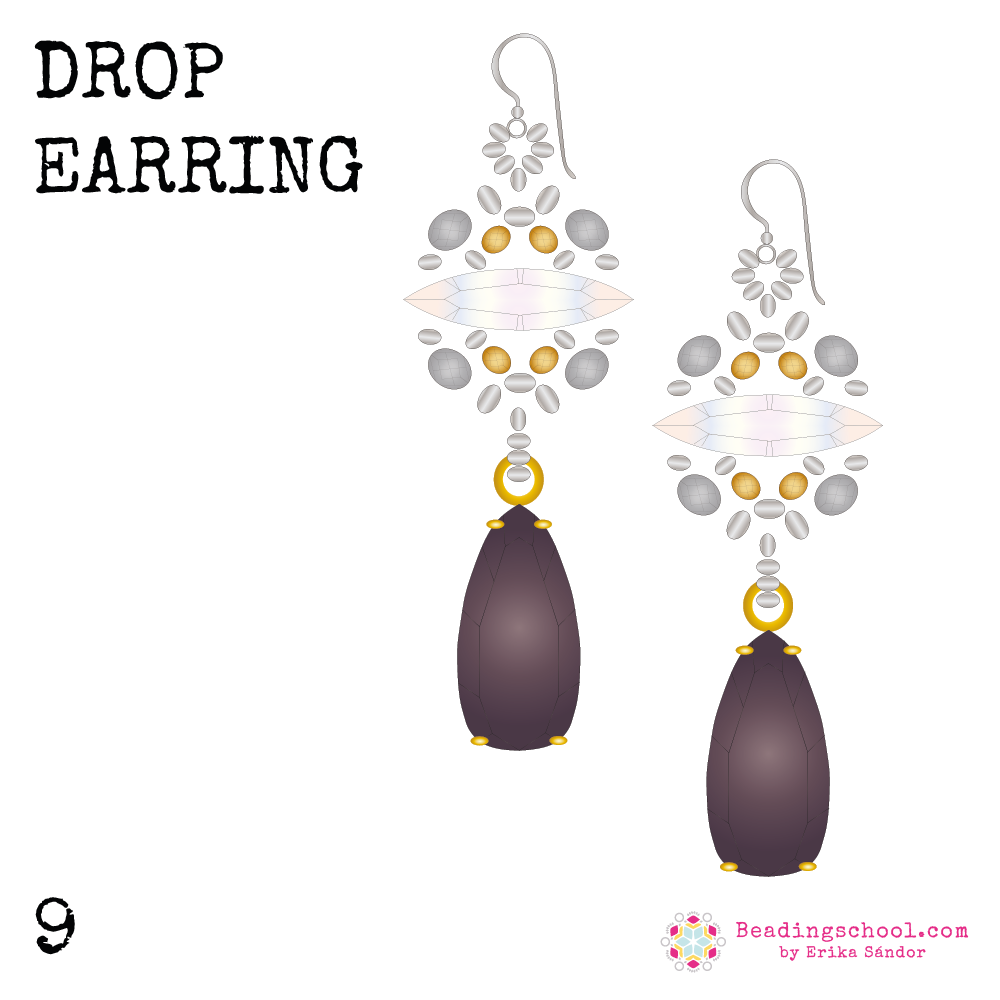
Attach findings and decorative components.
Secure and trim all thread ends.
Do you need help with attaching your metal components?
Check out my article and master how to attach any kind of finding – with the loop sideways or front to back!
HAPPY BEADING!
Show me in a comment your new jewels and let me know how did you like the article 🙂


Leave a Reply